
I’m a bit behind on this post, but that is because we have really been enjoying the yard and the pool!
Once we finished the stackstone walls that created the pad for our pool, it was time to figure out how to put it up. This caused a bit of a delay because there is so much contradictory messages out there. Plus, the directions for the pool were extremely basic at best ; downright guesswork at worst.
So many said to put sand under the pool, while other said don’t put sand down, just some sort of foam or ground material then the pool direct onto the hard ground. Others suggested putting blocks under the legs and other said to not put blocks under the legs under any circumstances. So I sat and pondered for well over a week after we had already gotten the sand laid down.
Everyone we knew had put sand down under their pool, so I felt confident that we had done the right thing. The challenge was I was worried about the legs sinking in the sand, and then into the hard packed soil. Being the bottom of a sloped yard, the snow melt does tend to end up at the bottom. That being said, it is never muddy in the spring, but it would only take one year for it to mess up the pool.
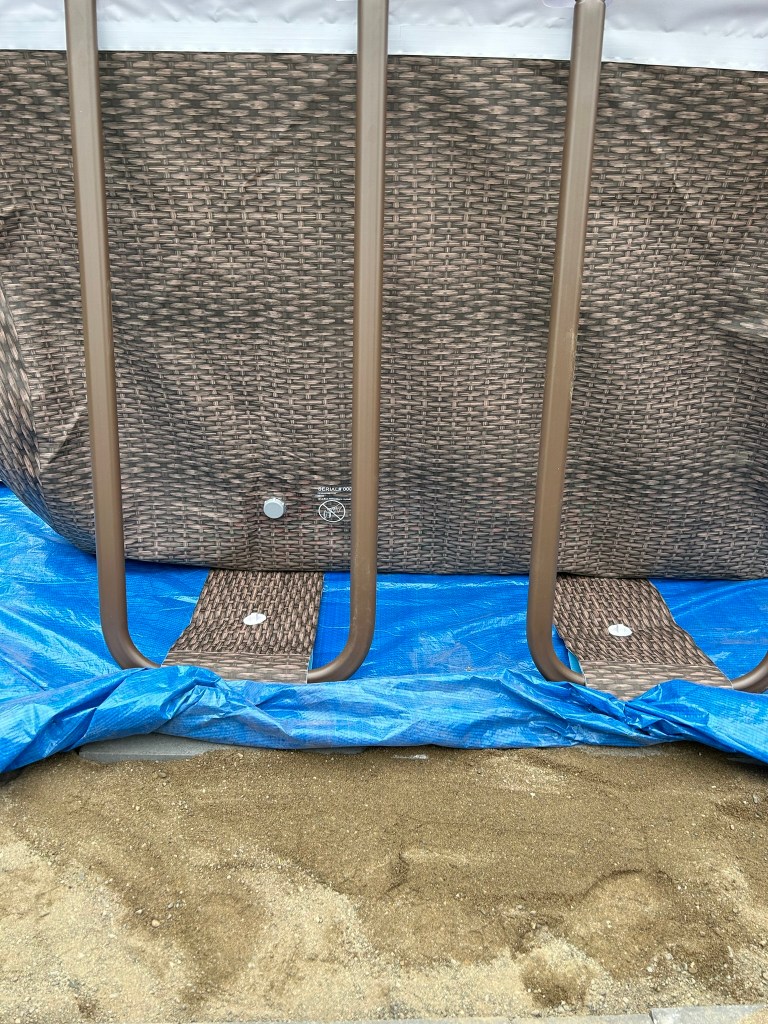
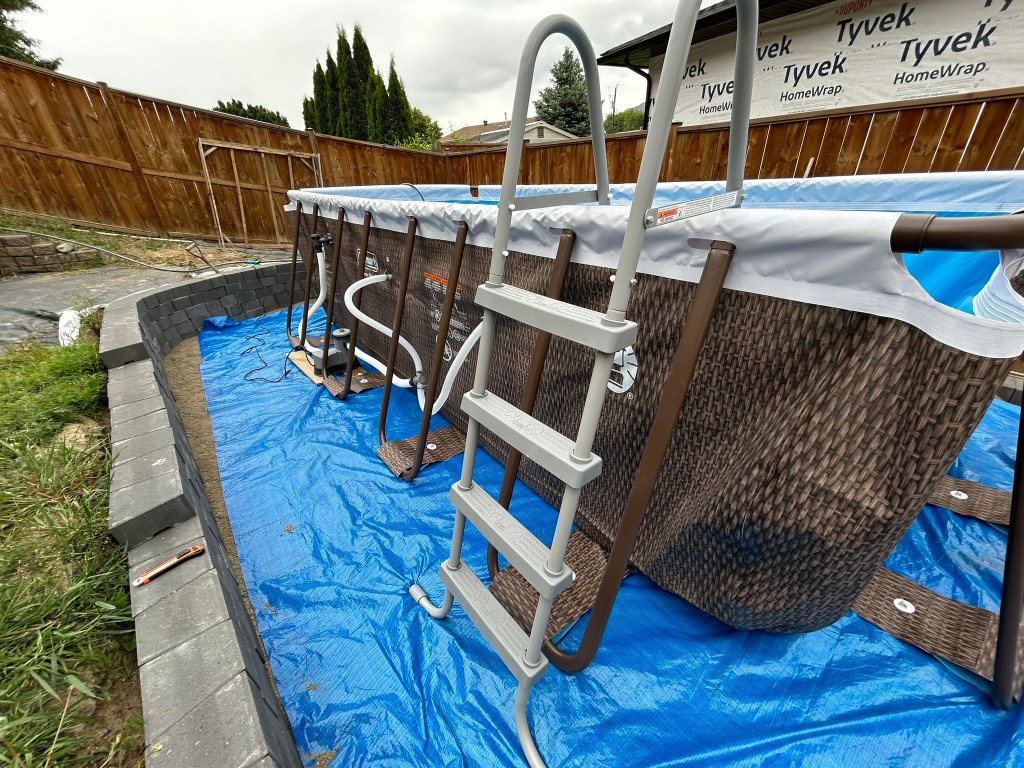
So after much internal debate, theorizing and literally building the pool in my head, I finally decided that we needed to go with blocks for the legs. I did make sure to get blocks that would fit under the legs and give a good, wide area for them to sit, without it coming near the edge of the pool. Being a soft sided pool, not a hard-side, we didn’t want the pool wall rubbing on the blocks at all. That would have led to all sorts of problems, and the main reason most said not to add the blocks.
I ended up with 12″ x 24″ x 2.5″ pavers. The legs of the pool are approx. 16″, so we couldn’t use a 12″ x 12″ paver. I had seen some people who didn’t use sufficiently wide or thick pavers, and once filling, the leg cracked them all in half. The legs sit approximately 1-1/2′ from the wall of the pool, so I felt confident with the 12″ deep pavers, providing approx. 6″ on either side of the leg, plus some excess on each end.
Nowhere in the instructions or on the box does it say how far apart the legs are spaced. I would have liked to put the pavers perfectly spaced down first, then the pool ground tarp, then the pool. We don’t always get to do what we want though.
We did consider putting up the frame without the pool attached so that we could space everything out, but then realized that the pool holds the frame to the correct sizing, so that was out.
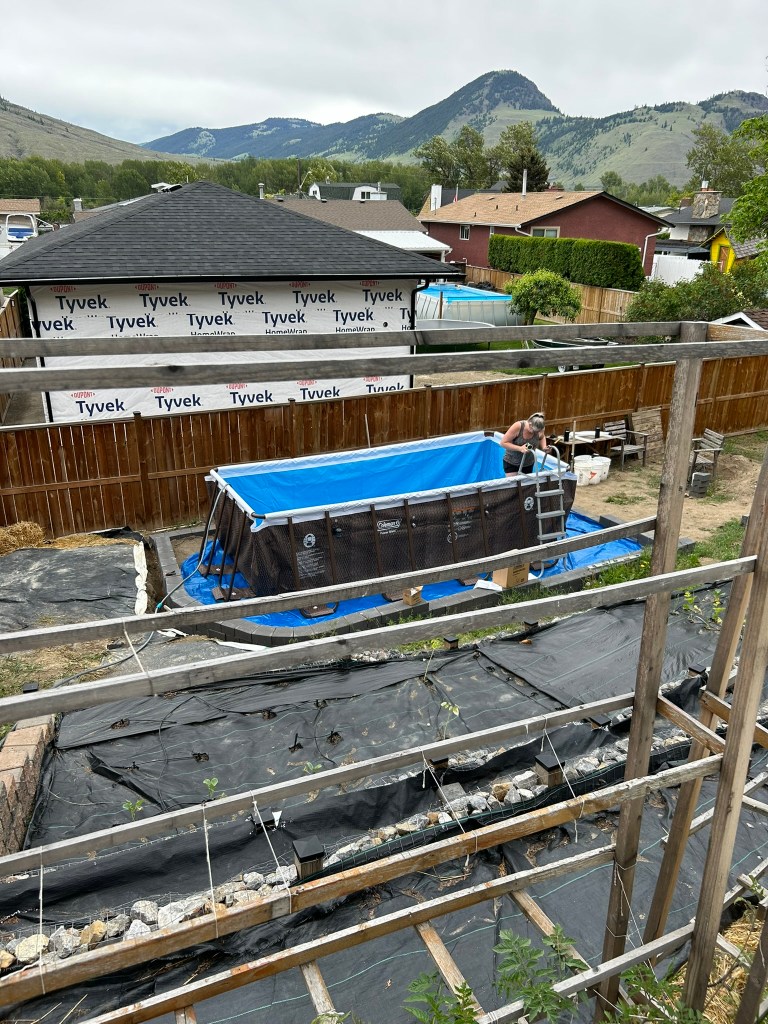
We decided that the most sure-fire way for us to not waste anymore time and be able to just get the pool up was to put it up on the ground cover. The pool was extremely easy to put up, with the frame easily clicking into place and into the liner. From there, we could work together to dig out the sand under the legs to place the pavers.

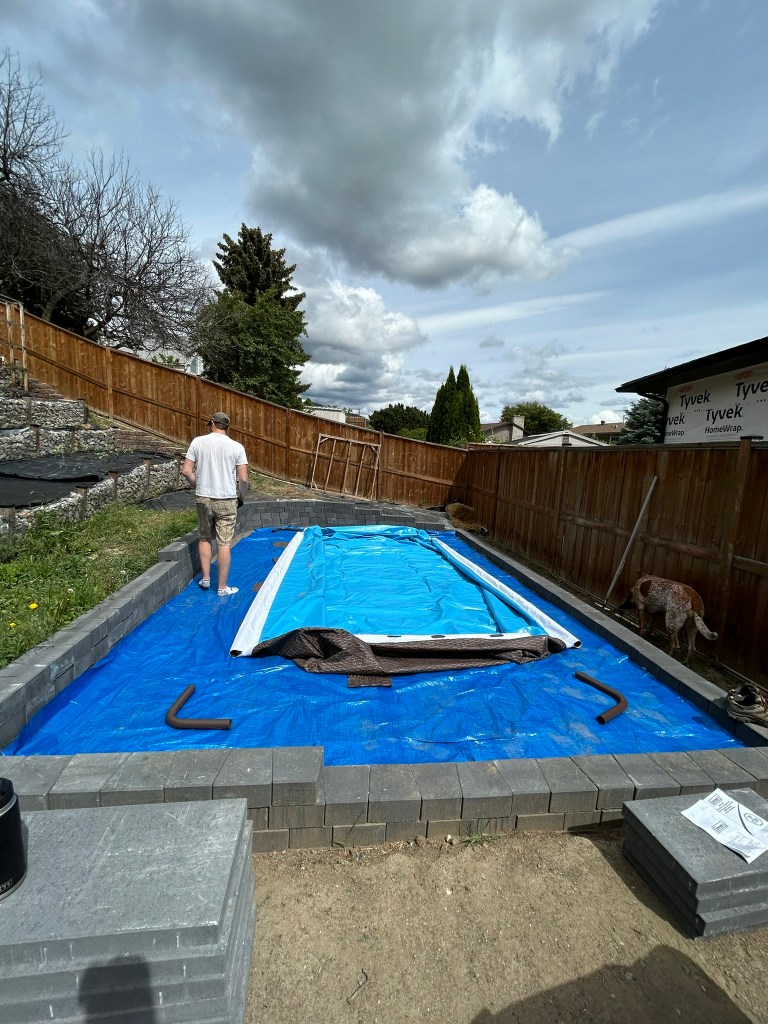

We knew that the soil under the sand was near level, so it should be pretty straight forward. We knew one corner, closest to the bottom left side of our yard, was going to be the trouble corner if we had any.
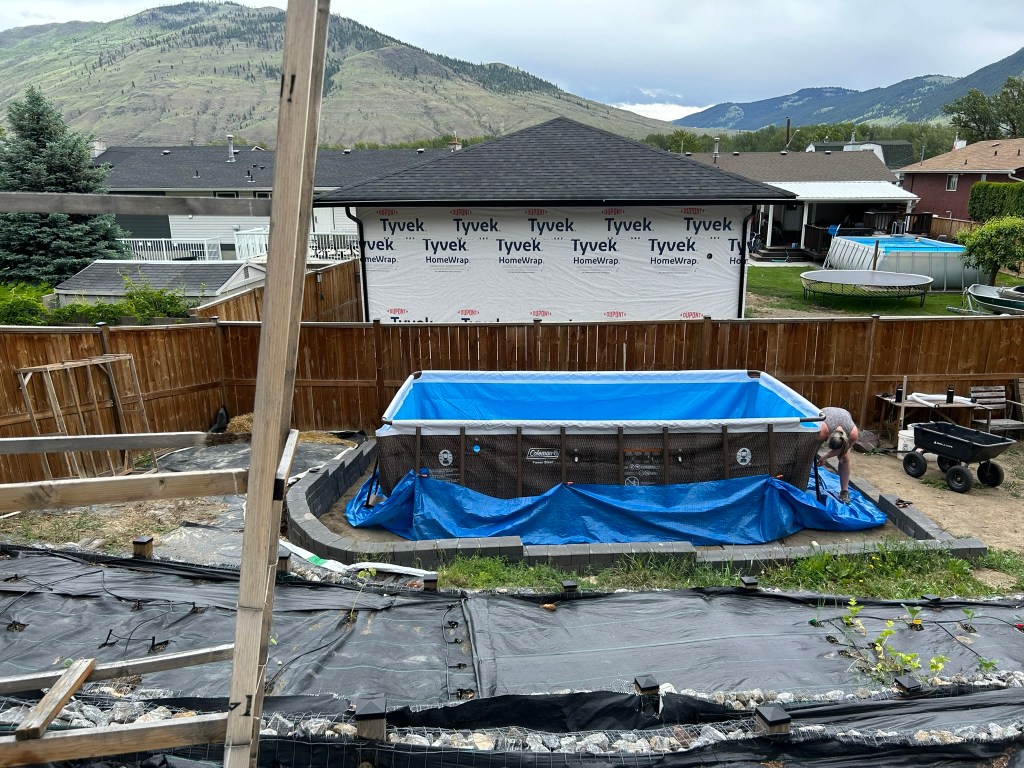
Overall, the process was actually quite painless. We luckily had the same depth of sand as the pavers are tall, which is what you want. We got the pavers into place, awkwardly. We pinned the ground cover up so that we could see what we were doing under the legs. Kurtis held the legs of the pool up while I shovelled out a rectangular hole for the paver to sit in, then we put the pool leg back down. Once we had them all in place, we checked the level using the top bar of the frame.

That also was not the most ideal thing to do because it had joints, but it was the best option we had and sliding the level along the top frame, everything was level. So we did a few last checks, pushed the sand back around the pavers so that everything was levelled out together, dropped the ground cloth back onto the ground and pavers, and started filling the pool.
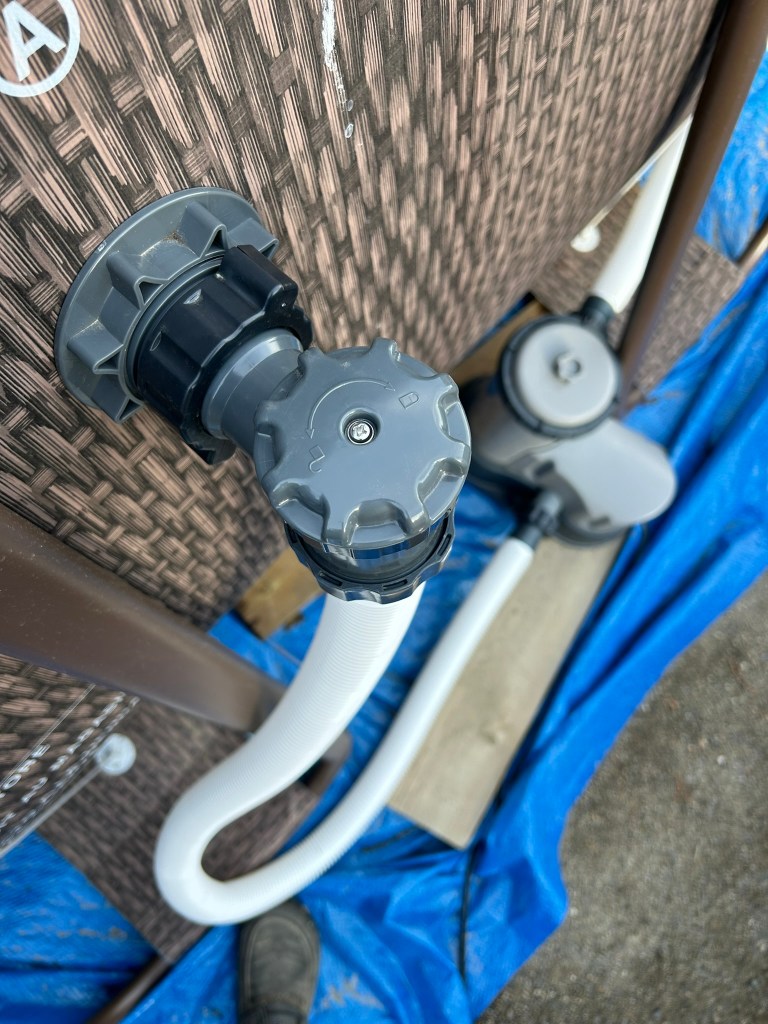
While we started filling, we got the pump hooked up. I expected this to be the worst part because the directions are all photos that are left to interpretation and vague information. The actual assembly went really well and was easy to follow.
The directions were easy to understand when it came to bleeding the air out of the pump before turning it on. So we did that.
After that, it looked like we could turn it on. With the pool being at the bottom of the yard, we needed at least a 100′ extension cord to run from the house. That was another whole conundrum and a lot of research, which ended up with us buying 2 extension cords, one to get us by at 100′ until the proper one came, which is 150′. Turns out that using the 100′ one works great, has plenty of power and will be plenty long enough because the pump comes with an approx. 20′ cord. We will keep the other extension cord in case we decide to upgrade the filter and need a better extension cord.
Once plugged in, we felt the intake and outflow and surprise, surprise….nothing! So back to the stupid drawing instructions we went…nothing. We had followed every picture.
So, we did what everyone usually does in this situation and we googled it. Sure enough, there was a little lock that we had to twist to the open position on the outflow line. Once we did that, voila, worked great!
So now it was time to just wait and watch the pool fill. We assembled the ladder and I got in while it was still low water so that I could make sure there were no wrinkles in the bottom. Luckily this type of pool is less finicky than the hard side ones with liners.
As you fill, you have to go out and pull the legs out a few times to ensure that they are at their most extended angle away from the top of the pool. We did this a few times until it got to the fill level that the legs wouldn’t shift any further as the weight of the water was now enough to hold all the legs firmly in place.
We had no idea how long it would take to fill. Some people had to do it over two days, others it took almost a full day. It took us about 7 hours.
We used the blue line of the inside of the pool to check the level. Overall it is great, but our trouble corner was sitting a little lower. We looked around and realized the one leg was slightly crooked. Nothing major, but just a slight angle. We tested the leg to see if there was a bunch of tension on one side, or if it was bowing at all, and it wasn’t. The angle that it is out is also pretty minor, so we decided to leave it over night and see how it looked in the morning.
Out we went the next morning to check and everything still looked great! So we decided to leave it for the summer and will make it sit properly in the fall when we remove some of the water to winter it.
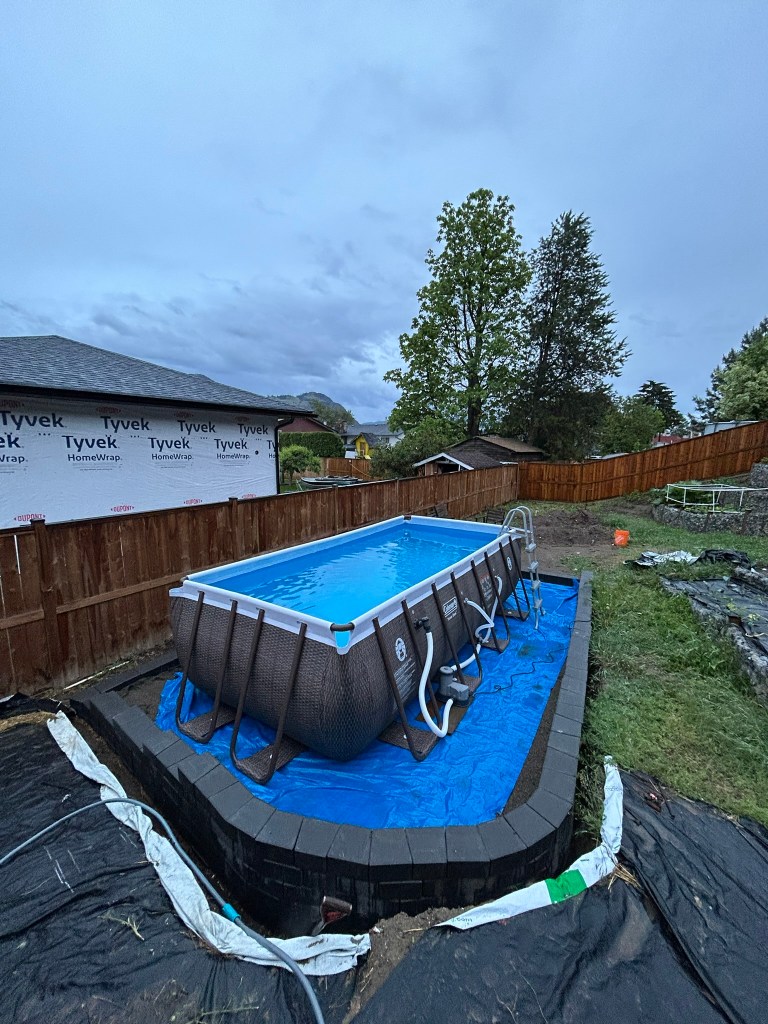
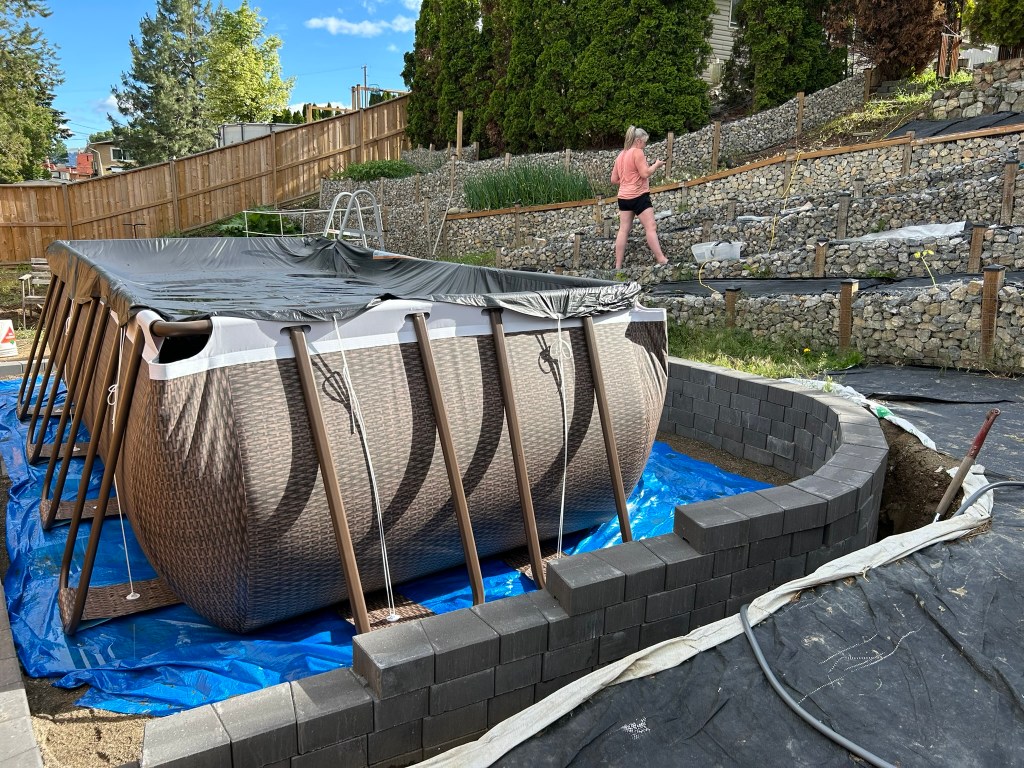
We have enjoyed a swim now twice and it feel sturdy and strong. There are of course some things we need to do around the pool to finish the setup, but nothing urgent. I would like to get a tupperware container and drill some holes for the pump plug to be covered and out of the rain. For now we have tucked it under some of the tarping. I want to make sure the tub is big enough that the chemicals and testing kit can sit with it.
We also need to make a temporary seating area. We don’t want to be tracking dirt and mud into the pool, or into the house, so we will lay out an area near the pool for this summer. By next summer, we will have our deck, gazebo and grass put in, along with a nice path from the deck to the pool.
I also want to install some hooks on the fence for the skimmer and vacuum to go, as well as somewhere to hang our towels.
For now though, it feels good to get the pool in place.

