
Alright, it was finally time to start the actual build. Enough thinking about it, time to get the tools out, and get started.
We had all the supplies delivered to our house, with the items being stacked in our driveway. Now, if you have been following along with my ramblings, you will know that it is about the equivalent of 4-5 stories from the front yard, to the back of the yard…and we have been doing this for 8 years…we are sick of hauling stuff up and down our hill. So, we hired some guys that Kurt works with to come and help load all the items down to the back of the yard. You’d think it would be easier going down rather than up…but not really by much.
While the guys worked on loading all the supplies to the back of the yard, I worked on getting the footprint mapped out. I wanted to make sure it was in line with our pool and fence, leaving room for us to dig up our irrigation line that runs along the fence, if needed. We did the same thing with the pad for the pool.
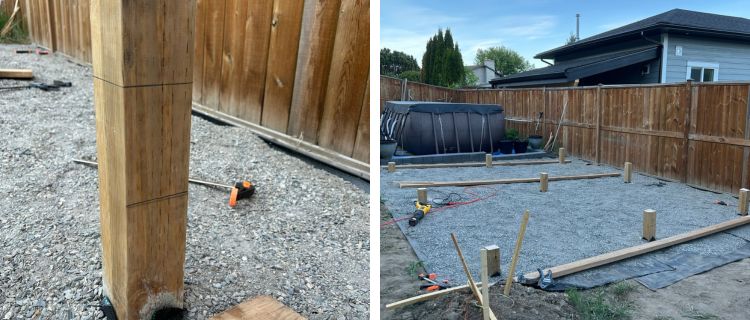
Using stakes and rope, I mapped out where the posts needed to go, as well as the overhang of the deck. As a visual person, it was nice to see it all measured out to confirm that yes, it would be the right size. As you can tell from the photos, our foreman, Basil, was on the job and right in there with us. Always helpful…hahaha!
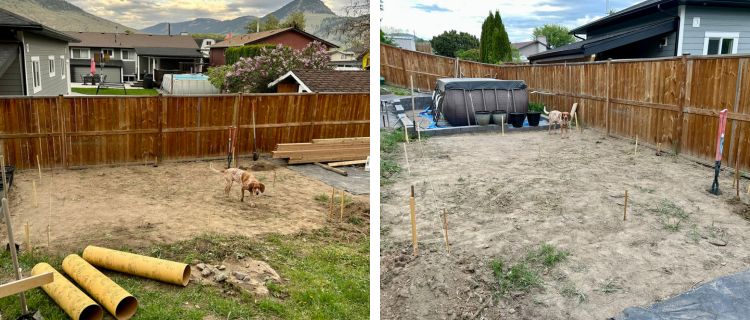
Once I had the lines all mapped out, I wanted something a little more permanent, in case our foreman got a little lazy and took out one of the lines or the stakes, so I used some red spray paint I had in the shop and sprayed the lines onto the ground as a backup. I did leave the stakes & rope in place while we dug the post holes.
Because of the mapping it out with the overhang, we ended up making some great “X” marks the spot points for digging our post holes, again, still using the rope to ensure that they are nicely in line. This is important because your beams are going to be on this, so you want to make them as square as possible to ensure you don’t have angles to deal with when doing the deck surface frame.

Next steps were to dig all the post holes, which Basil was once again very helpful with. She wasn’t overly impressed that she was no longer allowed in the interior of the stringed section and would inch as close as she could.
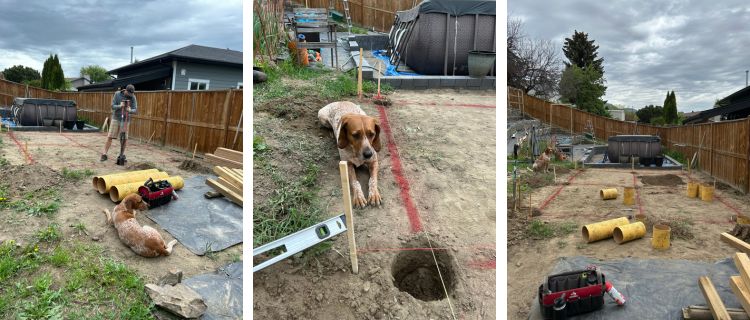
Once all the post holes were dug, we put sono-tubes into the holes, to help form the cement. I don’t think it was actually needed since that part of the yard is mostly clay and holds its form really well, but we figured if we ever had to remove the deck, then at least it would be easier if the cemented footings were of a uniform shape.
Because this is a surface-level deck, and not significantly off the ground, we didn’t sink the posts in very deep, only going about 1-1.5′ into the ground. It is more just to stop side to side movement.
Next, we very roughly measured the post lengths, knowing that we would be cutting them down in size once we started working on the actual surface framing. To keep things simple, we just cut the 6′ posts in half because we knew it would definitely be less than 1.5′ – 2′ that we would need for the surface of the deck to sit on top. Because there is a slope, we knew that the side closest to the fence would be higher off the ground than the side closest to the garden beds. Doing this also allowed us to not have to worry about perfect measurements prior to cementing.
As we cemented the posts, we made sure that they were lined up against the strings so that the posts would be as in line as possible. We also have a great little tool that we bought when doing all of our rock walls, which is a 2-sided, 90* level that helps ensure your post is standing properly upright and is not leaning one direction or the other. Unfortunately, I didn’t get a photo of it.
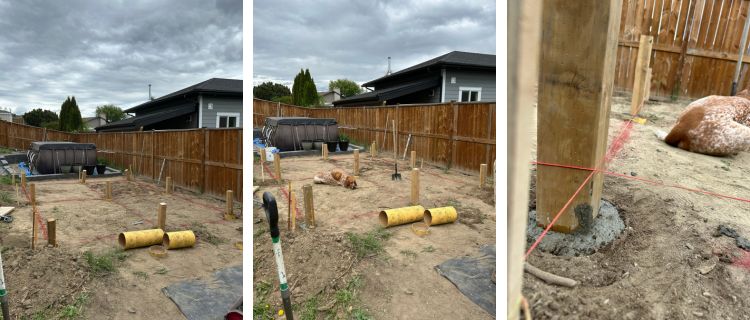
We made sure to let the cement cure for 24 hours to ensure it was solid before we started the next part. It is important to let the cement truly set before the next step to ensure your posts to do not move as you work on the surface frame.
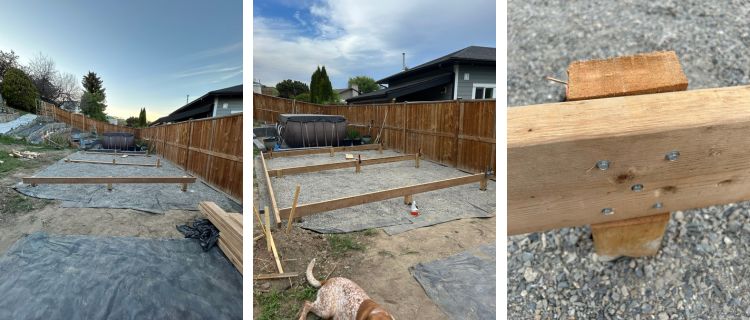
Once that was cured, we were able to get a better idea of how sloped this area was. We had some small piles of dirt from the post holes, so we used that dirt to level out any dips or areas that would make our build a little easier moving forward.
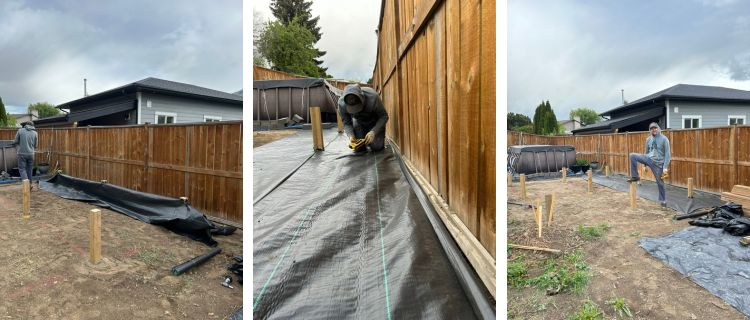
Now, our yard is excellent at growing gargantuan, hearty weeds. We did not want anything to grow under the deck, or push through between the boards, so our next step was to put down commercial grade landscaping fabric. At this point, we removed our stakes and lines that were outlining the deck since we could now go off the posts.
Similar to how we attached this to our rock walls, we cut simple a “X” where there was a post, so that we could shimmy the fabric down to the ground. When cutting the “X” only go from corner of the post to corner of the post. You want it snug against the post so that nothing grows up between the post & the fabric. You have a bit of wiggle room due to the diameter of cement pad that is also around the post. Also, make sure to hold all the fabric at the top height of the post, otherwise you risk having bunches between the posts. Ideally, you want it nice and tight.
We also made sure that the fabric covered the space between the deck and the fence, where our irrigation line goes, so that we wouldn’t have to deal with weeds behind the deck either. We want to keep that as clear as possible so that we can walk the fence line as needed.
Starting at the fence, once we had the first line of fabric in place, we stapled it to the fence, to the posts, and using metal u-shape landscaping stakes, pinned it to the ground. We then continued with the next row, and so on, until the whole footprint was covered. We also extended it past the edges on all sides, so that there was no chance for weeds to grow beneath the deck.
For good measure, we decided to add a couple inches of crushed gravel down on the landscaping fabric as well, adding some weight and additional weed protection under the deck. We pounded the crushed gravel to make it as compact as we could for walking on while we continued the build.

The next part we took our time with to make sure our deck was as level as possible. Because there are gaps between the boards, you don’t need any slope to the deck for draining.
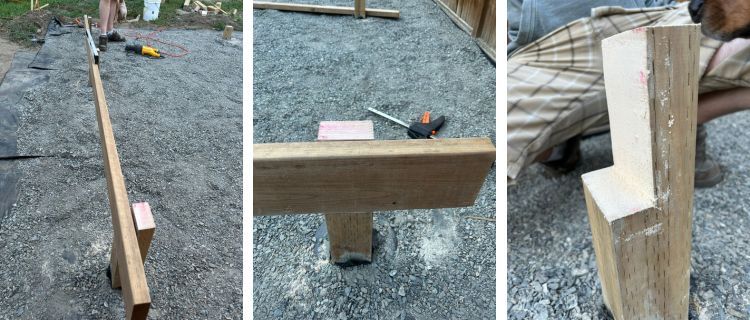
Grabbing all of the ratchet bar clamps I have, along with our long level, we got started on the next step. We grabbed the 2″ x 6″ x 16′ beams and put them into place using the ratchet bar clamps. Unfortunately, I forgot to get photos of this process, but it allowed us to make adjustments once we had them all in place, to ensure that we were not only level front to back, but also side to side. To check the level of side to side, we placed some of the 2″ x 6″ x 16′ posts across the beams and used the level to ensure we were good to go.
Once we had done our adjustments and were happy with the level of everything, we marked the posts on both the top of the 2″ x 6″ x 16′ boards and the bottom. It is important to do both measurements, not just the top, because we are going to notch our posts so that those boards sit on the posts.
Once everything was marked, and we did one more check of all the levels before removing, we were ready to cut our posts down to the proper height and add the notch.
Using our sawzall, we topped the posts at our top line. To do the notch, I used a framing square to add the lines/guides for the notches, which extend to either side of the post from the face mark that we made. I then ran it up to the top and along the top so that we had a clear guide for our cut. This doesn’t need to be perfect, you just want to make sure your beam seats fully into the notch and is sitting on top of the post.
Once that was done, we treated the cut tops and notches with the Cut-N-Seal to ensure that those ends would be sealed from the weather, extending the life of the treated post. We also treated the ends of the beams as we had to cut them to length (12′ 9″) as well.
We placed the first beam, measuring to ensure the correct length of overhang on the front and back. This would be our guide for the remaining 2 beams. Pulling our ratchet bar clamps out again, we attached the beams to the posts temporarily, so that we could make minor adjustments to ensure our front and back boards would be square. Once sure that we were square on all beams, we used the SD Structural Connector Screws to attach the beam to the post. I used 5 screws per beam.
Next up we needed to add the front, back and side beams for the full frame to be complete. We started with the front beam, again ensuring that we had the correct overhang from side to side for how we planned the build. As a reminder, there will be a narrow section going up each side that will have some extra supports for our picture-frame on the surface, so we wanted to make sure everything was even on both sides. You will need your joist hangers to connect the front and back boards to the cross-beams.
We then repeated the process on the back board, again measuring to make sure everything was even side to side, but that we were also square to the front board. As this is the outside frame of your deck, this is the area you want to be most detailed with getting it square.
Lastly, we attached the final side pieces, using the corner joist hanger. We also added a couple of deck screws in from the front beam, just to make sure everything was nice and flush and had some extra support in the attachment of the boards.
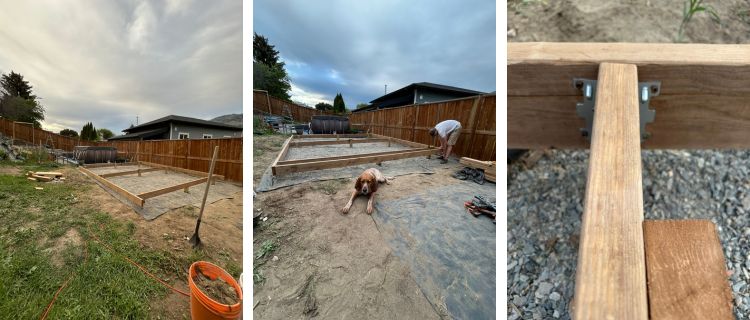
Voila! You now have the outside frame and your main cross-beams for the deck. I will note that at this point we hadn’t added the extra posts, so there will be a couple more beams that we end up bracing for extra support.
Next up is finishing the framing!

