
Jumping right back into the groove of getting stuff done in the yard, the weather has turned cool, the skies are clear and the air is crisp and clean. It is the perfect time to be doing some more work on the wall for our main path.

After letting the concrete set for a few more days, I used some concrete caulking and went around all of the posts. This caulking should ensure that it is a nice water-tight seal around the post where the concrete meets it. This should help with water not getting in there and freezing during the winter, causing all sorts of splitting and problems.  I wasn’t expecting it to be as runny as it was. I thought it would be a nice malleable tube that I could smear onto the post and concrete. Instead it kind of is like melted plastic and flows well. I was still able to push it up onto the post and it was already running down the concrete. It should still provide a nice seal, it was just surprising at how gooey and liquidy it was.
We let that cure for a weekend while we went away to spend some downtime at a cabin. Beautiful weekend just chilling on a covered porch overlooking a stunning lake with nice fall temperatures and rain. Ah. It also gave K’s back a chance to fully heal up and it is now as good as new….or at least it is back to how it was prior to the strain.

 We realized as we were doing the caulking that we would need to cut some space behind the posts to get a stapler in behind them. It was hard enough getting our hands in there to put the caulking in.
  So we cut some area behind each post so that we could get tools down the back in order to attach the wire fencing to the back of the post. We hadn’t wanted to do a lot of back-filling, so we had put the posts in right against the cut area without realizing that we would need to get tools back there. It was an easy enough fix and will be easy to back-fill that small area.
 With all the different types of soils & sands along the length of the wall, we wanted to make sure that it is not going to shift too much.
 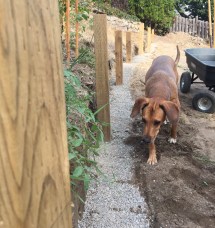 So, we pounded the ground as solid as we could (sand doesn’t really pound solid)
and we put a nice thick layer of our crushed gravel which will be the foot of our wall. In the sandy area, we definitely had to pound in a bit more of the crushed gravel to ensure that it was nice and solid. By the time we were done, we could stand on it without it shifting.
We know our soil is fantastic at growing. Just a bit of moisture and it becomes a jungle quickly. To try to avoid having weeds sprouting between the rocks in our wall, or threading themselves through the back, we decided to run a length of our heavy duty landscaping fabric the length of the wall. We made sure that it will be enough to cover the foot of the wall and go up the back to the top of the new bed. I am sure at some point there will be weeds that are able to wiggle through, but it should keep the majority of the weeds at bay. It was super simple to put the fabric on, we just cut an “X” over the post and slid the fabric down the post. I did the sliding in phases to ensure that the fabric was fairly taught between the posts. We also left about 2″ hanging off the front so there was a little overlap onto the path.


Once we had the fabric run, we did not cut off the excess. Instead we ran our wire down the backside of the wall, creating the back portion of our new rock cages & fence. When we were doing this we didn’t think about where the fabric was, we just put the wire down the back and stapled the wire and fabric to the posts. In retrospect, we should have put the fabric on the other side of the wire as it will be in the way when I put on the brace wire between the two sides of the wall. But I can just poke a small hole through the fabric with the wire to reach the front portion of the fence. Easy fix.

We used 1″ x 1/4″ crown galvanized staples to attach the wire to the posts on both sides. We had to go out and buy a new stapler and bought an air stapler to use with our compressor. This ensured that I could get the staples deep enough into the wood, without having to use a hammer. We are DIYers, so we weren’t going to go and spend $200+ on an air stapler. So I did a little research and ended up buying a Bynford stapler.  I kind of laughed, because I immediately thought of “Tim the Toolman Taylor” from the show Home Improvement. It is spelled differently, but it still didn’t stop me from wanting to do a cave-man grunt when the stapler worked perfect on every staple. Luckily we didn’t actually have any “Tim” moments. Everything went smoothly for us. It was a $65 air stapler, and it worked like a hot-damn. It has a depth adjustment as well so that we could change how deep it went depending on the depth of our staples. No jams, great size & with, I would definitely recommend if anyone is looking to get one (again, I am not getting any funding for promoting, just giving a personal recommendation).
Prior to using the stapler on our fence posts, we got a piece of scrap post to test the stapler on to ensure we had the correct depth. We also tested the depth with a piece of the metal fencing as well to ensure it would have a nice snug fit.

We cut off a bit of the excess metal fencing from the backside as it was taller than we needed. We went with the taller roll as the 36″ roll would have been just barely tall enough on our tallest posts. We then worked on getting the front side attached. Once attached, we again removed the excess at the top. It is not as low as it will need to go as it will end up sitting about 2″-3″ from the top of each post. We plan to put a wood cap across from post to post and a small fence post solar light. For now we left the excess until we have filled the wall with rocks. We may use the excess to fold over the top to cap the rock portion before we put the wood cap on it.


The hard part about using the flexible wire fencing is that there are a few little wows and bows in the fencing between posts. The bottom 3/4 is nice and taught between posts, but the top 3 sections are a little loose. I think this happened because of the way our yard slopes. The last 3/4 is all along the same grade, the top is slightly different. I am thinking we will need to use some spacers and braces in that portion to keep it a fairly uniform look. I am ok if it bulges here and there a little, but I think it would be very wobbly looking without something between the front and back.

We will be heading out this week after work to our favourite cut block rock piles to pickup our rock for filling the wall. We also take a nice dinner and make an evening of it. Ellie especially loves it because she gets to sniff out all the critters that are around. Hopefully no skunks though!
We should have this wall done by the end of the week!

