
Making cutting boards has been a lot of fun, and I am continuing to explore ways that I can make new patterns. As I have been enjoying making them, an idea came that it would be fun to have some wooden charcuterie knives to go with some of them. I checked out Pinterest for ideas and found some great ideas and tutorials. But none that I was really excited to try. Then I remembered this beautiful charcuterie knife I have at home, that is made of metal, and I decided that it would make for a great first knife.

Although this knife will have a slightly sharpened edge, it will be meant for cutting soft cheeses like brie or camembert. It may also be able to cut into some medium cheeses like gouda or swiss, but it has a bit of a thicker blade as it is made of wood and you don’t want the tension of the cut snapping the blade, so it wouldn’t be a nice slicing cut, but rather a chunk cut.
I used some Alder that my dad had shared with me for the initial knife build. I ended up cutting 4 templates from Alder, so I will end up with 4 of this style knife. Although alder is good for carving, it is only a semi-hardwood, rating as one of the lowest hardwoods on the Janka Hardness Scale at 590. Moving forward I will aim to use some of the higher rated hardwoods for this style knife as it’s purpose will be to cut and I would like the blade to not wear down too fast. I have some cherry wood from our cherry tree as well as the neighbors cherry tree that I will try some knives with. it should have a similar finish, but rates at 950 on the Janka Hardness scale, so the blade will be more likely to stay sharp longer. I will also try some walnut, maple and other hardwoods for a variety of styles and colours.
So, let’s start at the beginning. I used one of my metal charcuterie knives as a template. Because this was my first knife, I wanted to use an existing template. I like the curvature and shaping of the metal knife and thought it would translate well into a wooden version. It took a little finagling to outline the knife onto the wood. It has a nice thick handle that caused me some issues, but in the end I was able to get a pretty close outline that I could make some adjustments to. Now, had I been thinking, I would have traced the outline from the wood onto some paper for future knives, but I wasn’t thinking, I was just excited to start making the knife. So, I will need to finagle again, and hopefully next time I will remember to create a template for myself that will be much easier to trace onto my wood pieces.
Once I had the shape traced, I took all my wooden blocks and used my scroll saw to cut out the general shape. If you have a band-saw, you can also do it on that, but these are small blocks and I like my fingers where they are, so I opted for the scroll saw, which I have more control with. It was a little slower going than it would have been with the bandsaw, but I am ok with that. The blocks were only 1-1/2″ thick, so my scroll saw could handle it. I will be interested to see if it is able to handle the harder woods at that thickness, but I also think I would plane the blocks down to 1″ thickness when I do this again.


Thanks to my carving lessons with my dad, I knew that my next step was to place my center line around the outside edge of the piece. Go all the way around, because you will be working on top, bottom, front and back. It seems like such an intuitive thing to do, but I have done many attempts at carvings without the line and I have gotten some very wonky little pieces. From that centre line, I also added a cross line that indicated where the edge of the handle should be, where it meets the blade. This will help later with the shaping of the handle. I then determined how thick I wanted the top part of the blade, and drew those lines on as well.


Using the band-saw, I cut the blade portion narrower, so that I wouldn’t have to remove that with the sander or carving knives. I gave myself some healthy margins outside of my blade thickness lines so that I could sand the blade shape to that line. I didn’t mind using the band saw for this part because it was too thick to do on my scroll saw, and it was some straight lines that I could use some push sticks with to keep my fingers away from the blade. Once I had the blades roughly cut it was time to sort shaping the piece.

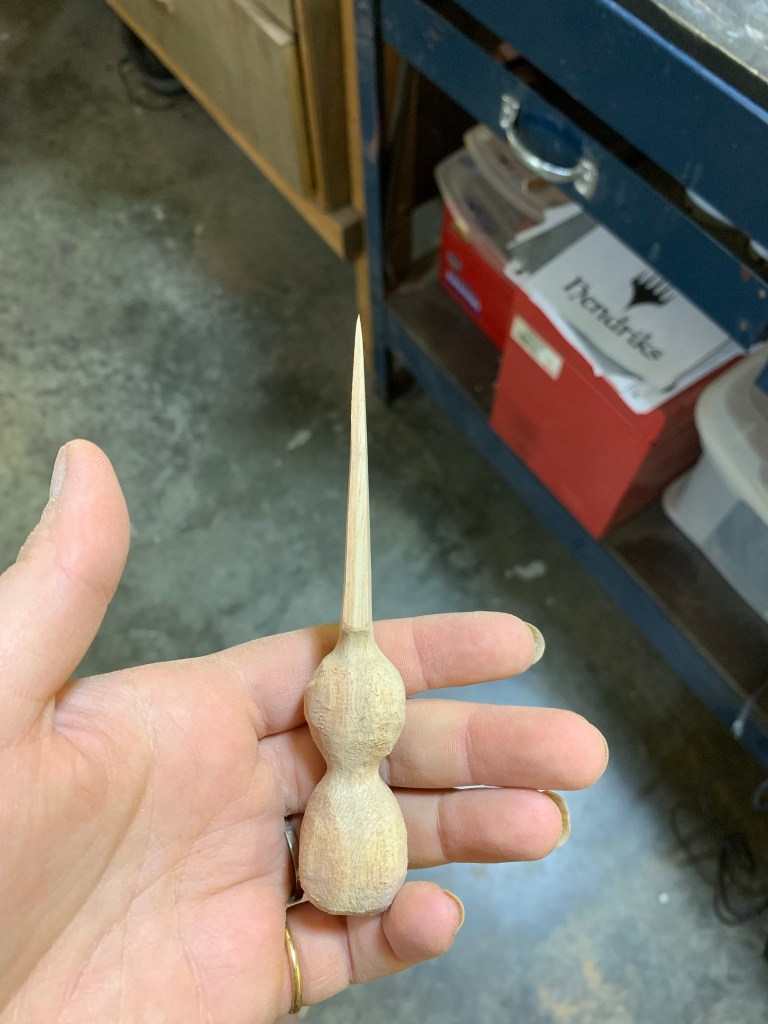
I had already shaped part of the handle with the scroll saw but now had to round the handle for a comfortable grip. I moved away from the original metal knife design slightly here and made the handle a little more shaped with two rounded sections. To shape most of the handle, I used my Dremel with a carbide double cut bit. I went with a round end taper but for this project. As with carving with knives, I was slow to shape and remove layers. I wanted to not have too many dips and buckles to have to sand out so although the speed was high, I was careful to do small amounts at a time. Once I had the handle how I wanted it, it was time to move on to the blade. I used a bench belt and disk sander.


I started by sanding the blade on the bench sander to the lines that I had drawn for the top edge thickness. I also ran the top edge on the sander to ensure a nice flat top to the blade. Using the sanding disc, I was able to taper the blade for a sharp edge, then finished it off by gently sanding out any rough or edged pieces using the belt sander again. I had been worried about the blade and getting it shaped, but it ended up being much easier than I had anticipated. Due to the curvature, it naturally wanted to sand the edge sharp. Perfect!


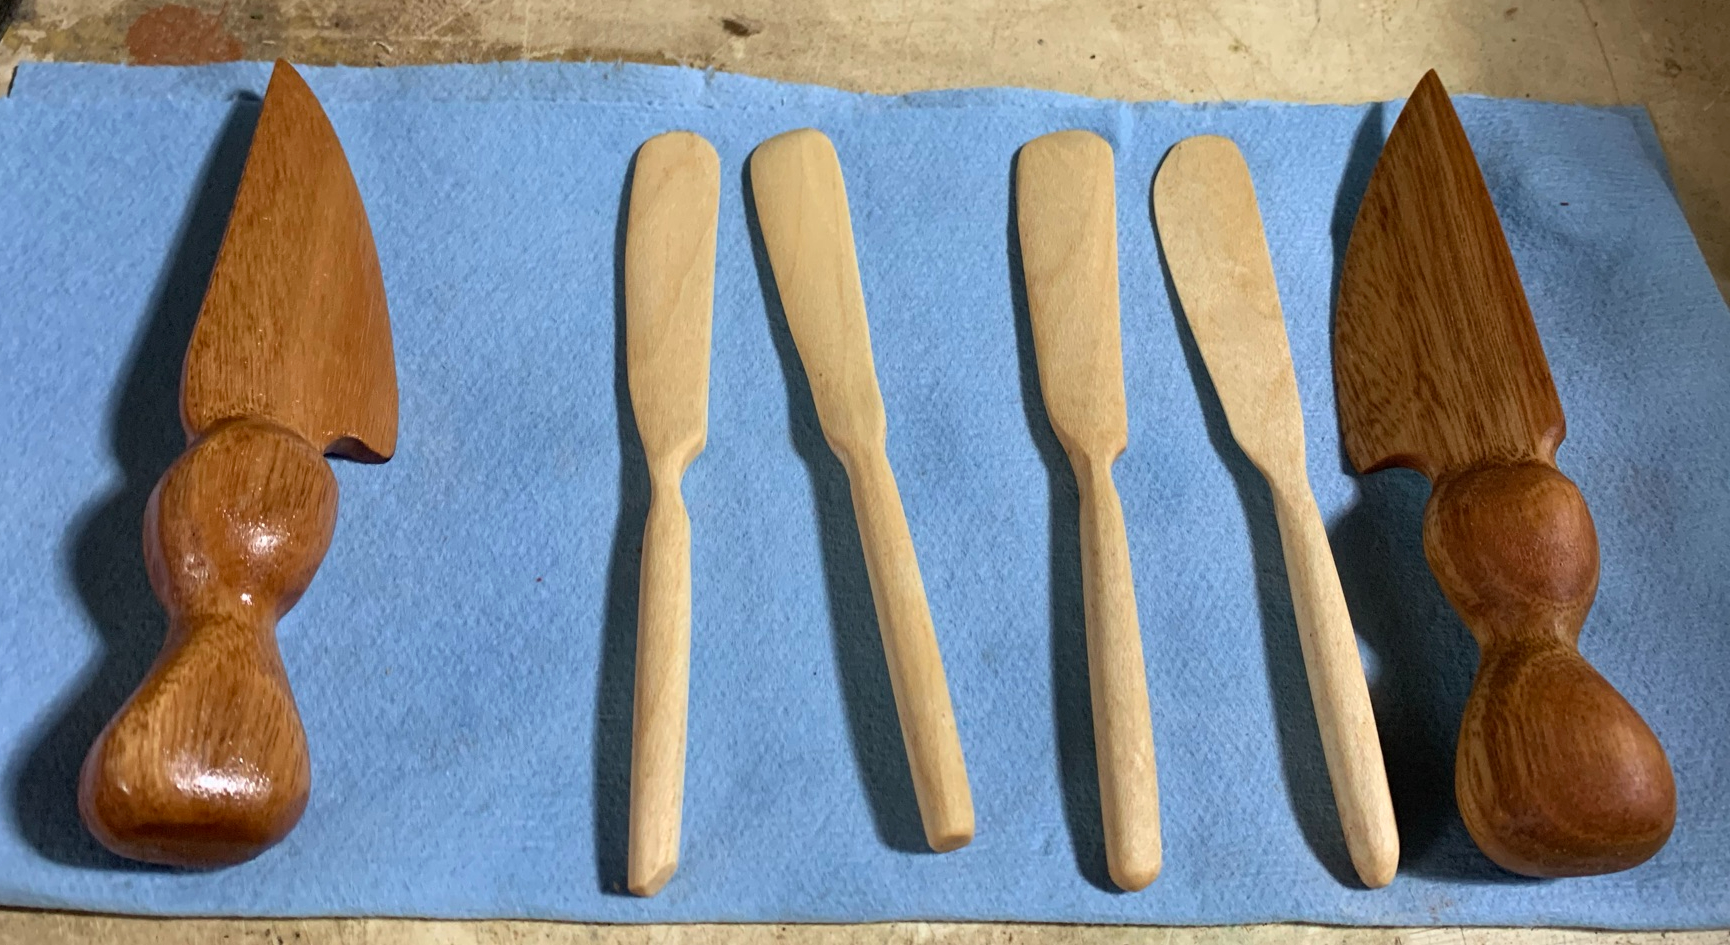
Now came the part that requires some good music and a topic to sit and muse about. Hand sanding it all to a silky smooth grain. Using 220 grit, I sanded and sanded and sanded until that knife was buttery smooth and there were no blemishes to be seen. Once I was sure it was ready, I grabbed some of my M2C1 Kraftwerks wood butter and shined it up. The wood butter will also help protect it and give it a long life.


For my first knife it went well. I have since made another and it also turned out great so I don’t think this first attempt was a fluke, but I guess we will see by my 10th or 20th knife if I am still thinking this. I have also tried out a spreading knife which is more like a butter knife for spreading soft cheeses, jellies or sauces onto crackers.
I plan to try out some other shapes for different uses. I am also going to try my hand at some larger scoops, spatulas and tongs. My fall shop list is adding up!

