
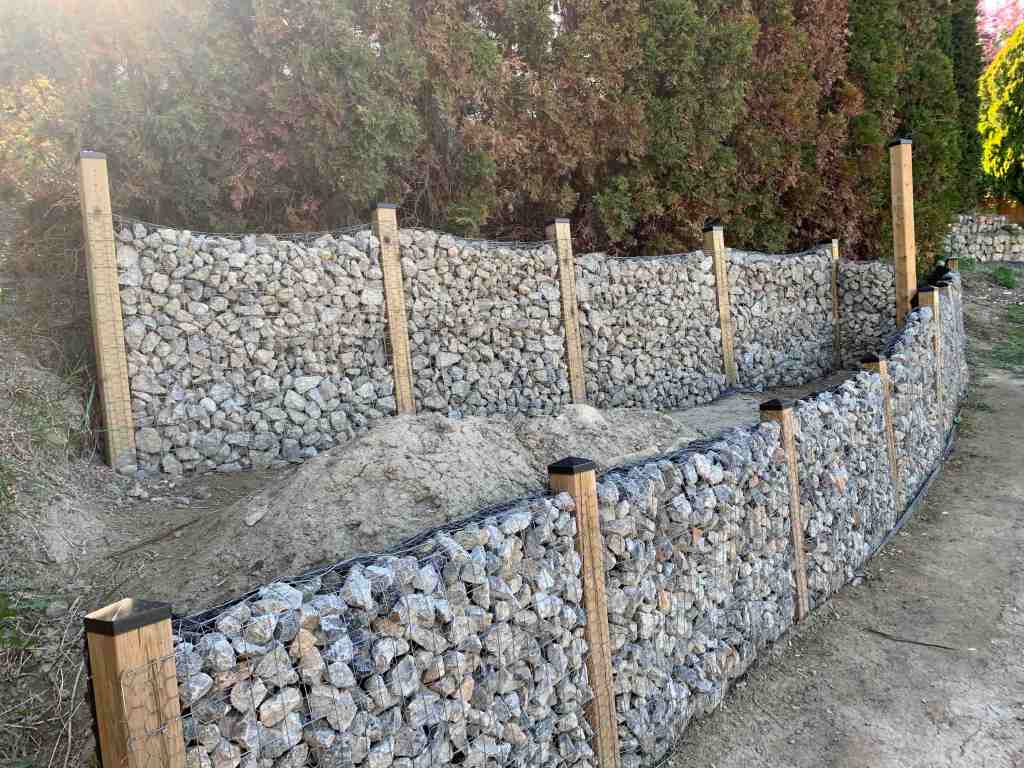
With the rock wall being complete, we now have all new levels of gardens to utilize this summer. The only issue is that I got ahead of myself again and all the stuff that needs to be planted now is planned for the new beds. That’s ok though. After years of working on rock walls, Kurt and I were really looking forward to doing some different projects in the garden and are especially excited to open up new areas for growing our food.
So we decided for the next week or two, we are going to garden hard. There are a few things we have to do before we even consider getting seeds into the ground…which again…should be happening around now. Or maybe even a week or so ago. No biggie since the weather really can’t make up it’s mind what it wants to do. It is once again a bit of a late planting season.
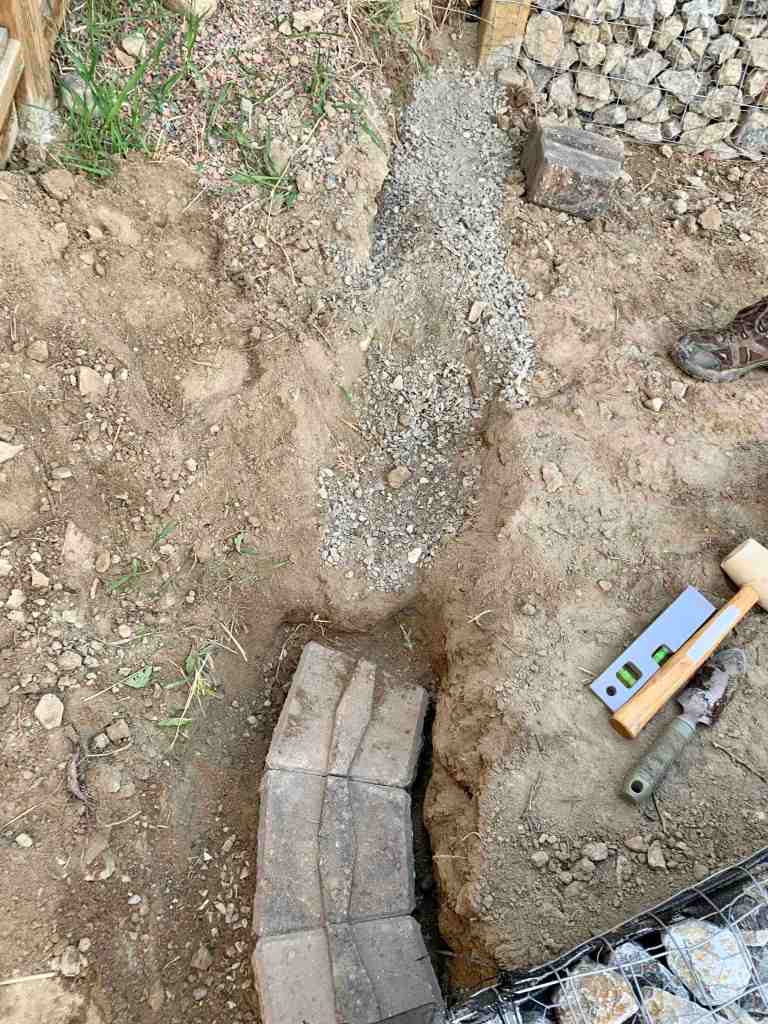
- Cap the end of the top bed with a stackstone wall so that the soil doesn’t sluff down the side steep walking path.
- Fill the top bed with beautiful growing soil. 8-14″ deep depending on which side you are measuring and the angle of the wall on the side-slope.
- Remove tarps from the bottom bed to check the status of that area.
- Turn and level the soil in the bottom bed. Backfill behind the wall where it was loose and has sunk down.
- Top the bottom bed with nice growing soil.
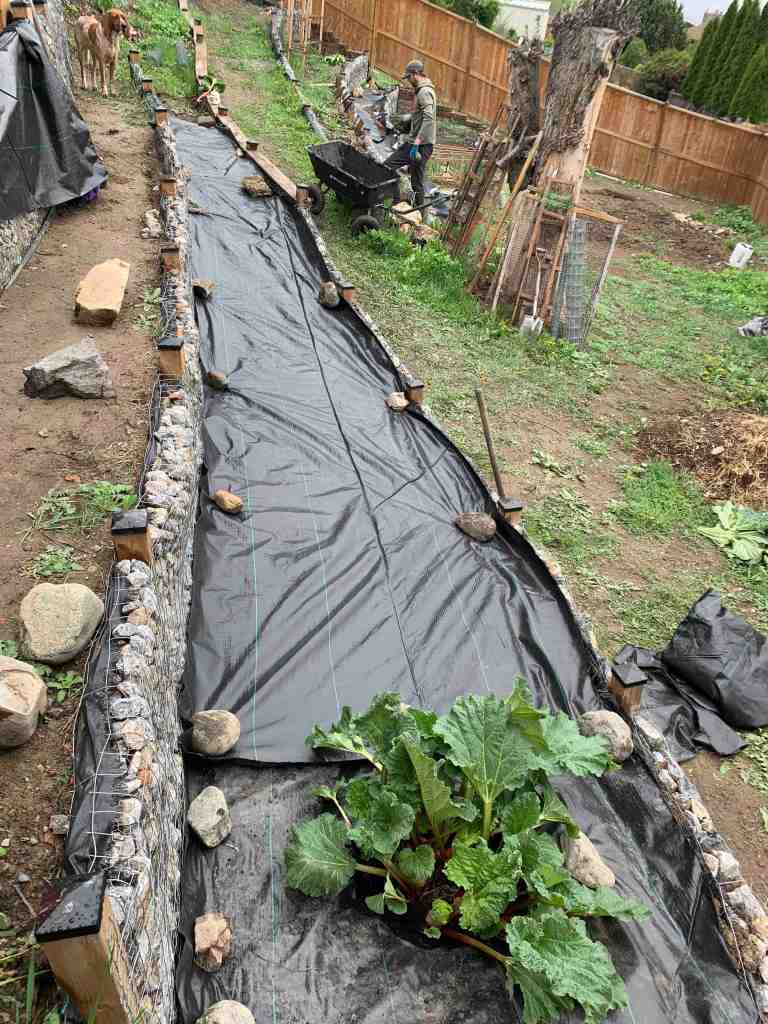
- Transplant the Rhubarb to it’s new home in the bottom bed.
- Cover both top & bottom bed with landscaping fabric to keep the weeds down this summer.
- GET PLANTING!
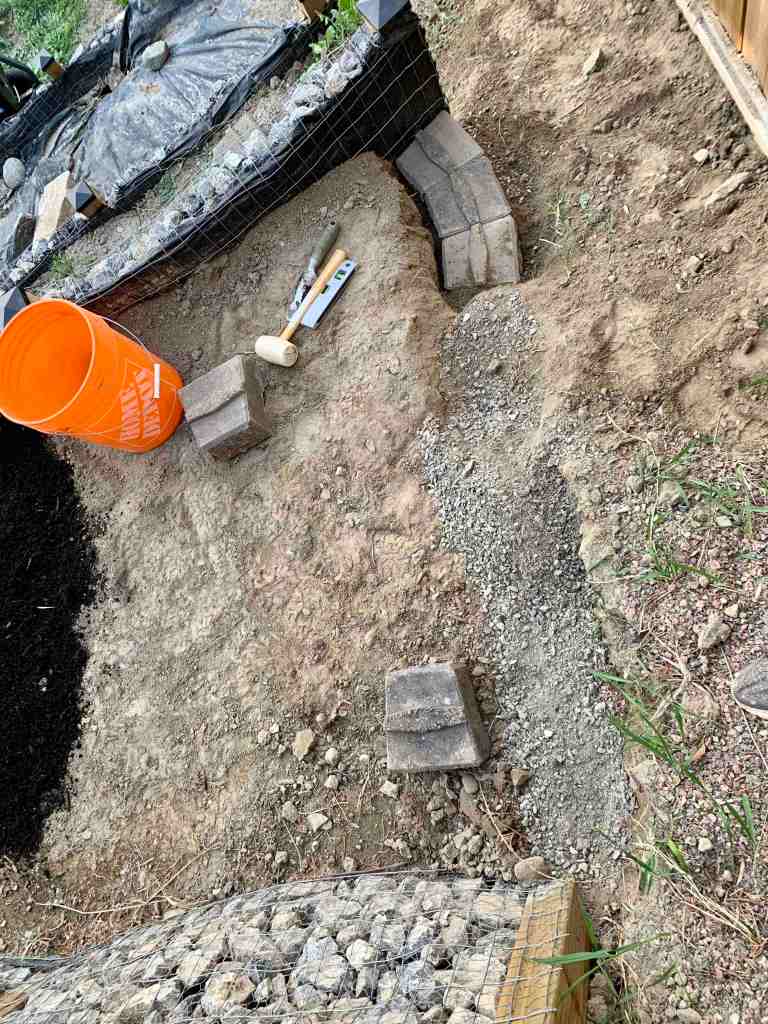
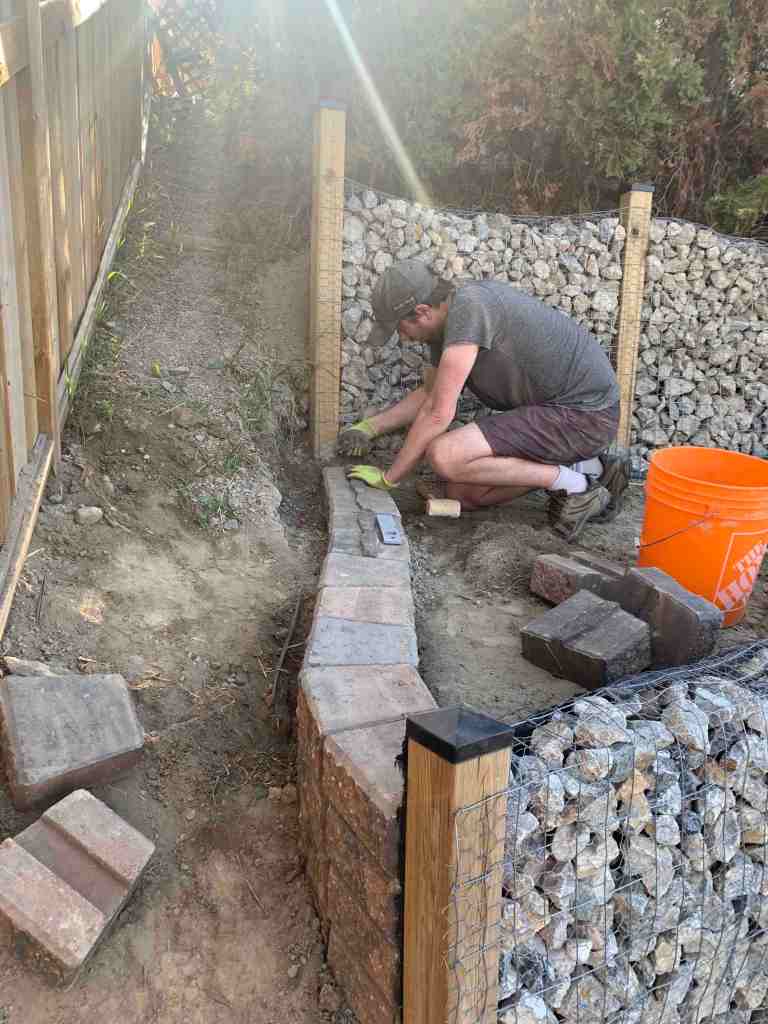
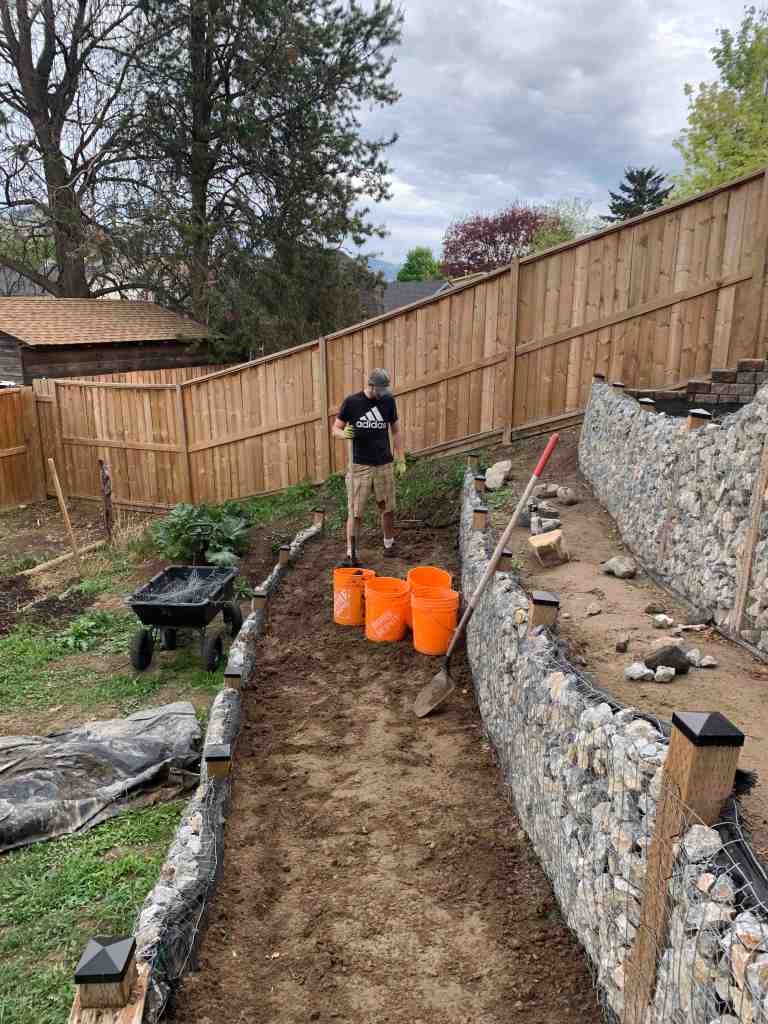
As you can see, the list wasn’t short. So earlier this week, we got moving after work, and started on the stackstone wall that was going to cap our top bed. We’ve built a few of these now, but sometimes wrapping our heads around how it will work takes a minute. Luckily, we had walls on the other side of the yard to look at and remind ourselves of what we needed to do. We at least remembered to start at the lowest point and work our way up…a mistake we had previously made with a past stackstone wall.
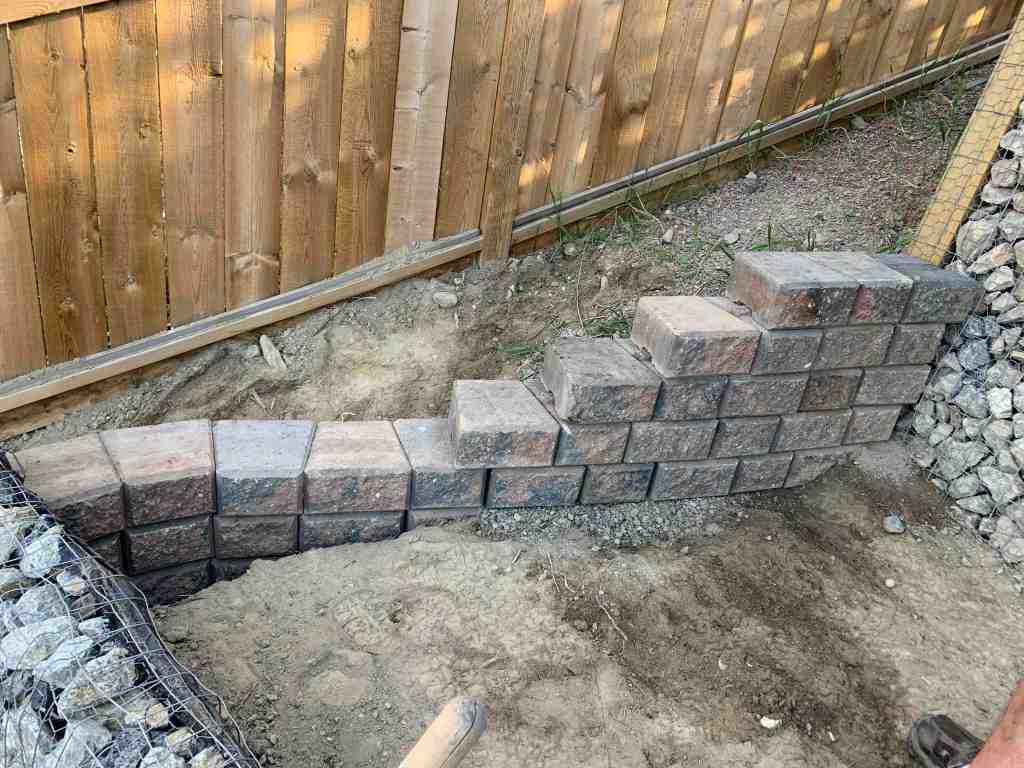
The challenge with being amateur landscapers is that we don’t always think of everything that a professional landscaper would. For example, when we were cementing in the posts for the walls, we made sure that the end post on all the walls lined up because we knew that we were going to be adding stackstone end walls. What we didn’t think of is which walls would actually have the stackstone walls between them, and thus, making sure the posts were angled properly. Instead, we made sure that the bottom three were angled the same, and the top one is different. What is the problem with that you ask? Well, the stackstone wall doesn’t end up meeting up with the posts well and leaves a big ugly gap.
Solution? Well, nothing is straight in all our landscaping. No straight lines…or at least very few. So, use the angle of the bottom wall to do a curvy stackstone wall from the bottom to the top. It was intentional, or at least that is what we will tell people. Ha! As you can see from the finished product, the curves actually give it a lot of character and fits right in with the rest of the yard, so it does actually look like we meant to do it. I actually love the way it turned out and prefer it to the straight walls on the other side.


Check off task one!
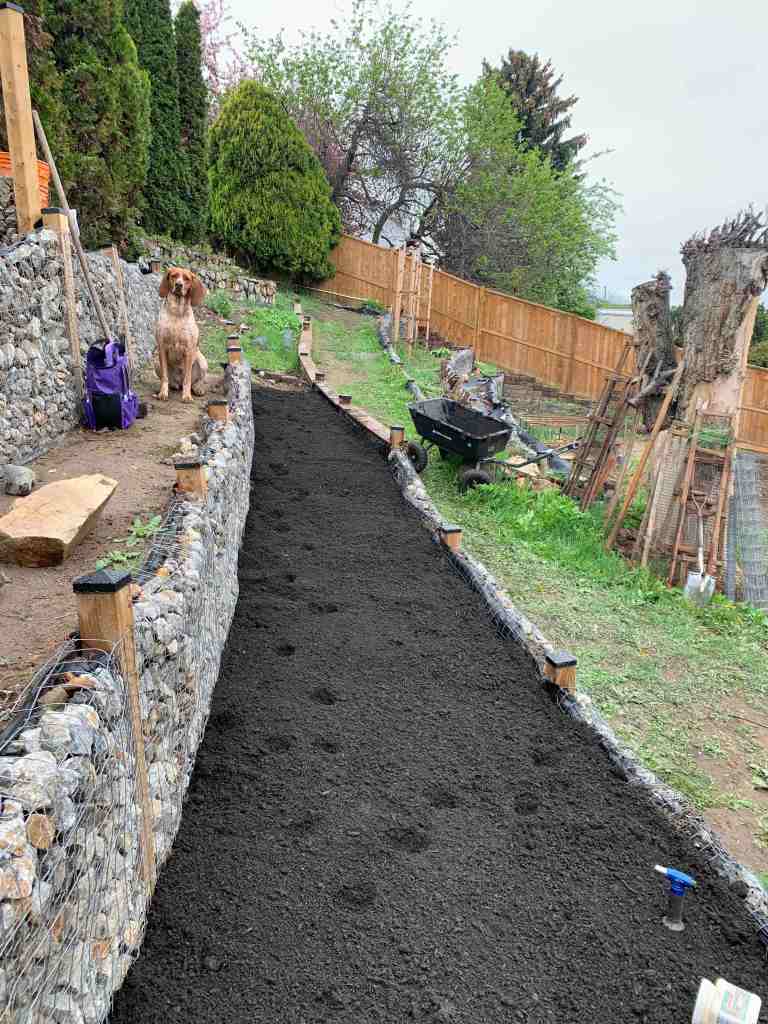
Kurt grabbed some lovely composted soil on his way home from work, so we spent an evening this last week filling the top bed and preparing it for the carrots, beets, radishes, and possibly pumpkins or squash. We did have to dig out a mound of soil, and dig down a bit to make sure that we had plenty of depth for the growing soil to go. Conveniently, we also need to backfill that very top wall, so using buckets, we filled it with the soil we were taking out of the top bed, and dumped it behind the walls, stabilizing them, and eventually giving the cedars a better landing. We have a lot more fill to go, but luckily we are leveling the bottom of the yard, so that won’t be a problem to find.
Once we got all the unwanted soil out, we started filling buckets with the composted soil and worked to fill that top bed. Our cart doesn’t go to that level, so the best way to fill it was carrying big buckets of soil. Who needs a gym pass when you have a large garden?! We definitely felt like we had gotten a workout doing all that soil hauling.


Check off task two!
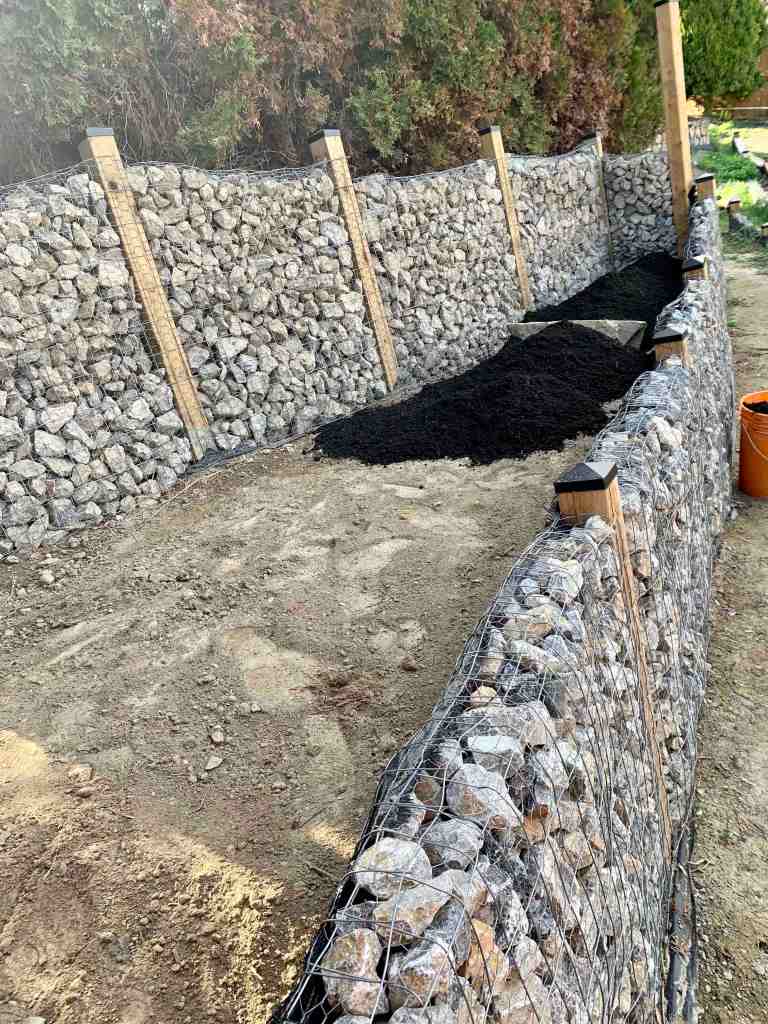
Yesterday, we got an early start and took the tarps off the bottom bed. These are tarps that usually go around lumber and are generally excellent at killing everything under them. We put them down last year to ensure we didn’t have to weed that bed while we built the rest of the walls. Unfortunately for us, there was a lot of water that came through the bed over the winter and as we peeled back the tarp, there was some serious stink at one end. I felt like something had crawled under it and died. However, after much looking, we realized that it was just stagnant water from the tarp and a bit rotted plant material. Luckily as a bit of time went on, the area aired out.
It was interesting to see what had tried really hard to grow under that tarp. Almost nothing manage, but this funky grass certainly tried very hard.


Check off task three!
When we built this wall, we had backfilled behind it, but hadn’t really tamped it down, so the soil had been pretty loose. With the melt and rain, some of the areas had sunk down pretty good and required some better backfilling and tamping to make sure it wouldn’t sink again. We noticed that the grate in front of our shop empties just above this bed and the water naturally travels along the wall. We do have a plan for this issue, but that is a future post.
Since we had to remove some soil from the bed, as well as turn and loosen up some of the soil, it was easy to backfill that wall. We did however have a lot of excess soil because it was almost up to the top of the bottom wall, which wouldn’t do. We wanted at least 12″ of growing soil on the top. Our strawberries, onions, potatoes and corn will be going in this bed, so it needed some decent depth. So, once again, we grabbed buckets and as Kurt filled them, I hauled them up to the top bed and dumped it behind the top wall. So much moving of earth. But, we got the depth we needed in the bottom bed, turned the soil, and managed to backfill almost the whole top wall to just 6″ under the top point.

Check off task four!
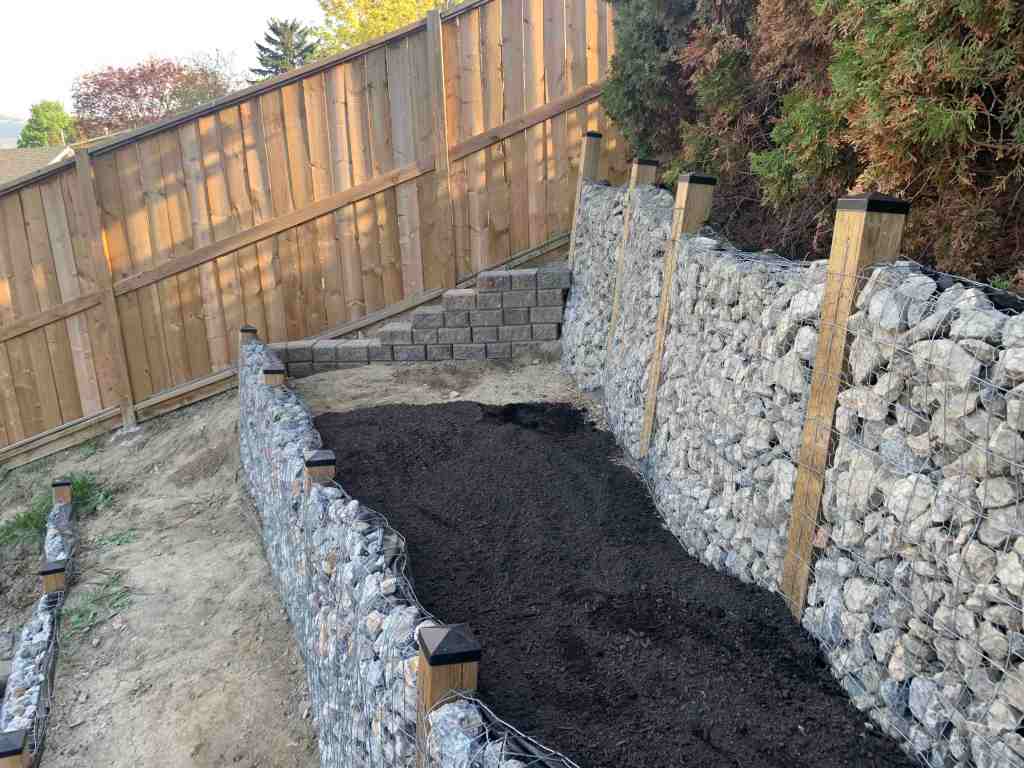
Kurt had grabbed another scoop of soil on his way home from work on Friday, knowing that we were going to work on filling the bottom bed with soil. After filling as much as we could with the soil he had grabbed, we took a little break to run to the landscaping store to grab another scoop of soil and a quick breakfast. We had thought it would take a few scoops to fill that long bed. Once home, we grabbed our trusty yard cart, filled it up and started making trips to the bottom of the yard to fill the bottom bed. Hauling soil down the yard is way better than hauling rocks. Both Kurt and I mentioned how much more we were enjoying this work over building the rock walls. It was nice to have new tasks to work on. We got the bed filled in nicely. Basil thought it looked so nice and fresh, that she just had to take a gander through it. So very proud of herself for enjoying the fresh soil between her toes.


Check off task 5!
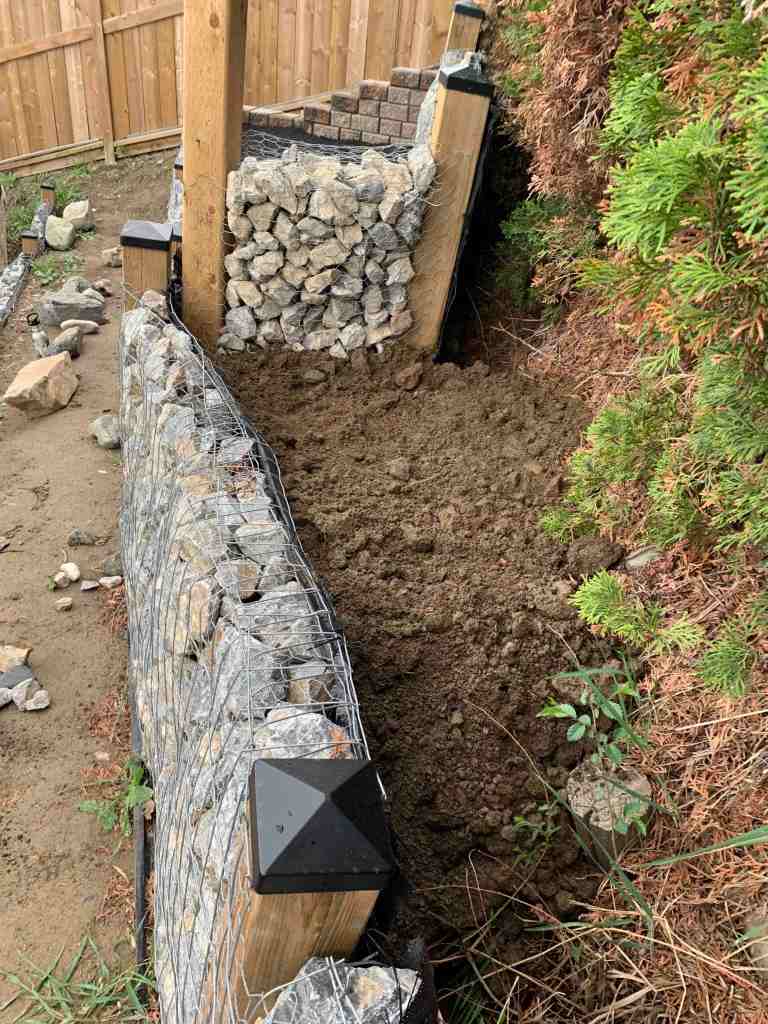
We left the one end of the bed without new soil because we were going to transplant the rhubarb up into that area and planned to just add some nice fresh soil to the hole that it was going in. We were going to put landscaping fabric around it to keep the weeds down, but had thought we might need to wait until the following year because the rhubarb was already so large.
I did a harvest of some of the larger stalks and leaves to make it a little easier to manage. Plus, Kurt had mentioned he would really like a rhubarb and apple crumble, so I had plans to use it all. As I was cutting around it’s base, doing my best to not break too many of the roots, I realized that after harvesting, the plant was going to be much smaller. Kurt also saw that and suggested that we put down landscaping fabric and just cut a lightly larger hole. The nice thing about rhubarb is that it’s foliage is so thick that weeds don’t generally grow around the base or a bit of a perimeter around the base because the large leaves don’t really allow for anything else to successfully grow.
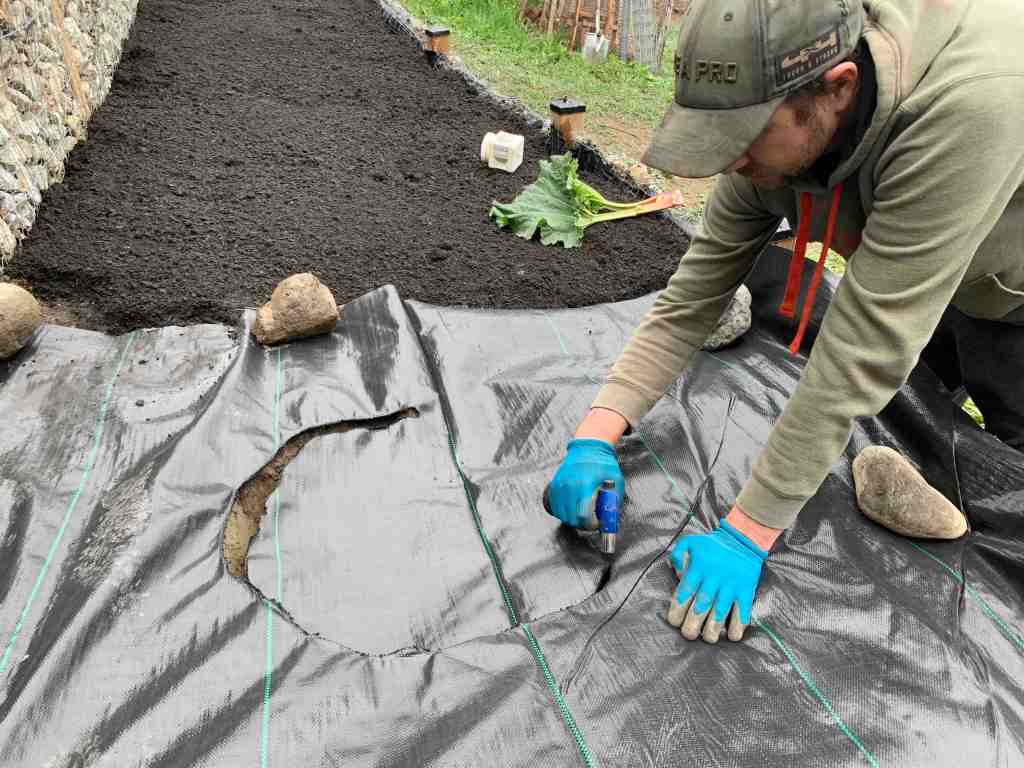
So we got our roll of landscaping fabric out and laid out a piece to cover the rhubarb corner. I had brought down scissors, but Kurt had seen a handy video where someone cut the fabric with a small torch. The material is plastic-y so a little torch would burn through it and singe the edges so that there were no strings of it to deal with. Something that had driven us nuts while making the walls was all the loose strings of fabric that caught on everything!
So, Kurt went and grabbed his torch and did a test run on a scrap piece. It worked like a hot-damn! So back down to the bottom bed we went with the torch in hand. Kurt had already dug out a hole for the rhubarb, and found it easy to follow the edge of it while he torch-cut a hole the same size. It was awesome and much less finicky than scissors.
Once cut, we placed some nice soil in the bottom as well as some plant food in the hopes of keeping the rhubarb happy. Kurt and I carefully lifted the plant and placed it in it’s new home. We know rhubarb is pretty resilient, so we weren’t too worried about it taking to it’s new home. When our neighbour had given it to us originally, we had just plunked it in a spot out of the way and forgot to water it for a few weeks. And it still thrived.


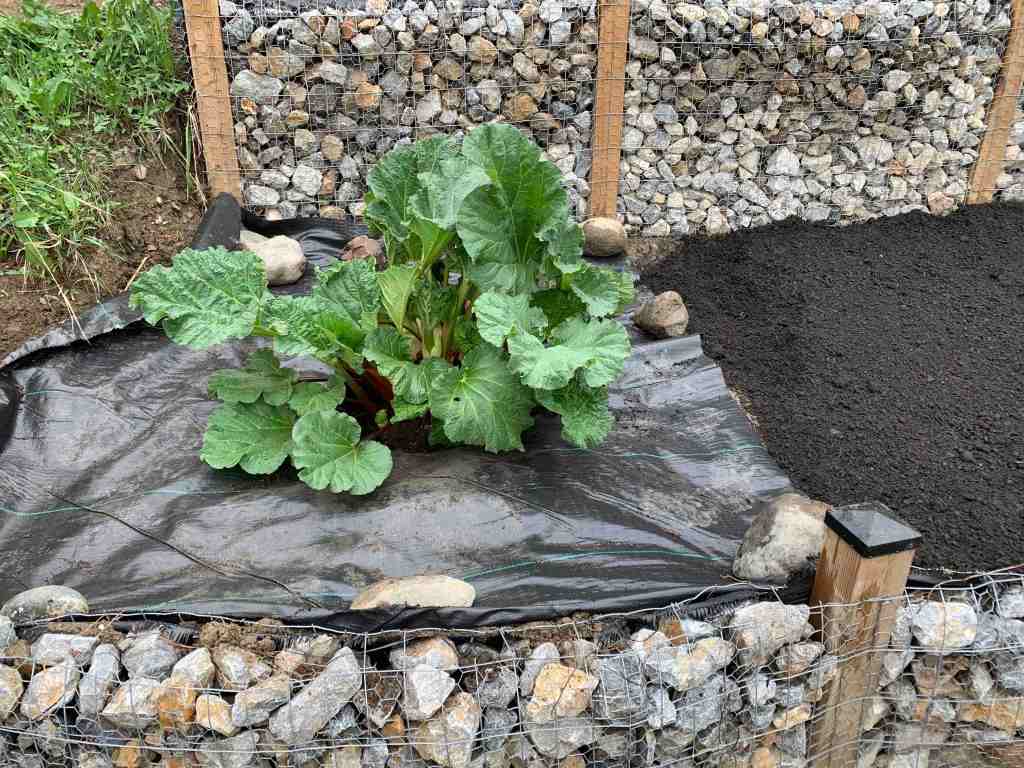
Check off task 6!
The last task that we wanted to complete for the weekend was to get landscaping fabric down on both beds. We decided that our battle with weeds needed to be lessened, so we decided to try adding landscaping fabric to all our gardens and just cutting holes for the plants. We drip feed almost everything anyways, so why not give it a go? It sounds like a few people I know who have big gardens are also tired of the weeds and are going to try the same method. Hopefully it works out. Even our standard yard soil, not the lovely composted soil that we grow in, produces so many plants. Everything thrives in the yard, including the weeds, so we are going to see if we can at least stop it in the gardens.
Out we rolled the long fabric and used our handy torch to cut it to shape. Our beds are clearly not a uniform size or shape, so the torch allowed us to contour the fabric to the shape of the beds. Once cut, we placed a few rocks to hold it down until I can get proper landscape fabric pins. That will be one of my tasks for this coming week.
It looked great and already made me feel better about weed control. Some of the plants will be interesting to do in this style. Things like potato mounds, onions, carrots, beets, radishes, corn, etc. I plan to cut strips where those items will grow, and hopefully the fabric between rows will stop some of the weeds. I guess we will see though! I also will have to spray those areas, so I need to make the channels wide enough that they get enough water. Something we will have to figure out once we have planted and run the irrigation to that side. Two tasks for next week.

Check off task 7!
This morning, we thought we might just relax a bit today. I had thought I would get out and plant some carrots, beets, onions, radishes and potatoes, but flipping through my social media, I noticed that our favourite place to get plants was having a sale on canna lilies today. Well, we couldn’t pass that up, and the weather is pretty crappy and rainy, so we loaded Basil into the car and drove the hour to pickup our plants. While we were there, we also got 36 strawberry plants (2 flats), all our wave petunias (3 flats) and 2 little rosemary plants. Mine are growing, but very slowly, so I bought some backups.
We did get planting some of that, but this post is already long enough, so I will save that for our next post, which will be all about planting and irrigation.

