
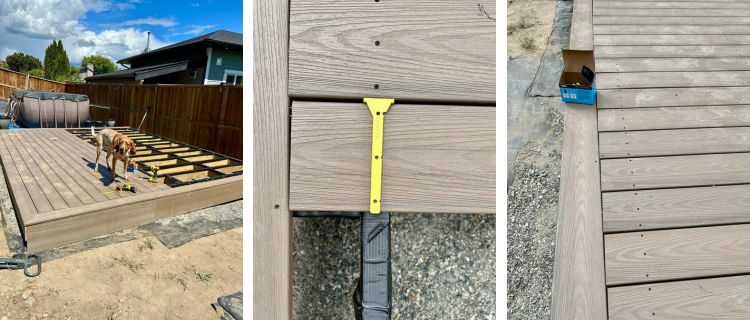
Now that the frame was complete, it was time to add all of our joists and cross-beams. Using the same joist hangers as we used in parts of the framing. We made our joists 16″ on centre, which was a recommendation from the building supply store. Originally we had planned on doing 12″ on centre, but they suggested that might be overkill for the type of deck we were building.
Once we had all the joists in place, we needed to add the cross beams. These are smaller pieces that fit between the joists, stabilizing it from side to side. This is an arduous task since there end up being so many of them. They need to be off-set so that you can screw through the joist and into the cross beam.
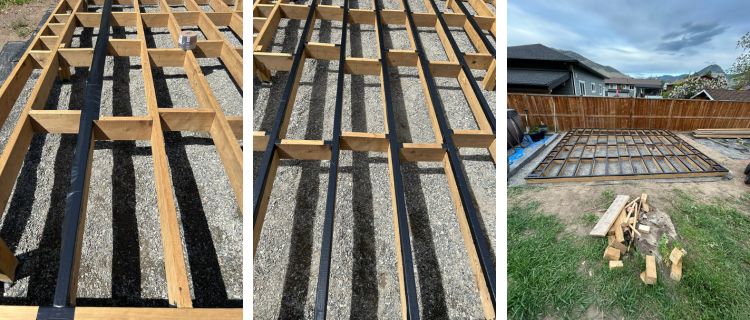
We also added the cross beams to the narrow sides where our picture frame border will be screwed in. You will notice that we did double up some of those cross beams in the corners. This was so that we had something to screw into along the angled cut of the top board. If you are planning a picture frame border, you will definitely need to add this into your planning. If you are just doing a regular straight-across with an edge piece on either end, then you will just need the narrow sectioni without the doubled up boards in the corners.
This is where we really started to see the deck come together. You can picture it a bit when the frame is complete, but seeing all the joists and cross beams in place really gives it some shape.
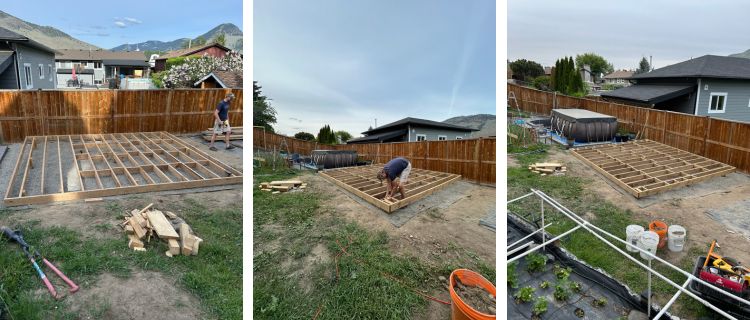
At this point, my parents and I were chatting about the deck and my dad noted the location of our posts. He suggested and extra post in the middle, on both sides of the centre post going lengthwise. With it being a 15.5′ wide deck, he thought there might be some flex if we didn’t add another post on either side. We took his advice and added 2 more posts. These two were not cemented in, instead placed on top of a cement block for stability. These two were really just to ensure we didn’t have bouncy spots on the deck.
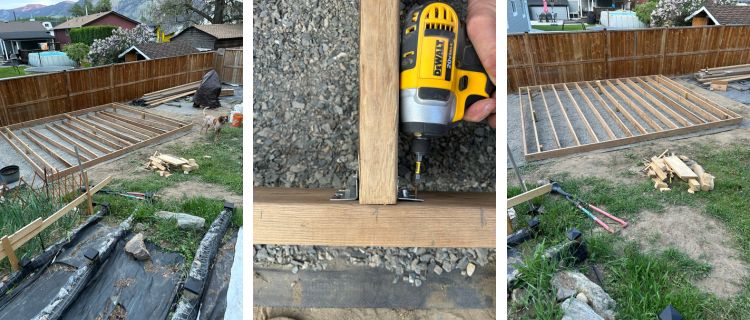
Kurt did the next step, which was a little sticky. All the videos we watched recommended that a joist guard deck tape is now a standard. This tape goes over the top of all of the beams and posts, ensuring that water can’t seep into them from above, extending the life of the wood and your deck. Though it was messy (don’t plan on keeping the knife you use to cut the tape), it was definitely a step we were not going to skip.
Now that the base framing was done, it was time to get to the vinyl decking.
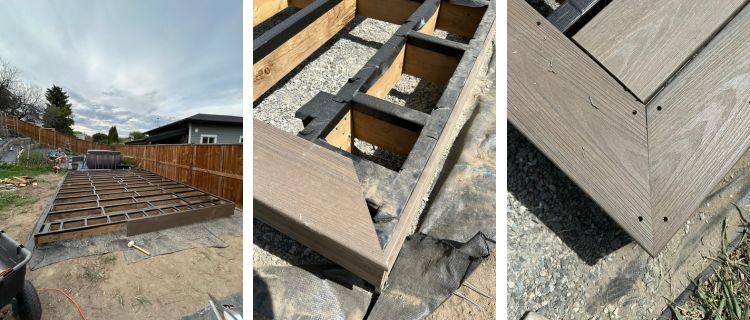
We started with the facia boards, or the boards that will go along the large flat surfaces of the frame boards along the outside. We had to do some angled cuts on these due to the slope of our yard. It is only 6″ height at the front and over 2′ at the back. Luckily it wasn’t too hard to get those angles and sort out the cuts that were needed. In some areas, we had to dig down an inch or two and then we didn’t have to cut the board. Along the front we also back-filled the one side/corner to make it more uniform in look.
Unfortunately the facia only comes in 24″ width and 12′ lengths. As our deck is 15.5′, we had to butt some pieces together on all sides. Along the back, along the fence, it doesn’t go to the ground, however that is ok. No one can see it, and it isn’t off the ground much.
Next was the actual deck boards. This part was easier and harder than we thought. Hahaha, not to be too confusing by that statement. The decking we decided to go with is one where we screw through it like a regular wood board. There are then plugs that go in where the screws go through the board to provide a seamless look and protect the screws.
It was easy because the deck brand has thought out all that you will need and packages it up for you. When we bought the special screws to go with the boards, it came with a specific bit that helps set the screws at exactly the right depth for the plugs. The box of screws also came with a little tool to provide a consistent gap between boards since they flex a bit with the weather, so you shouldn’t just but them together. The gap left when using the tool is minimal, just enough for the boards to flex a slight amount.
It was hard, because I wanted the picture frame border. We definitely did it in a bit of a “cheater” way…or at least it is what I assume a proper decker would call cheating. We built 3 of the edges, picture framed, then added our center deck pieces, finishing with the final piece of the frame. We did it this way for a number of reasons.
- If our deck wasn’t as square as we thought and hoped, then we were going to end up with a bit of an odd cut at the end and thought it would be easier to deal with that and make it look good if we didn’gtdo the full frame first.
- This allowed us to continually measure each board to ensure there were no big gaps on either end of the long boards. Again, if our deck wasn’t square, there could be a gradual angle, which would result in gaps at the end of the boards.
- Lastly, we knew that the last board was the one closest to our fence, so if there were any issues, or something ended up a little off, it was the least seen and only we would really know if something got really screwed up. Lucky for us, it didn’t…but it was nice knowing it would be well hidden if we did.
We did use a carpenter square, clamps and measured each end about 100 times before actually cutting and screwing the 3 sides down. Again, we wanted it to be as nice as possible and we really are newbies at this.
Because your facia boards are on, you will know the amount you need to overhang to get a nice seamless look. We left just a couple mm over, making it mostly flush. We wanted a very slight overhang incase of expanding or contracting, so that we didn’t end up with the facia sticking out from under the picture frame boards.
Once the three edges were in place, we started working on all the boards. It unfortunately took a couple days because my drill batteries kept dying on us. I had 2 drills, but no spare batteries, something I still have yet to remedy. Eventually I will invest in a few more.
Our final board (not the picture frame board but the middle section boards) did need to be cut in half, but luckily not in a weird angle, so that was nice. If I had to see that half size board all the time, it would probably bug me a bit because my original plan was to just have full boards, but building is never exactly how you want it to be it seems.
Once we had all the boards screwed in, we went through and added the plugs to all the screws, completing the seamless look. It turned out excellent and i liked being able to just screw the boards down rather than dealing with a track that goes between each board.
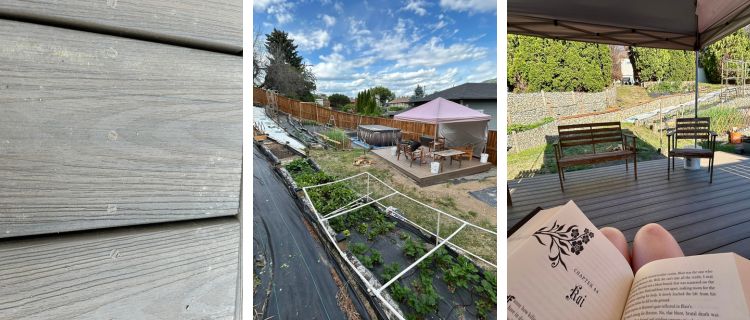
We didn’t buy a gazebo last summer, so we still went a little rough with the final look, adding our canvas tent back to the deck. We didn’t want to screw it down because it was much smaller than our future gazebo, so instead, we filled some good ol’ Canadian Tire buckets with rocks around the legs and made sure to stake down the ropes. She wasn’t the prettiest, but she got the job done for the summer. We spent a lot of time enjoying the deck, pool and views of the garden.

