
Judging by how well all of our other builds had gone for the back yard, we were doing well. We decided on two more building projects, a strawberrty corner and some potato towers. K’s mom had some fantastic strawberry plants and offered us some of the shoots to transplant to our yard. As we are still under construction and we wanted them to really take hold and not have to be transplanted again, we decided to make some strawberry beds. Our seed potatoes were on the verge of busting through the bag because as with everything else, we were getting a late start to our planting due to all the building.
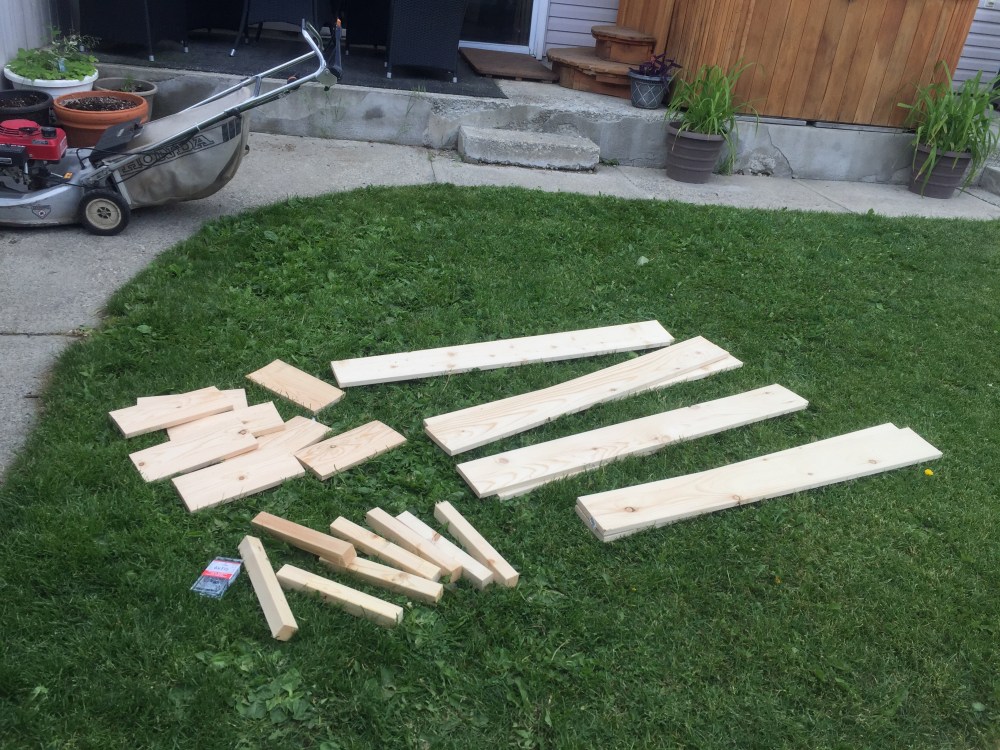
So we started with the potato towers first. We weren’t heading to see K’s parent for a few weeks so we decided this was a good place to start and it would get our seed potatoes in the ground before they started forming plants right in the bag. This is a first for K and I. We have never tried potato towers and once again found a helpful tutorial on Pinterest that gave us the idea. Each tower is 1 1/2 squared, and are approx. 3′ high once finished. The cut list for these towers are:
- 12 – 2×2 @ 3′ – 4 per tower
- 72 – 1×6 @ 1 1/2′ – 24 per tower
We started off by only attaching two boards on each side to begin with. From there we once again laid out some landscaping fabric and filled with soil. These started off with just about one full cart of soil each. We then spaced out 5 seed potatoes in each tower and covered just to the tips of the sprouts. We of course didn’t think to stain the towers until they were in place and filled with soil…so we grabbed a brush and gave the bottom layer a coat.


Over the last month or so we have been adding a board to all sides as the potato sprouts grow. We then add a little soil, just covering the tops. By the end the towers will have all 24 boards on them and the tops of them will be sprouting with the potato flowers. As each board is added we also have to add stain to that level. Despite pre-cutting everything, we didn’t bother staining until we added a level.

")

We unfortunately got a little overzealous and added the last two boards on at the same time, still only just covering the plant tops, but we noticed that two of our towers have very little plant action, one of them the tops never popped. Our thoughts are that the sun wasn’t able to get to the soil and we had an abundance of rain so we essentially stunted the plant. When we do this again next year we will be patient and only add one board level at a time so that the sun can always get at the soil. Up until this point we could barely keep up with adding soil or straw to the towers. The plants seemed to peek through the soil every day. We also decided to add some straw that a friend gave us, to ensure the soil stayed nice and moist.


Technically we should be able to take off some of the bottom boards to steal potatoes from the bottom as they have been growing the longest. We haven’t tried this yet, but will likely do so in the next couple weeks just to take a peek.
We have no idea at this point if we have been successful in growing these potatoes, but the pinner who we got the idea from ended up with 50lbs from each tower that they did. Fingers crossed that we even get a basket full from each one. I’ll update about the outcome in a future blog.
Next we were onto the strawberries. Our yard will end up with many layers and levels by the time we are done. We decided the strawberry beds were going to be multiple levels, almost half-pyramid. We had some of the leftover 1×6 so we were able to make these without going out and opening our wallets again….something that happened frequently this spring!
Because there are going to be multiple layers/heights to this bed, we decided to keep each level at 1’x3’x12″. We started off by cutting all the wood to size for the two boxes we are going to start with. Those cuts are:
- 8 – 1×6 @ 1′
- 8- 1×6 @ 3′
- 8 – 2×2 @ 12″
From there we did the same thing we did with the larger beds and connected one side at a time to the 2×2 corner pieces. It took us about 20 minutes from cutting to assembling.
As we finished the first one, I started working on the second one while K stained the first one. We were using the same cedar stain as the rest of the beds in the yard. We did however decide not to put a frame around the top of the bed due to the future additions.


Once we had finished staining, we took a much needed break with a nice cool beverage and waited for the stain to finish drying. We have learned that a cold beverage is an important part of keeping sane while putting everything together. Whether it be a simple iced tea with lemon or a nice adult beverage, more often than not an adult beverage, it is important to stand back and take a look at what you have completed so far.
Just before we took the beds to the bottom of the yard to be placed we cut out some landscaping fabric to just slightly larger than the beds themselves. No need for the weeds to ruin these lovely little beds for our strawberrys to thrive in.


Once we got them into place, we then had the arduous task of once again hauling soil down the hill. Luckily it only took three loads to fill these beds, which was a pleasant amount. Enough to feel like you got a bit of a workout, without feeling like an arthritic old couple who can’t stand up straight. One of these days I will somehow get a photo of the process it takes K and I to get soil down our steep slope. I feel like I will sound less whiney and it will bring some clarity to why it takes two of us.
Anyway, back to the strawberrty beds. We got them filled and the beautiful looking little plants nestled into their permanent homes. The plants themselves survived a 2 hour vehicle ride and an evening in a pot with just the bare minimum of soil while we got all of the beds made. Considering that, they transplaned very well. In fact they are now thriving and shooting off new plants with nice thick crawlers, while still producing some amazing berries! Loving the tasty treats that we get almost every couple days as we check the garden.


As you can see from the above photo, we have only done the bottom layer. We knew we weren’t going to get enough new shoots early enough to get them transplanted into a second level, so we decided to wait until next year to get the second, third and possibly fourth levels added. If you can envision, the second level boxes will have the front sit flush on top of the first level back. We will add legs to the back of the second level boxes to level it out and support it. We will do the same thing with each level as well. Eventually the strawberries will look like they are cascading down. Also, we plan to add just one 1×6 board to the front corner of each of the first level boxes to make a small square bed in the corner shown in the photo. We will find a plant that pairs well with strawberries to plant in that spot.
It felt great getting the last of these beds built and in place. The back of the yard was really starting to take shape and was looking beautiful. We could see the dreams from in our head finally coming together in the yard. It was such an exciting feeling.
Other than finally getting some more plants in the ground (we were already weeks past when they should have been in), we foolishly thought that we could sit back, relax and cut ourselves some slack.


These beds look great! So much work this year, but it’ll pay off for years to come.
LikeLiked by 1 person