
Jostling jugs of water up and down our hill didn’t seem like the best way to get water to our plants. Last year we had about a quarter of the plants that we do this year and it wasn’t so bad. K and I would spend an hour every night before bed giving our plants some water that could be absorbed overnight without the harsh summer sun sucking it dry like a greedy drunkard.
Living in a semi-arid desert means that our plants dry out quickly. We decided on a few tactics to help alleviate the watering issues we knew we were going to have. First we were able to scrounge up some straw. This sounds like it should be an easy enough thing to do, but with the droughts and rough growing season last year, most suppliers were short on straw and it was almost impossible to find. Luckily we have a friend who had some bales that we were able to use. We put a nice bundle around the base of all of our tomatoes, in the potato towers and still have some leftover for any other beds we feel will need it. Although this straw will help by locking in the beautiful blue gold, we knew that it wouldn’t be enough, especially with leaving for two weeks and relying on friends and family to remember to come and water.


So we decided we were going to lay some sort of irrigation. At first our plan for the next couple years was to have an external water timer that goes on the tap and we can run multiple soaker hoses from. Seemed like a legitimate idea when planning it out, but as spring came and the weeds started poking through, we realized that on the same list as the supplies for the above ground irrigation was a new weed whacker with a heavy duty plastic head that could rip through the stalks of the weeds like an old school lumberjack could chop through a tree. It would be a matter of minutes before we nicked one of our soaker hoses and we didn’t want to have to spend a ton of money replacing the hoses, or the time having to constantly roll them out of the way while we weed whacked.
So we went back to the drawing board. We realized that although we are not finished terracing and developing the yard, there were areas that we could run pipes underground that were not going to be changed again. We traipsed out to the yard and stood in the crisp winter air and realized, yes, we could actually run underground pipes that would not need to be dug up and moved as we continued landscaping and developing the yard. From those pipes, we would be able to add in some distribution line and easily water all our beds while protecting the areas that were going to be weed whacked.
So we started researching how to do this…for the most part, we didn’t research a lot and rather went to the building supply store to take a look at the supplies. Once I had a visual of all the items, I could mostly figure out how we would accomplish what we needed to do. There were a few areas that were still a little hazy as to how it would work, but as the amateurs that we are, we decided to just figure that out later.
K went and measured out how much PVC pipe we would need and I started figuring out what fittings and additional supplies we would need. We purchased:
- 80′ of 3/4″ PVC pipe in 10′ lengths with one end flared for easy connections
- 100′ roll of distribution poly pipe (we didn’t come close to using this much but we knew we would use it in the future and it was on sale)
- 3/4″ Male to female threaded swivel connections
- 3/4″ Male to male threaded swivel connections
- 3/4″ Female to female threaded swivel connections
- 3/4″ t-connections
- 3/4″ threaded PVC to distribution hose adaptors
- 3/4″ non-threaded 90* elbow connections
- 3/4″ grasping 90* distribution hose connections
- 3/4″ distribution hose end caps with garden hose connection capabilities
- 3/4″ water regulator
- 3/4″ extend hoses in 6″ length
- 5′ garden hose
- Double head spriggot
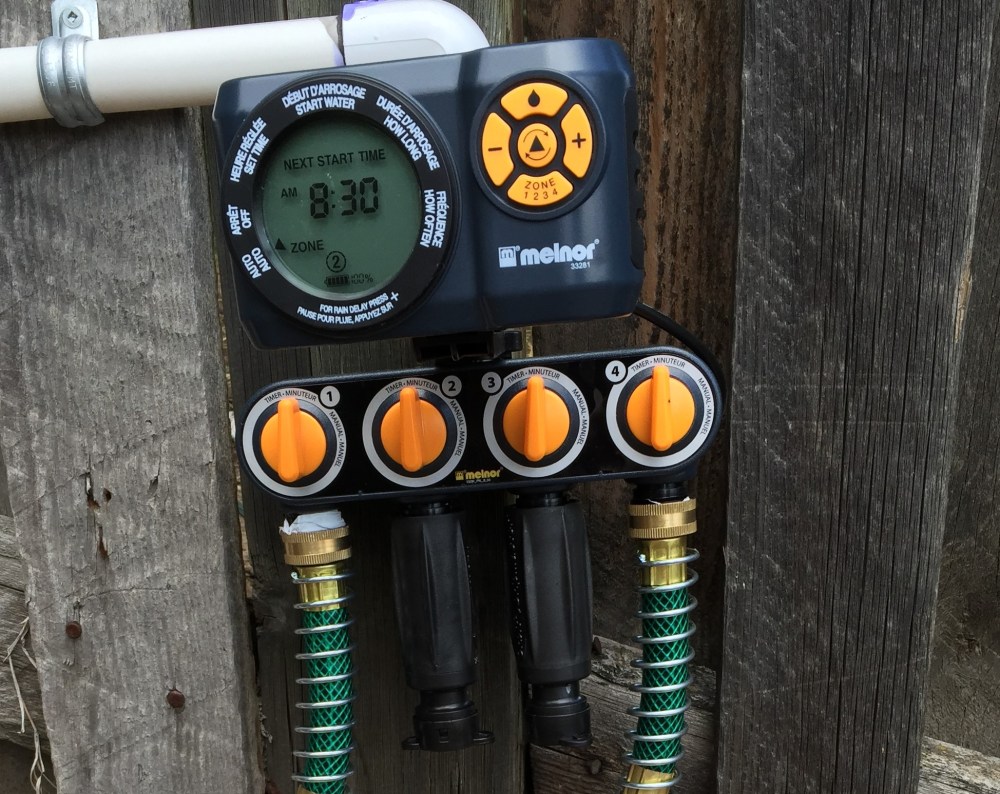
- Melnor 4-zone electric watering timer
- Teflon tape
- PVC primer & glue
- PVC cutting tool
- Variety of dripper, sprayer and soaker heads
- Irrigation hose for drippers, sprayer and soaker heads
Once we got home, we got started. As there are no heads that are going to be spring loaded that will come out of the ground, we did not bother digging our pipe down very far. We know that we will be adding in additional sections and didn’t want to have to dig a few feet down each time. So we dug trenches approx a foot deep and started laying out the PVC. As K dug, I started connecting the pipes together. The first part was really easy. It was a straight line from the tap on the house, over to the fence, 90* elbow to another straight line along the fence. We took it behind our shed, and through some permanent bushes to where we intended to put the electric timer. Once there, we got the timer hooked up and attached it to our fence.


This is where we decided to call it quits for the day…not necessarily because it was hard work, but because we had hit one of those “we will figure it out when we get there” points. We knew hooking up the PVC to the timer was a decision we had to make. Do we want to go directly to PVC or do we want to have a bit of hose to that we can detach the system easily if the timer needs to be replaced. Over dinner we decided that we wanted to be able to detach the system easily in the future without having to cut or wrestle with the PVC.
The next day we did a quick trip to grab the extension hoses that we had seen. They came in 6″ lengths, which was perfect as we didn’t need a lot of length, just enough to be able to unscrew from the timer. Once home, we hooked them up to the timer and they fit like a glove. Only problem now was that the other end of the hose would not screw nicely onto the PVC connector. That was a bit of an issue, and we didn’t feel like going to the store again, so we decided, what the heck, let’s just get all the pipe done, and we will come back to this. In retrospect, this could have bit us in the butts if we hadn’t been able to figure it all out as it was a lot of work we did before coming back to this.
So blissfully ignorant of the fact that this could potentially not work out for us, we continued on in the yard. It once again was quite easy with K digging the trenches and me following attaching the pieces. Along we went down the fence and came to the corner. This is our current composting corner, which made it fun to try and get in behind to lay the pipe, but we managed. Threw another 90* elbow and continued along the back of the yard along the fence line. Once again, everything was connecting easily, we were adding a few t-connectors so that we could branch off to our raised beds. Once we got to the end, we threw another 90* elbow on and ran the PVC to our strawberry beds. We once again added another 90* and ran the PVC up the side (weed whacker proof) and added another 90* angle. We then threaded a PVC to distribution converter on and attached our distribution hose. We hadn’t thought about the 90* corner on the bed so our hose kinked. We ended up having to buy a 90* distribution hose connector, which worked like a charm, but sits a little awkwardly. Once we had that connected we added some drippers so that it was ready to go.


")
")


We had to take a break as we had grossly under-estimated the amount of 90* elbows that we would need and found that there were some connectors that weren’t going to work the way we thought and had to purchase other supplies. We didn’t bother returning the other connectors as we believe we will be able to use them down the road when we are adding to the system.
The next day after work, we grabbed the items we needed and headed home to hopefully finish up the irrigation. We got both the larger raised beds connected and added pipe and line across to the tomatoes and cucumbers, which had been previously run off our underground sprinkler system in the upper yard. A few caps and the upper yard irrigation was back to running full strength without the tomatoes draining the system.


Everything was ready except the timer connecting the water source to the rest of the yard. No matter what we tried, the hose would not thread onto the PVC connectors. The threads on the connectors were for pipe and the hose had a larger thread that just was not compatible. After some frustrations on trying to solve how we could get this together we decided to sleep on it as we were both at the point of seriously wondering if we had just done all that work and paid close to $1200 to have a system that wasn’t going to work.
We knew that it had to work. We couldn’t be the only people to think to do this sort of simple system in our yard. There had to be others. We both searched and couldn’t find any videos or articles about the same sort of thing we were attempting. We knew it was a little jimmy-rigged, but if it worked, it was going to be great….IF it would work. It was stressful worrying about it and it actually ended up being a few days later that we had the time to go back into the building supply store. K was at work and I had the day off, so I decided to go look at their supplies again. I took one of the hose extenders with me so that I knew whatever I got would actually connect properly. I tried everything in the irrigation section to no avail. I was starting to get a tad cranky (as in fire breathing, people stomping, dragon cranky) and had to calm down. I went for a little walk down one of the aisles and noticed metal connectors. Sure they fit the hose, but I couldn’t see a way to connect to the PVC. How frustrating.
Now for those of you reading, you may have an answer for us, and had we decided to make this blog earlier, could have probably saved us a GREAT deal of frustration and annoyance. But it was through this process that we decided it would be great to do a blog about us fumbling our way through the learning process.
As you can imagine, I FINALLY asked one of the very helpful people working in that department if they had a suggestion on how I could accomplish what we were doing. I was a little sheepish as I thought we were being pretty….creative….with how we were going about building this system. I felt as about as much of an amateur as I could and I also felt like a ditzy girl who couldn’t figure out how to connect two very simple things. It’s an annoying feeling as someone who prides themself on thinking things through, looking at things logically and most of the time doing the proper research. I hate coming off as un-prepared or lacking in knowledge. Now let me clarify, if I had asked at the beginning of our process, I wouldn’t have felt that way, but I now had to explain to the person working there, that we had done all the work and the main component of the system hadn’t been sorted out prior to doing all that work. It made me feel silly.
Well, I have to give the guy credit. He didn’t event bat an eye when I explained what we were doing and quickly grabbed the holy grail of an answer for me. He said that he had lots of people that were doing the same sort of thing and were running into the same issue. It was simple, it was just a connection that had pipe thread on one side and hose thread on the other. Simple. K had figured there had to be something like it, but for the life of us we hadn’t been able to find it on our excursions. Turns out if I had walked about 20′ to the right, there was a whole section on hose fittings. I had just assumed if it was not in the irrigation area, or the aisle with the PVC pipe, then they didn’t have something like it.
I took my loot home and quickly finished off the last piece of our irrigation system. I couldn’t believe how easy it was to put together and ended up elimitating a few other pieces that we had assumed we would need. As all the PVC glue had a full 24 hours to dry, I decided to test out the system before K came home from work. On it all went, and it was glorious. I had some adjustments to make on the sprayers and the drippers, which I quickly did, but it worked…and I didn’t see any leaks in the PVC. Hurray!

POP! POP! SPPPSHHHH! Crap. Each of the distribution hoses blew off the connection adaptors and the water went spraying. Off went the system, and around I went, adding some glue and putting it all back together. We hadn’t glued the first time around, assuming that it was a tight enough fit. Once I had the glue on, I decided to leave it until K came home. He would be so happy that it was working and everything, for the most part, was connected!
Once he got home, we ran the system again and it worked. No pieces popped off, no water blew out of the ends and it was all beautiful. We had done it! Or so we thought. The next night when we were running the system again (we figured we would test for a few nights before having it run while we slept), the distribution hose started blowing off again. Gah! If the glue wasn’t holding, then what else could we do?
I read up on some forums online and found out that it was likely that there was too much water pressure and that if we added a regulator that it should alleviate our problem. So we went and grabbed one and added it on. Low and behold, we haven’t had any issues since. The garden has been going for a couple months now and our plants are fantastic. We still have the odd plant that needs watering, but what would have taken us a couple hours to water, now only takes one or two watering cans full.


")
")

")


When we leave for Germany (in 3 days!) and are gone for 2 weeks, we can now be confident that our garden will continue to thrive thanks to our handiwork.


3 Comments Add yours