
Just as we were getting the hang of building walls with wire and rocks, we decided to switch gears and try our hand at another style of wall.
We have spent so much time tiering our back yard that we have let some of the already established gardens get a little out of control. Going into the summer, aka weed season, we decided to help ourselves out a little. Knowing that we will be focussing our efforts once again in the back area, building more walls and filling cages with rocks, we wanted to keep the top area a mini-oasis to rest our weary bones after a busy day in the yard. Part of that enjoyment will be not having to look at weeds that we should be spending some time pulling.
So, our plan is to transform and re-vamp the garden beds at the top of the yard. Our first task was ridding the area of a few bushes as well as any weeds that were left over from last year. I got the bushes cut down, and K dug out the roots and cleared the entire bed in preparation for laying the walls.

Next step, we had to find a similar landscaping brick to extend our existing top walls into the back area and meet up with our first gabion wall. I ended up matching the brick to what I thought was the “grey” coloured bricks at a home building store, but once we got the load home, we realized the original bricks were probably charcoal and had faded to be more of a grey. Not a problem, I think the grey was still a better match. The good news, after a little shopping around, one of the home building stores was having a scratch and save event, so we not only ended up with the lowest price in town on the bricks, but we also received an additional 10% off. It was a nice perk.

Once we had unloaded the bricks, we had to determine how to start this task. Neither of us have ever built this type of wall, or used these type of bricks so we checked out some trusty YouTube videos. Between building our past walls and the tutorials we watched, we felt fairly confident going in.
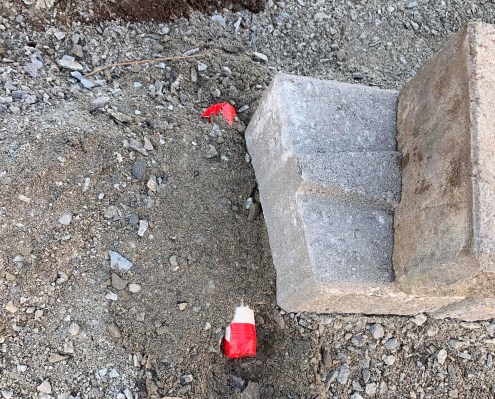
We started on the left side as it seemed to be the easier side of the two. To start we dug a trench that allowed for approx. 2″-3″ of crushed gravel to be packed down. Conveniently, we were lining it up with our existing wall, so we had a point of reference for our starting point on the wall. That being said, we were also starting on a new curve that we had to establish, and there was going to be at least one step down to meet up with our first gabion wall.

Equipped with a level, a rubber mallet and an early morning brain, we got started. It went surprisingly easier than K and I expected, even at the points where we stepped the wall down. A couple hours of work and the first wall was done. Sure there were a few times we had to take a brick out and add more gravel, or take some away, it is still a little finicky, but not as bad as trying to play tetris with a hundred or so rocks to fill a small section of wall.


We also made sure to add a spot for our irrigation to be run. We didn’t want to just run the line under the wall as we know it will need to be replaced at some point, so we buried a section of PVC pipe that will allow us to thread the irrigation through, under the wall and replace easily as needed.
The right side was definitely more challenging, but we had already learned a few tricks from completing the left side, so we were prepared. It was a fantastic decision to start on the left side. The right side runs beside our arch the sits between two of our cedars. The arch is held in by some landscaping ties that create a bit of a step, and there is some beautiful brick-work on the top side that leads into the arch. Knowing we did not want to disturb any of that, we quickly realized that our wall on the right was not going to line up and become part of the existing wall. Instead it would overlap about half way.


Not a problem, we got to work digging our trench. This side is also much steeper than the left, so it had a couple steps down to get to the Gabion. This time, we were more particular about where we dug our steps in, prior to pounding down the gravel. This saved us some back filling to were the levels needed to overlap.


On the right side, we also started at the bottom and worked our way up. This was partially because we learned that the overlapping steps were easier building up than trying to build as you went down. A few hours and we were done. Yes, as we got closer to the landscaping ties, we realized we were at a bit of an angle and needed to pull out all the bricks we had done to get a better line with them, but still, surprisingly fast.
All-in-all, we are really happy with they way the walls turned out and are excited that the top and bottom are now tied in together. It has been a weird disconnect for a few years, but now we are actually seeing our yard taking shape.

Our next step is to back-fill the entire garden to the most level we can get it. Again, the gabion wall is a little lower than the front of the garden, so we know there will be a bit of a slope. From there we will lay landscaping fabric, and pinch it between the wall caps, to ensure there are no weeds that will grown between the wall and the fabric. We will then fill the garden with the same rocks we are using in our walls, and place our barrels back in with the rocks. This way, we will have beautiful flowers pouring out of the barrels, and no weeds reaching up to ruin them. The rocks will also help tie in theme from the back to the top.
I should have more updates more frequently this spring as we have a lot of plans to get done before fishing season and the hot, hopefully not smokey, summer days hit…so come on back!

