
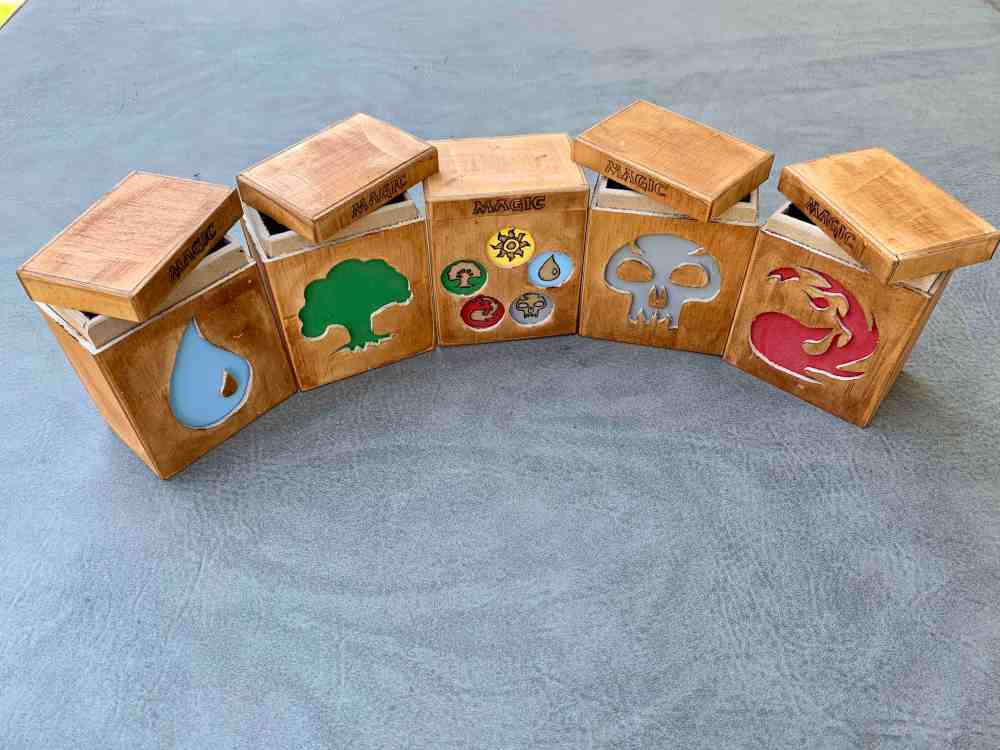
It finally cooled off enough that I could venture out to the non-air conditioned shop to build the carrying case for the Magic The Gathering deck boxes I made a few weeks ago. It was an adventure that I will re-count as I had a few hiccups that I had to work some magic on.
In my previous build of the smaller deck boxes, I used a new technique that I hadn’t tried before, where you build the box then cut off the lid of the box. It creates a seamless look to the box and ensures the perfect fit of the lid. I decided that I wanted to use the same technique for the larger carrying case. I have never actually built a larger box with hinged lid, so I knew there were going to be some frustrating points of this build. It’s funny the way it worked out because the parts that I thought would be a headache went really smooth, while the parts that I thought would be easy were anything but.

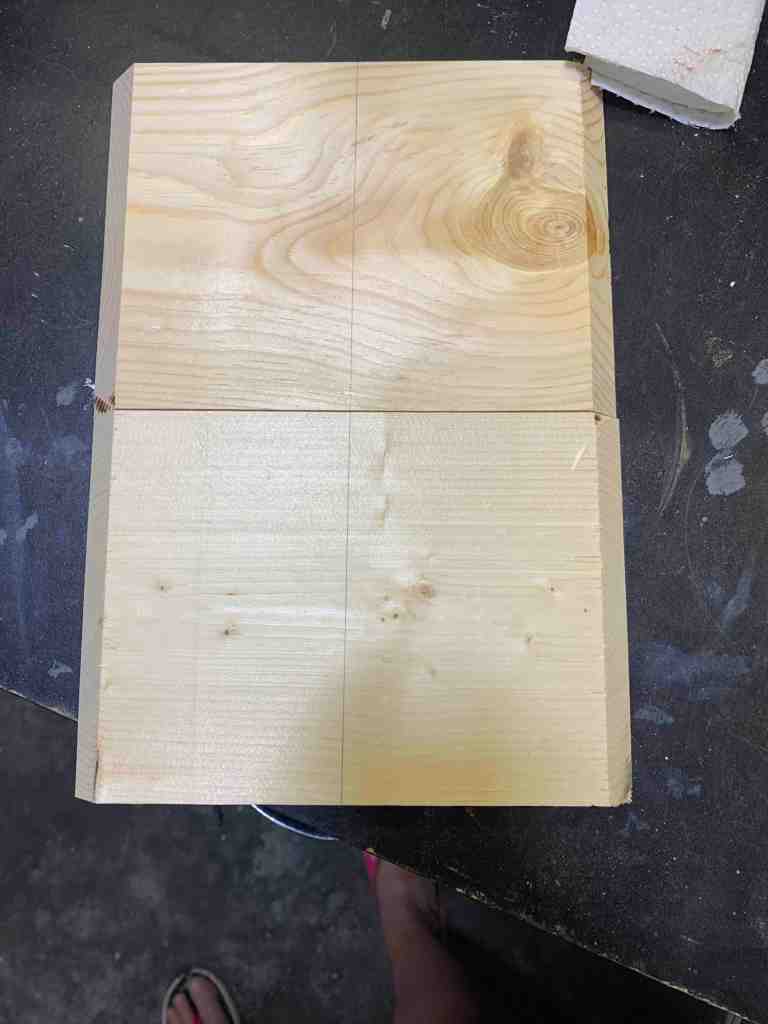
I started out with a drawing. It is my go-to way to visualize how I am going to build something. It is also good for understanding my thought process at the time, because I usually don’t build the project for a few days after the initial drawing. Gives it time to settle in the brain and sometimes I come up with alternative things to do that make the project so much better. Overall, I didn’t make any changes to the drawing, and most of my math was spot on. Which is always nice when that happens.
The most difficult decision for me in getting started was determining how I wanted to build the corners of the box. I am itching to try finger joints or biscuit joints, but I didn’t have any of those jigs built and I had a small window of mild temperature to work with, so I passed on those ideas. Thought the jigs are now high on my to-do list so that I am ready next time. I decided for this project to just do a framed corner, where the corners are cut on angles and then glued together. It’s very simple, and provides a nice look.
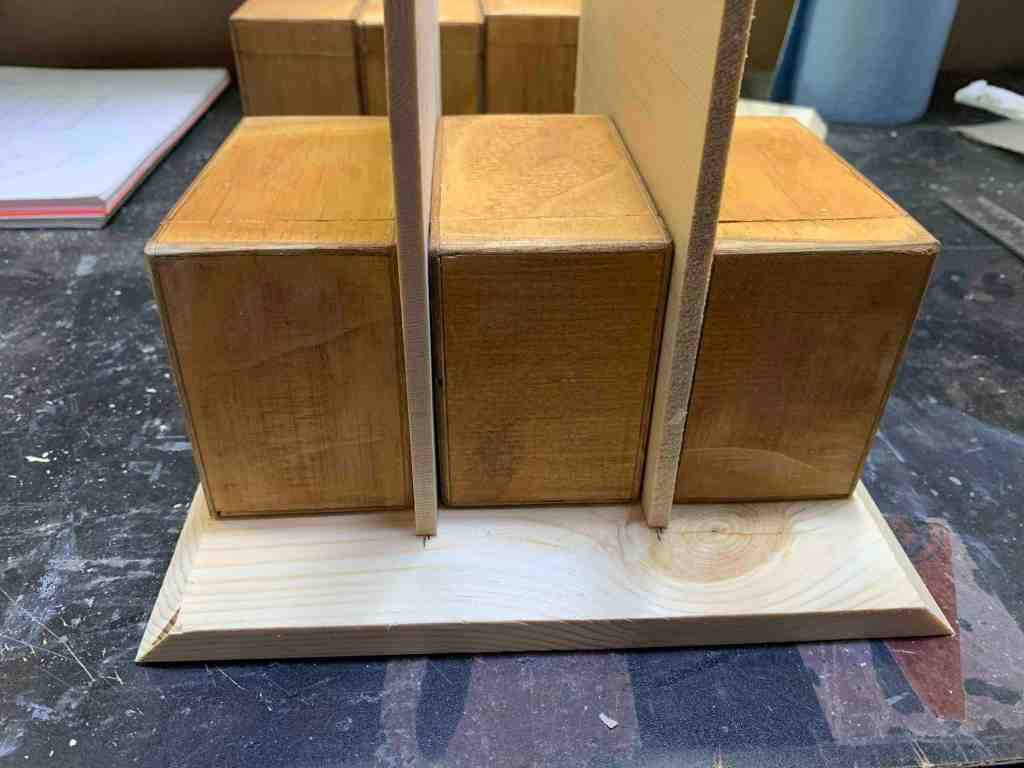
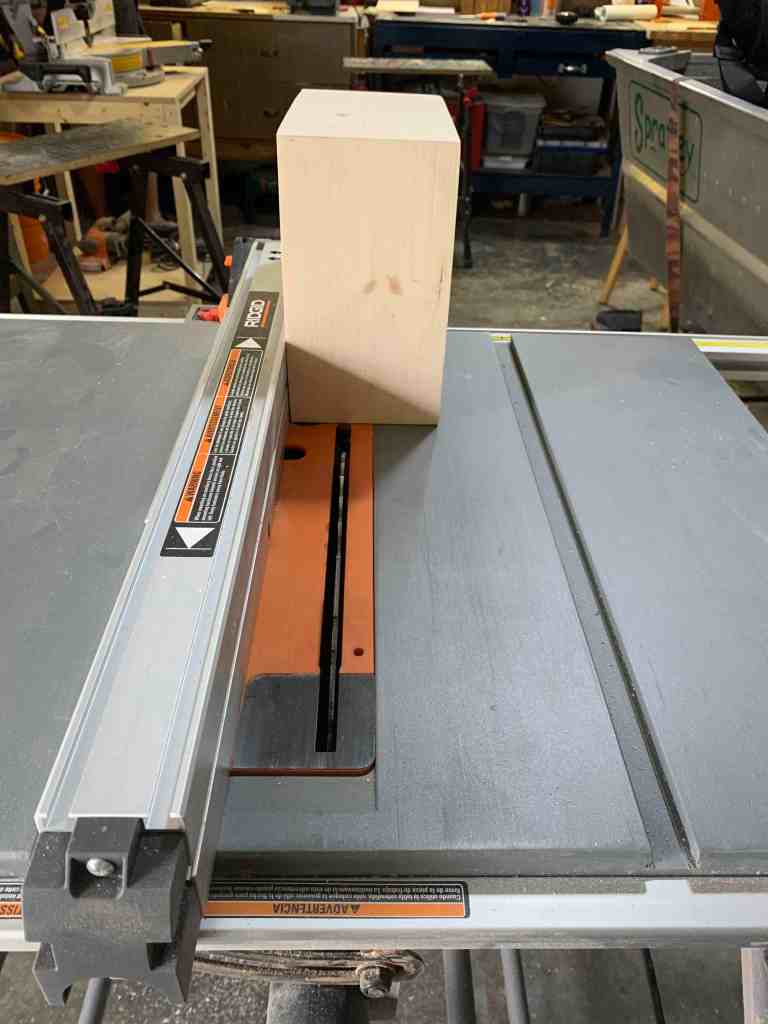
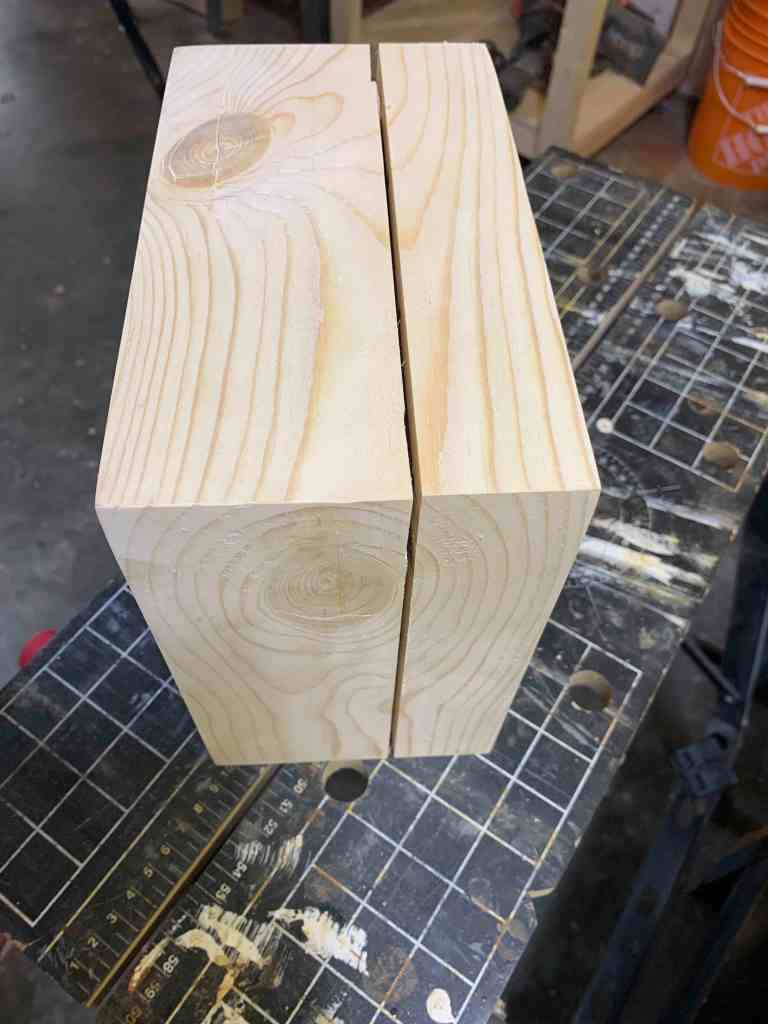
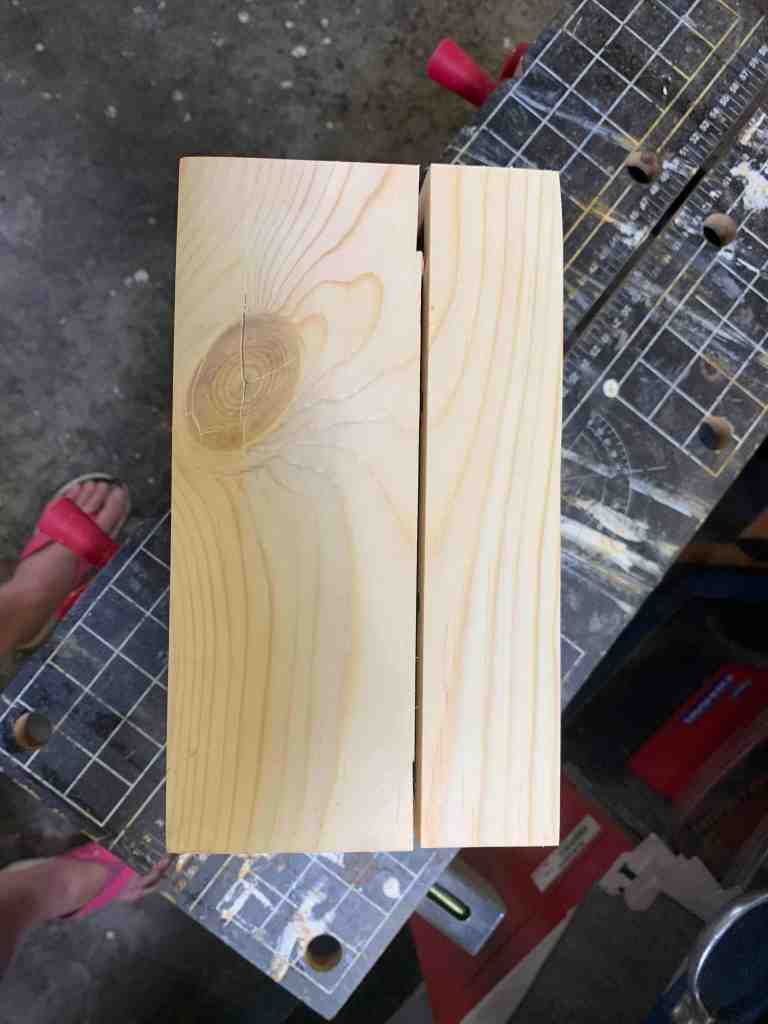
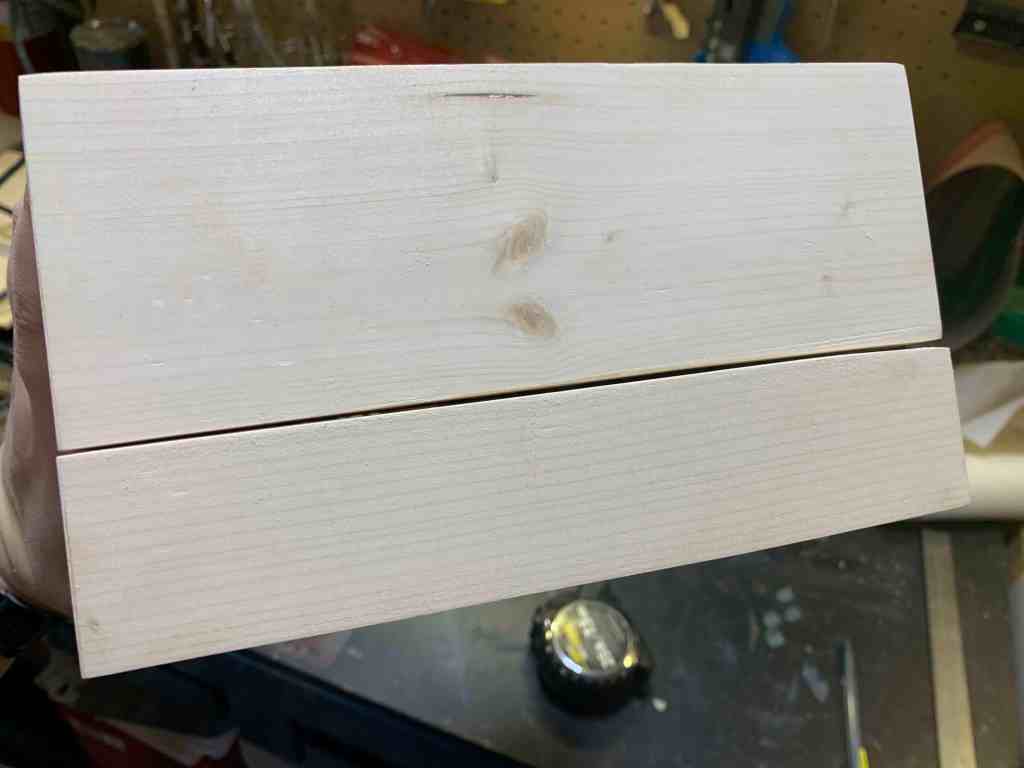
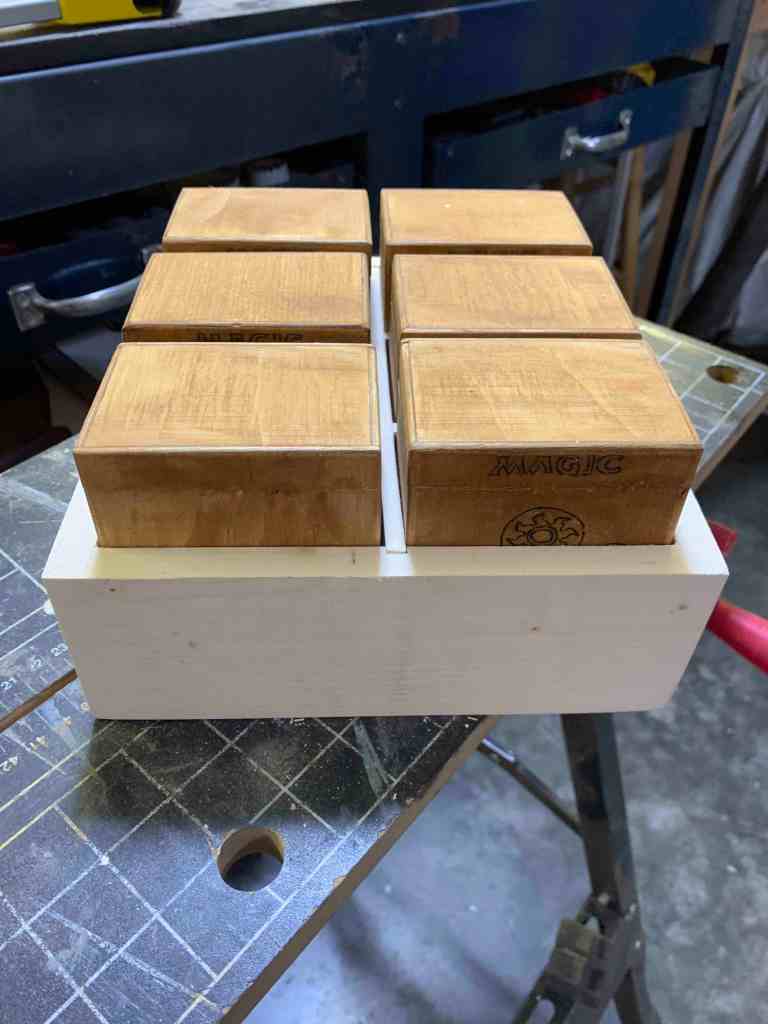
To start, I had to plane down some wood. I opted to use solid wood pieces rather than plywood like I had used for the smaller deck boxes. I wanted the carrying box to look finer and have a specific finished look to it. For the main box walls, I planed down the wood to 1/2″ pieces. For the top & bottom plate as well as the dividers that would go inside the box, I planed those pieces down to 1/4″. Once I had everything planed, I roughly laid out the pieces with the deck boxes to double check that my math was on course. It was!

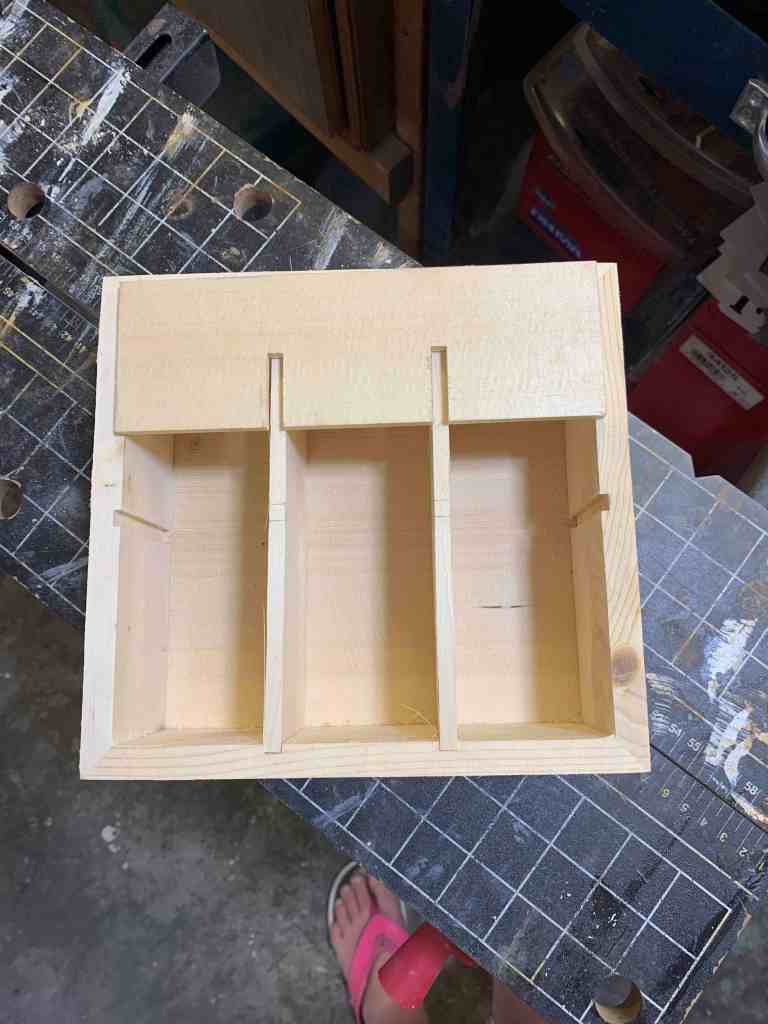
Next, I cut the box walls so that they had the 45* angles for the corners. Once again I did a dry-fit to ensure that the size is correct and that all the deck boxes would fit properly. All was good, so I continued along with the build. I wanted the inside dividers to be super sturdy, so instead of just gluing them in, I knew that I wanted to use my router to create a channel for each of the pieces so that I could glue them in using the channel. This would ensure that those dividers would not break loose.

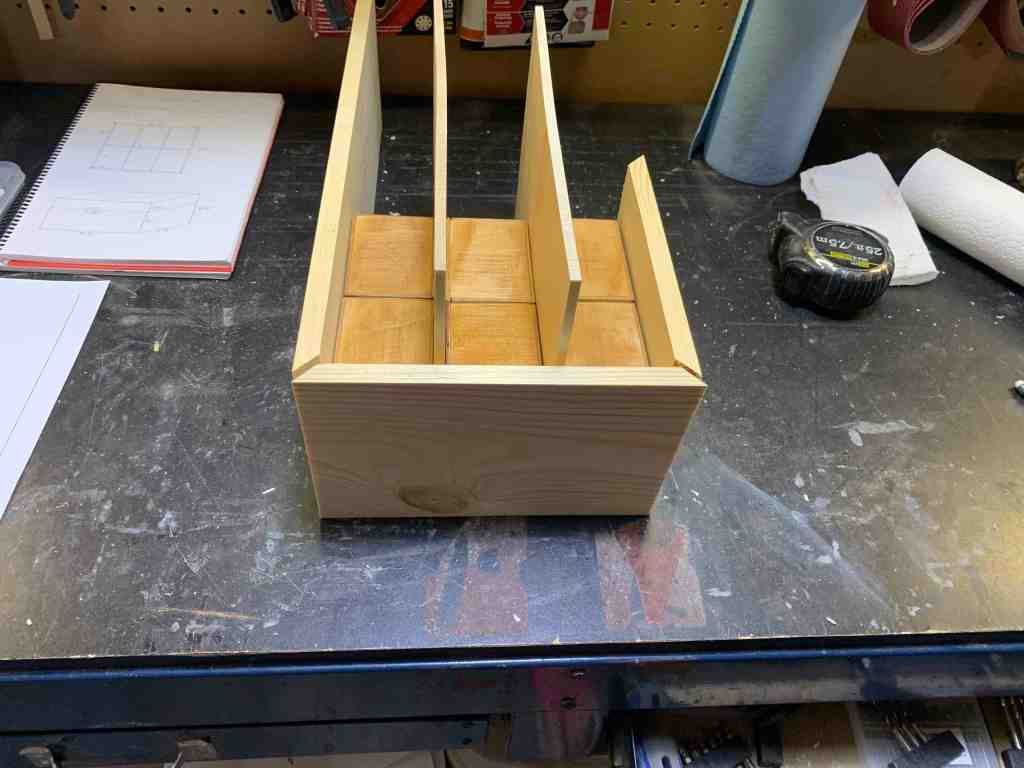
I am notorious at making projects with super odd measurements, making me quadruple guess myself and my math every time. It makes for a bit of a slow process, but also ensures that I am not making too many mistakes. I was even able to dry-fit the dividers on top of my router lines to make sure the deck boxes would fit properly. I was so worried that the deck boxes wouldn’t fit, or that there would be too much space and they would rattle and get damaged. Anyways, after measuring a million times and dry-fitting another million times, I finally took the leap of faith and routered the grooves for the dividers.
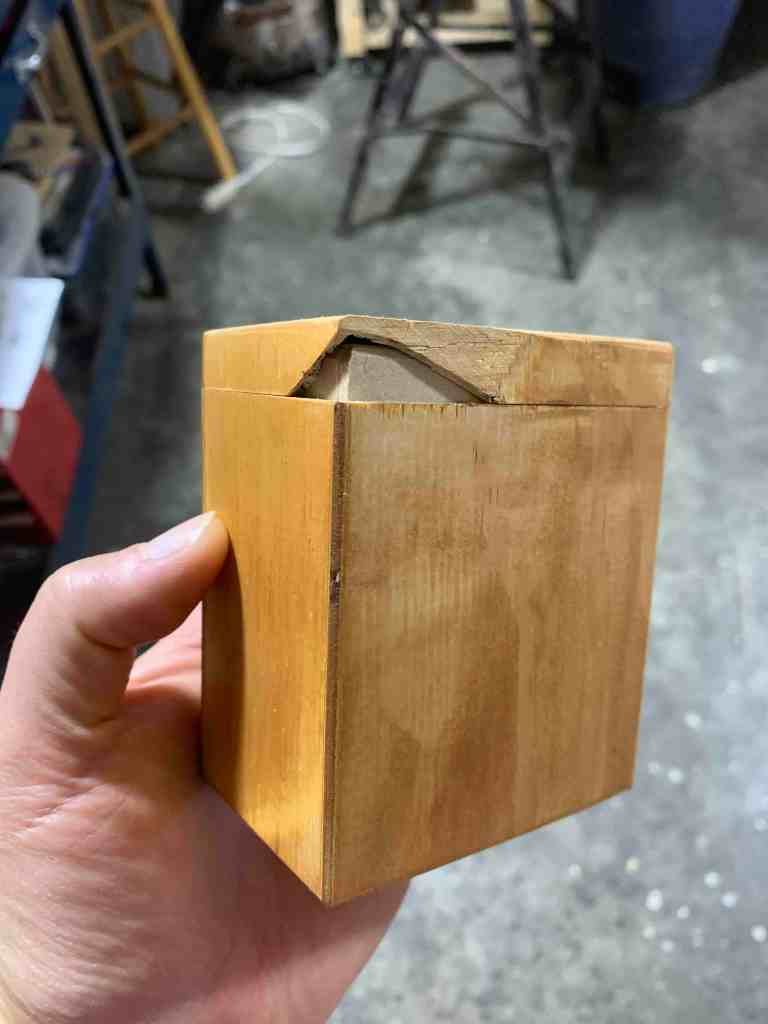
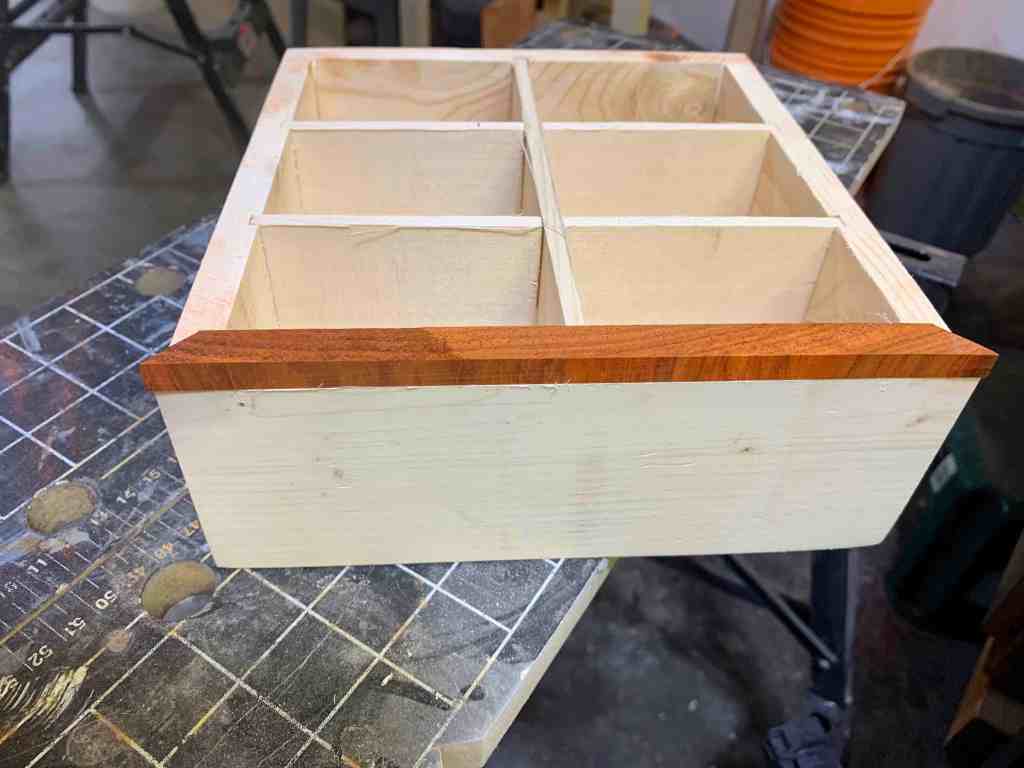
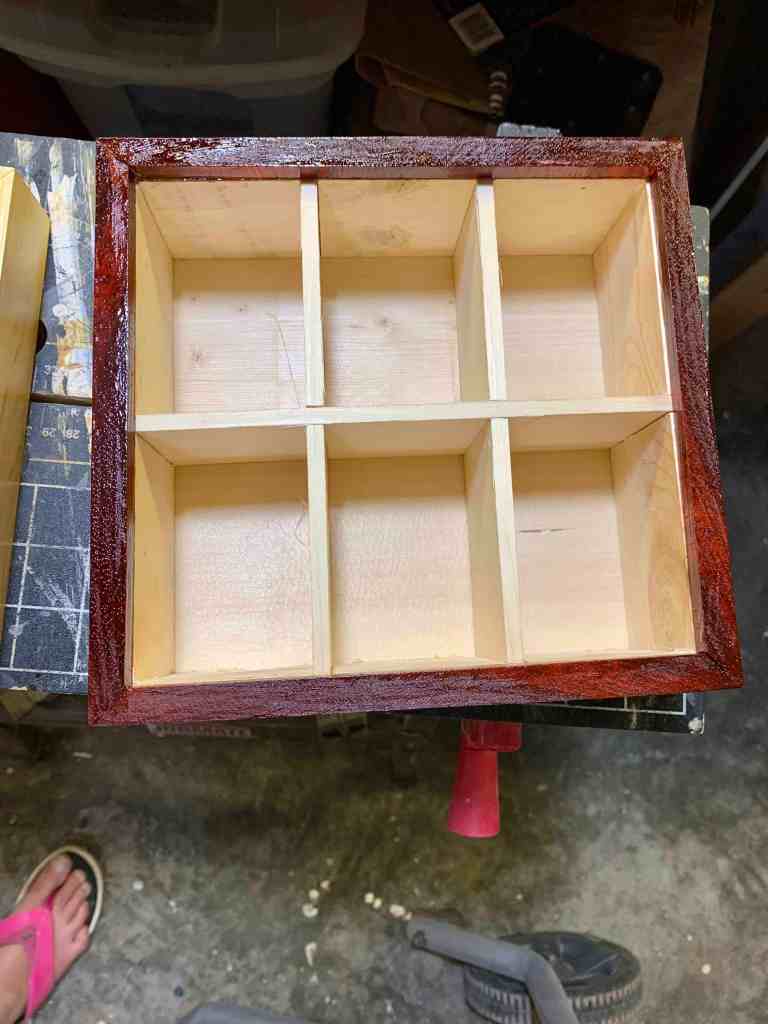
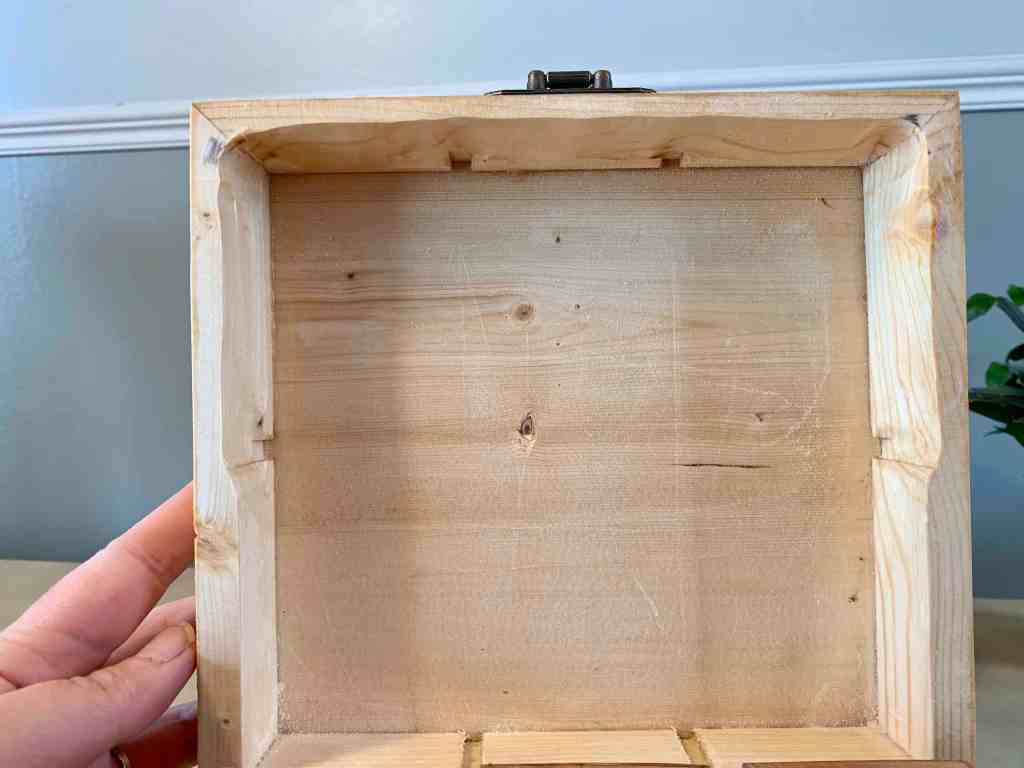
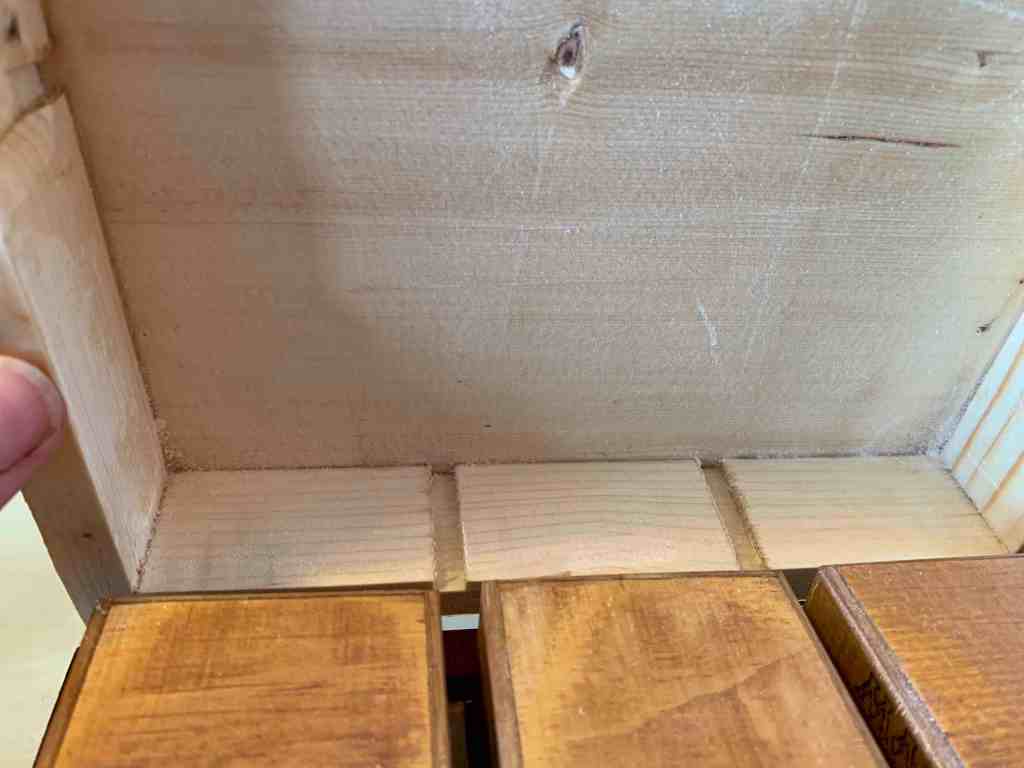
Do you ever get focussed on one thing so much that you completely miss and impending disaster? Yeah, well that is what I did. Not that it was a disaster, I was just a bit of a hiccup. See, I took those divider grooves from end to end of my box walls. What’s the problem you ask? Well, now those grooves are also going to show on the top and bottom with how I had planned to attach the lid and bottom. I realized my mistake when I did another dry fit with the bottom panel. I had routered a channel along the top and bottom, with just enough wood to hold the lid/bottom panel in place. Again, it makes for a secure hold since you are essentially framing the top and bottom panel. Once the walls are glued together, there is no getting that top or bottom panel out without breaking the box. Well as you can see from the picture below, my “frame” of the panel now had channels in it. OH!
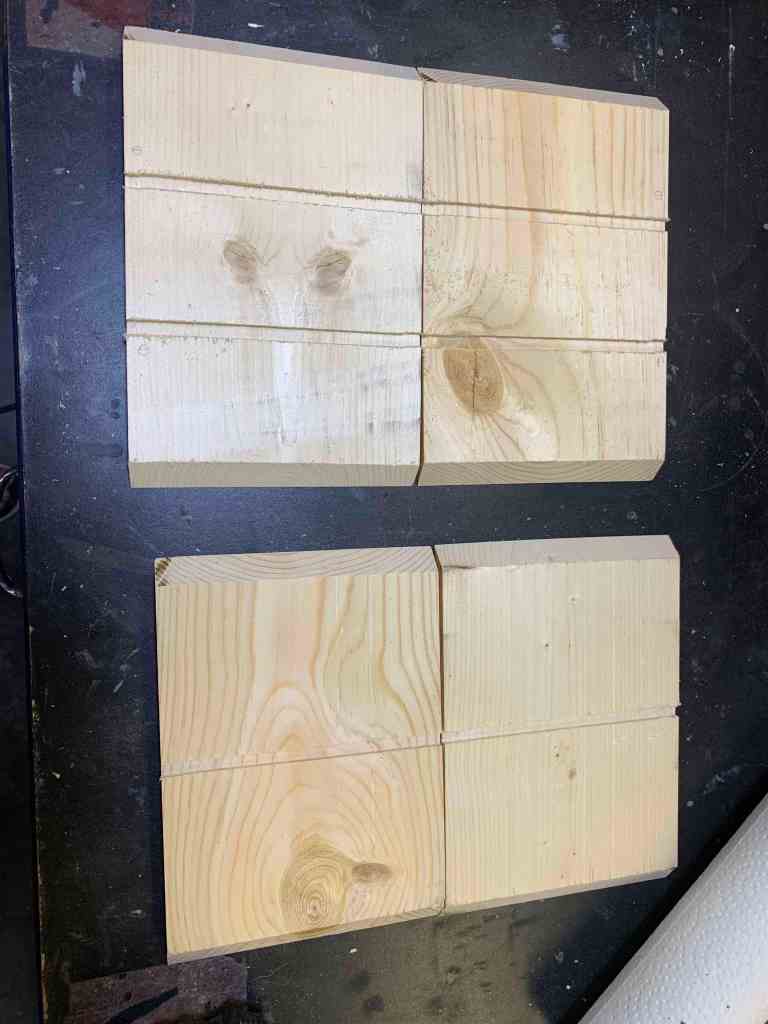
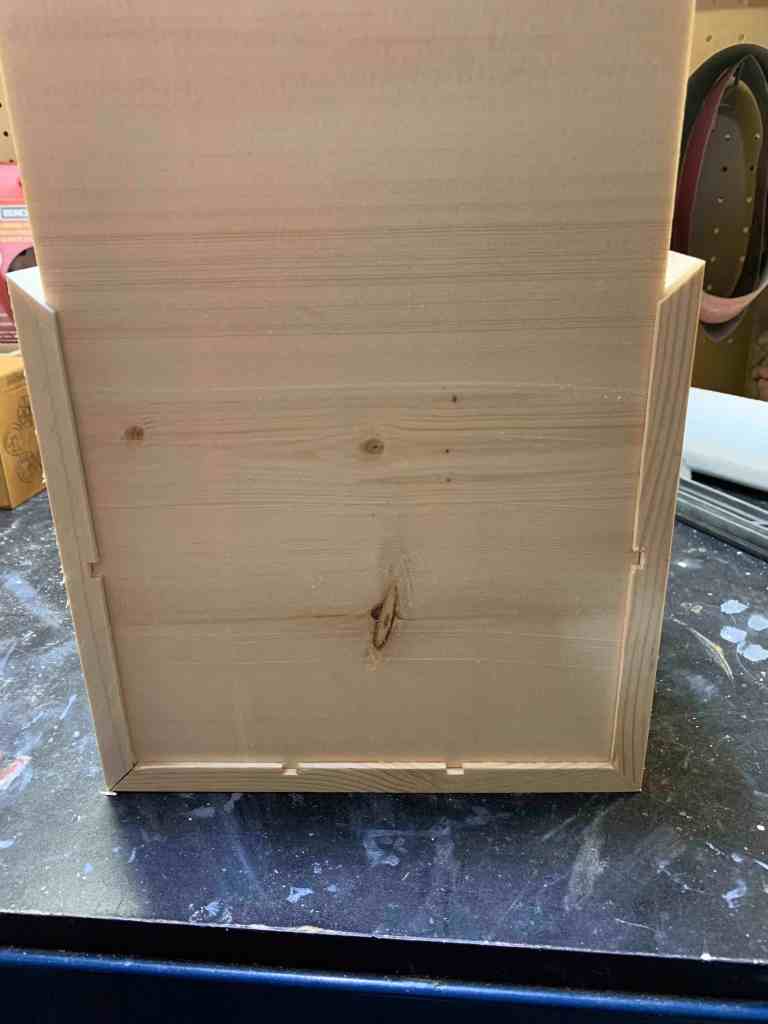
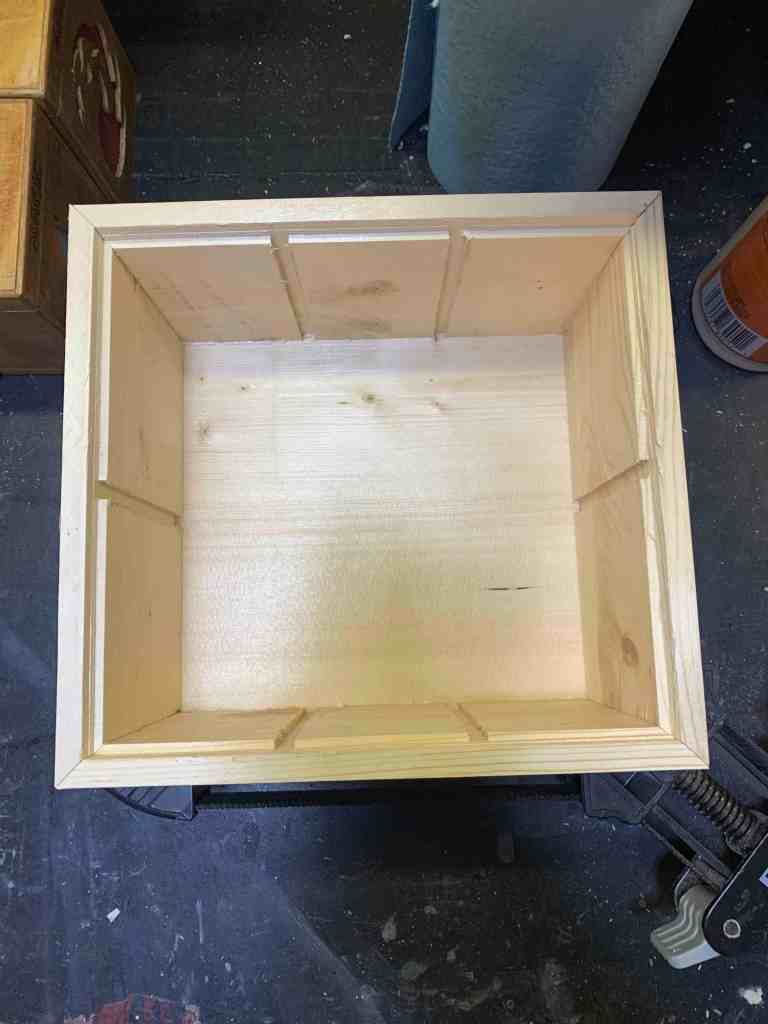
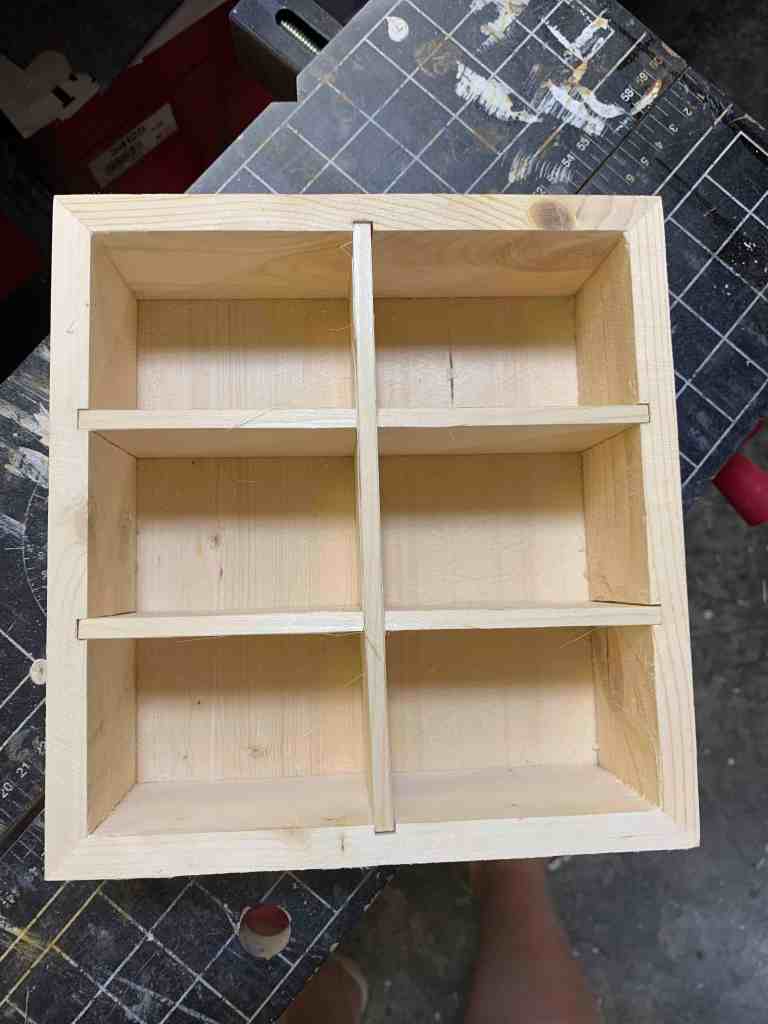
Ok, not a problem. I can work a little magic and come up with a solution. Ah-ha! I can at least fix the top. Using the router, I shaved off the bit of wood that created the channel, instead leaving an inset for the top of the box to be glued into. Depending on what the final product looked like, I had also considered adding a thin frame around the inside of the box to add some dimension and a finished look. I even cut the inside frame, but in the end decided not to use it, because I liked the finished look without it. Whew, crisis averted. I mean, I could have just cut more box walls, but I was determined to keep going, and this ended up looking great. The bottom however, kept the channels. It will always be set down on that side, so no one will see it, and it wasn’t overly noticeable. I needed that channel to hold the bottom because that is where all the weight would be sitting, which was the whole reason I had gone this route in the first place. Next time, the channels will be cut only where they need to be and not all the way.
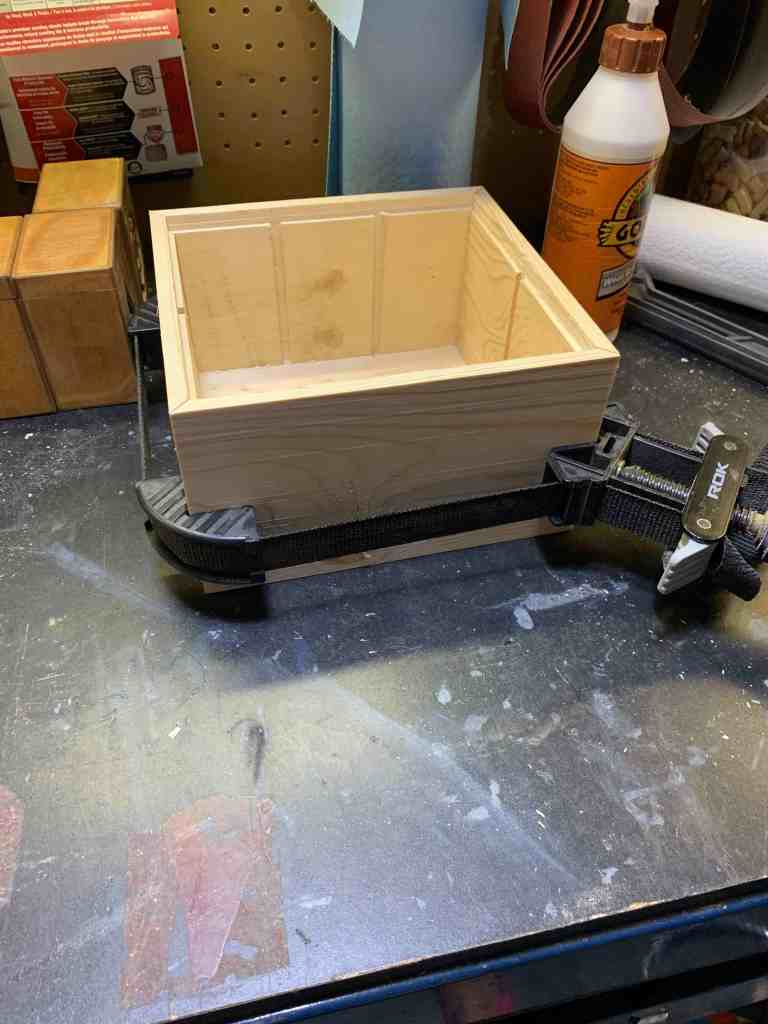
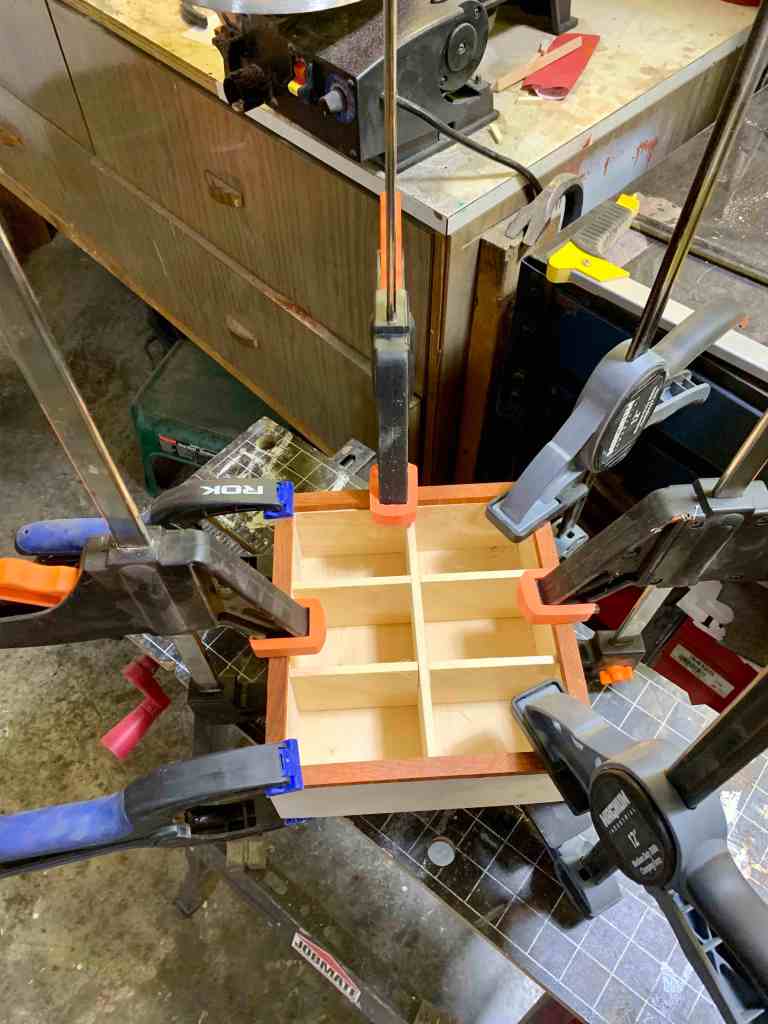
Back on track, it was time to glue the box together. Have you ever seen those corner clips/clamps. I really think I need to invest in some of those. I have a strap clamp that basically has 4 corner pieces all looped together with a strap. You glue you box together then use the strap to tighten everything up so that it is nice and square. Only problem is that it never really works out that way without a LOT of fiddling first. But no worries, we got it and the base plate being glued into the walls definitely helped with the process as it held the bottom of the walls square while I fiddled with the top. Voila! 12 hours to cure, and we were in a good place. I had the box built.
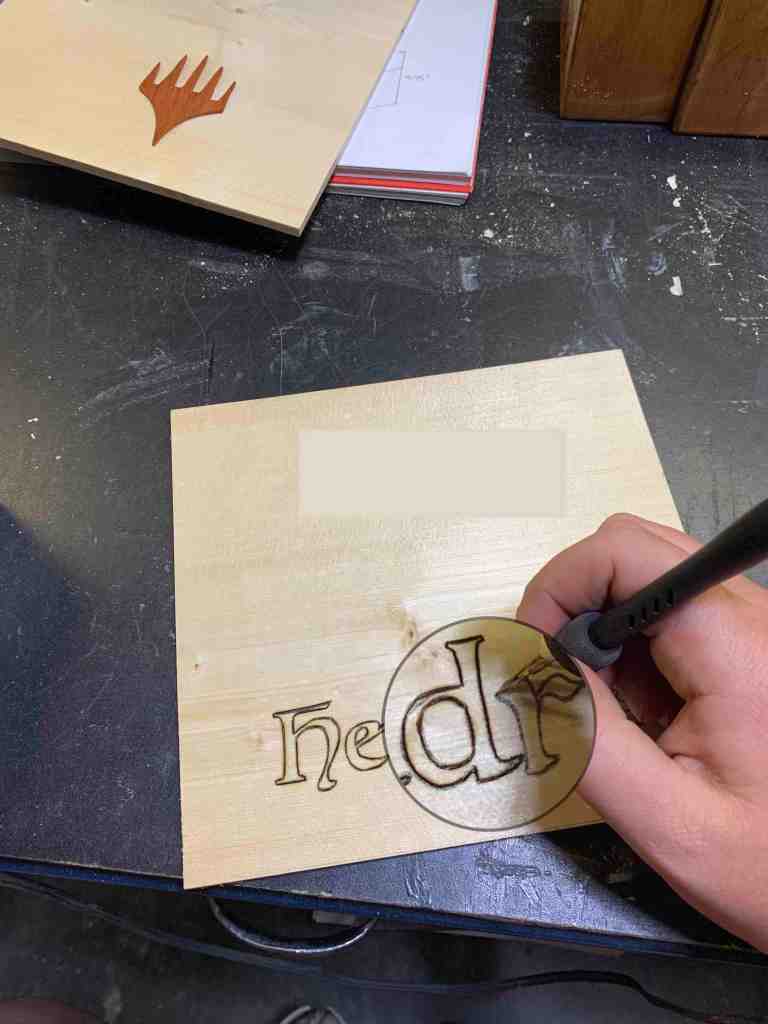
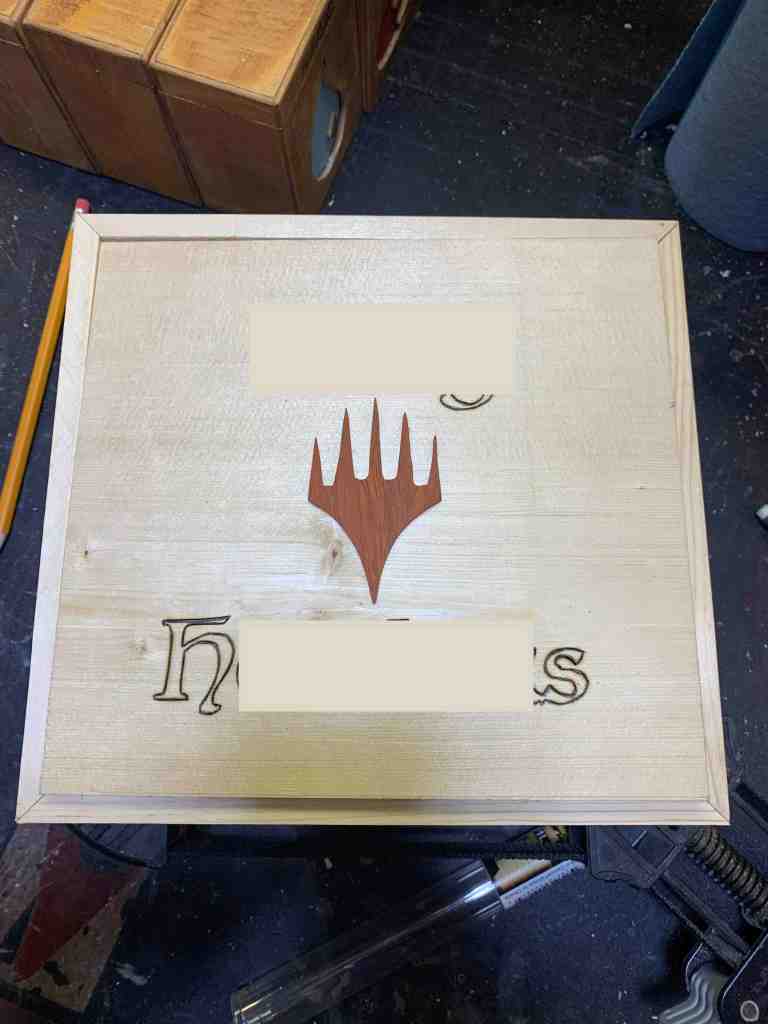
While I waited for the box to dry, I had decided to add some customization to the box decoration. Originally I had planned to just wood burn the name and the Magic The Gathering symbol into the top of the box. Instead, I found some thin slices of Padauk in my scrap pile and cut out the Magic The Gathering symbol from that as an embellishment. It would add a pop of beautiful colour as well as a little dimension. It looked awesome with the wood burned name. I unfortunately can’t share that part as this is a gift for someone, so I can’t ask permission to share his name on this blog. You’ll just have to take my word for it, but you can see the cool padauk symbol that I carved.

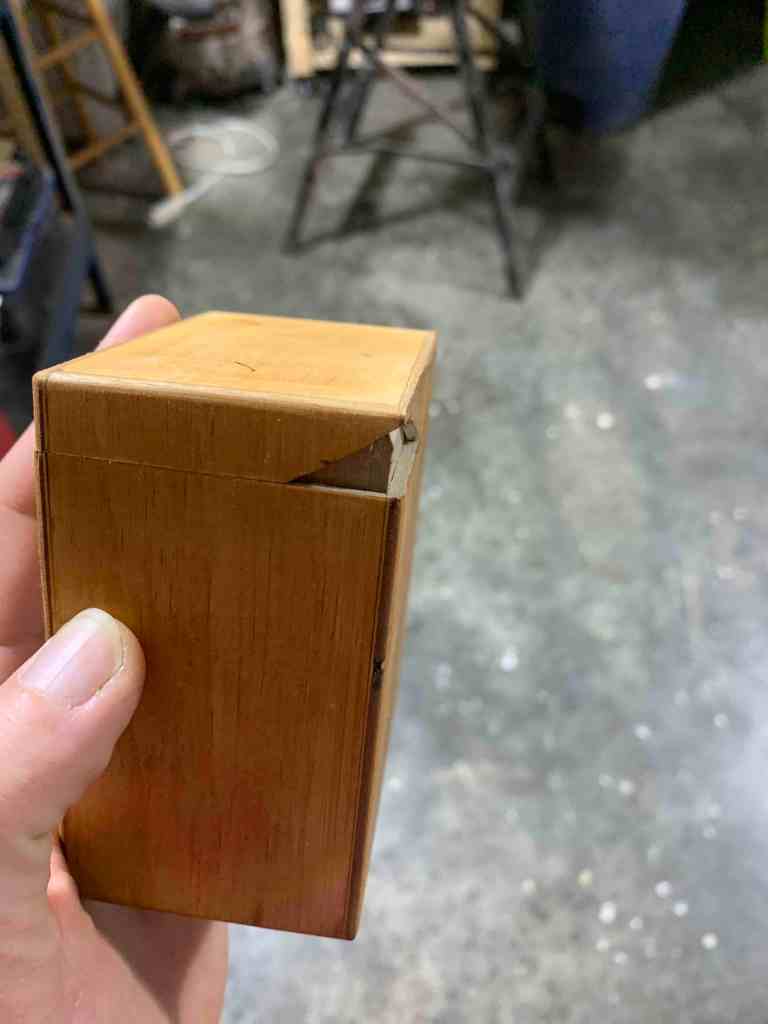
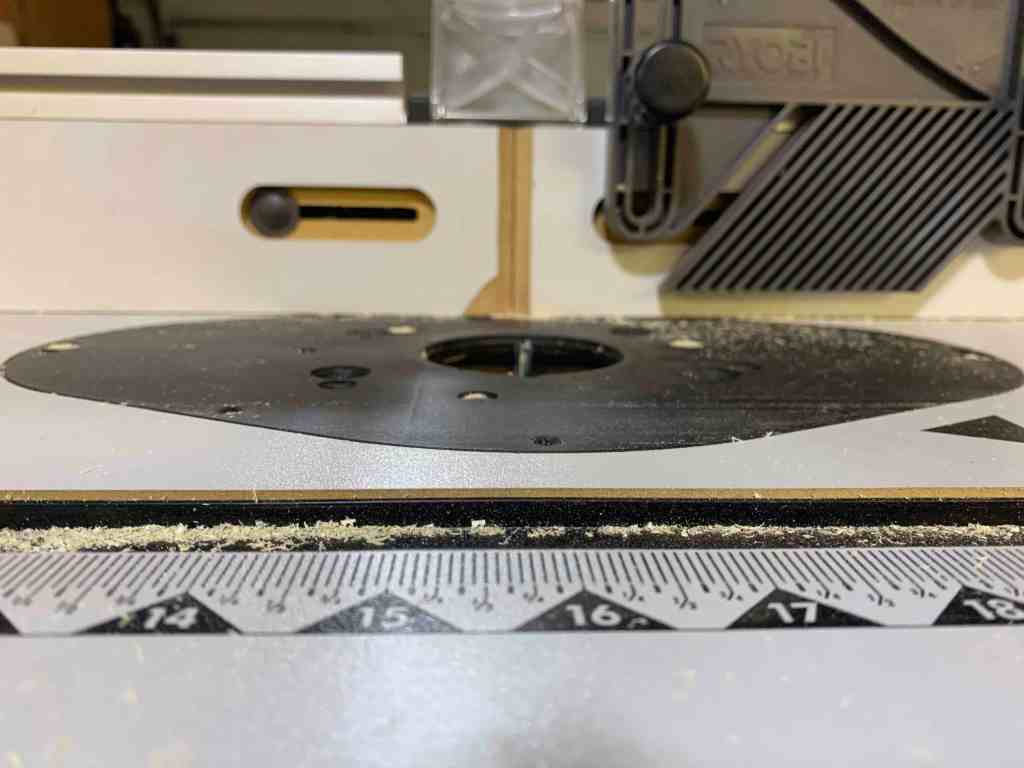
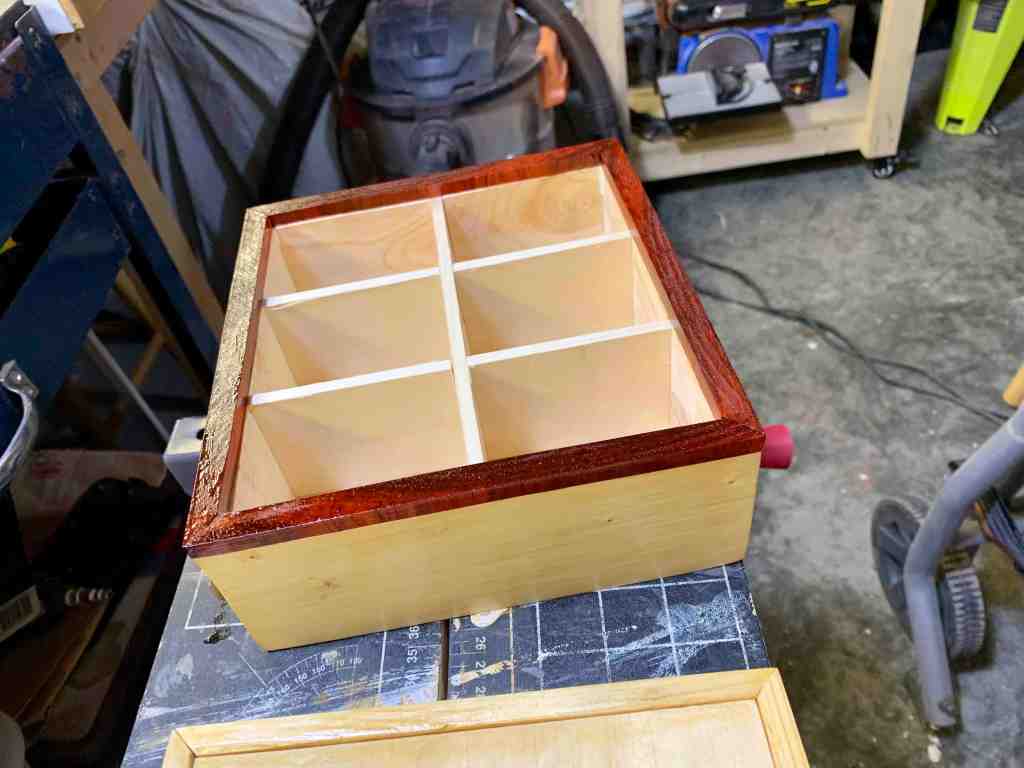
Once the glue was dry, I put the top plate into the inset that I had cut out for it. Fit like a glove. I let that glue cure for a bit while I worked up the nerve for the next step. It was the make or break….possibly literally…point in the build. I had to use the table saw to cut the lid away from the rest of the box. This is the tough part about the technique. You build this perfect, beautiful box, then you have to cut it in half. If something goes wrong with the cut, then you basically have to start over again. Breathe. Ok. So this was my first time doing a large box this way, and really only my second time using this technique all together. The good news…it worked! I did it, and the cut worked out. Though, after hours of watching videos and reading how-tos, I did finish the last edge with a handsaw. One of the cautions was that the lid can sometime kick back into the blade causing the lid to be broken or slashed. Since I had that happen with one of my smaller boxes, I was going for the safe route. Unfortunately that meant that the lip of the box where it connects top to bottom was not very event and needed some work. Out came the belt sander and with lots of minor adjustments, we had a nice flush fit again.
Kurt came in to the shop to see how it was all going, and as I excitedly showed him how everything had worked out he asked a question. An innocent question. A great question. A question that I had thought I had thought I had accounted for. Had I included the kerf of the blade and the bit of sanding into my calculations for fitting the deck boxes inside the carrying case? Psh. I am sure I did…I thought I did…oh crap, did I!? Nope, nope I did not. URGH! Or maybe I had and the sanding had taken off more than I had originally planned, but either way, my box no longer shut when the deck boxes were inside. Crappity crap.
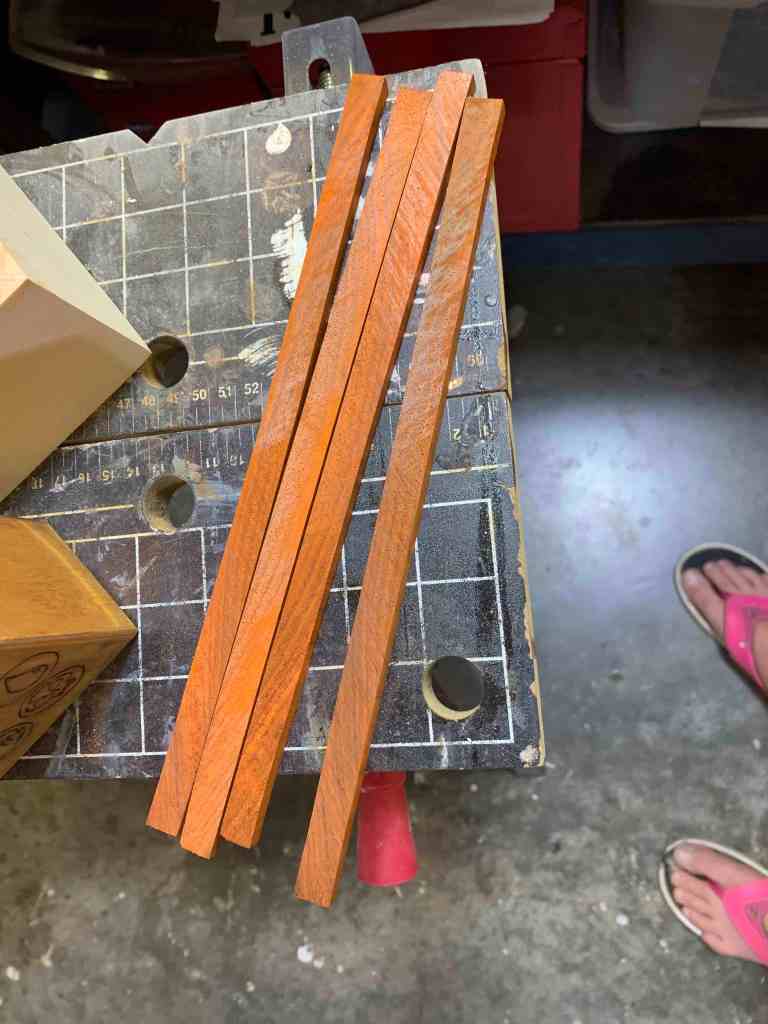
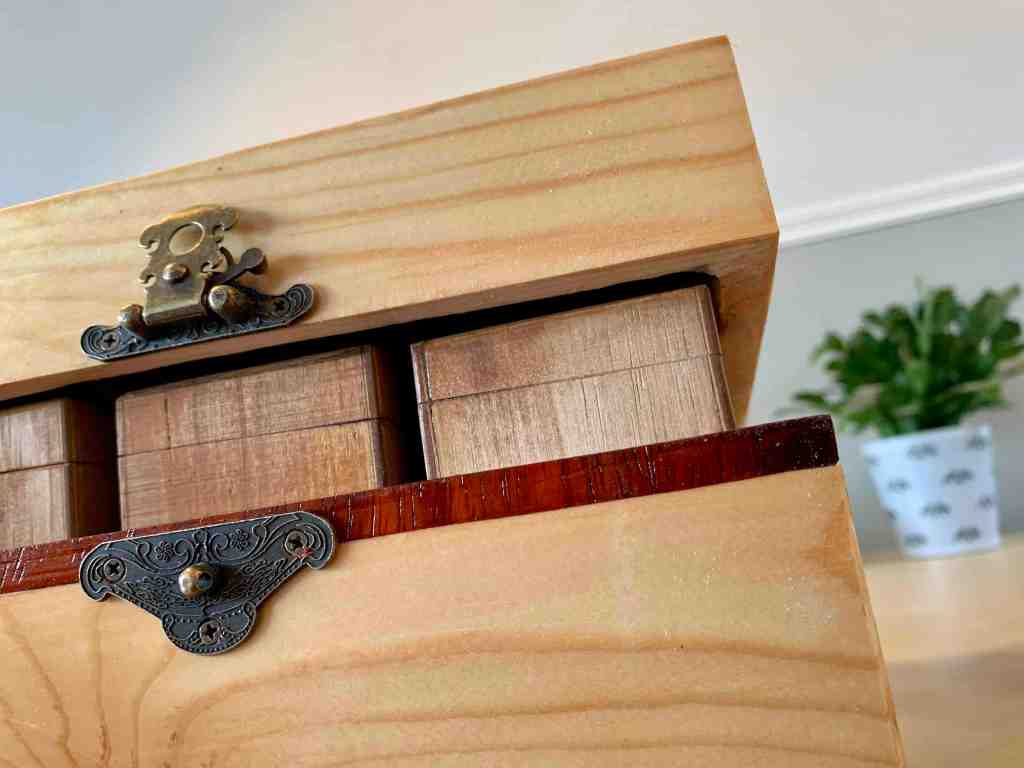
Ok, so time to work a little Magic again, right? Right. Sitting and staring at my now, not tall enough box, I fiddled with the carved symbol that I had made for the top of the box. Fiddling helps think sometimes. Boy did it ever. Eureka! I had been pondering how to add some more embellishment on the box without going too crazy, and now I had an opportunity and a solution to my problem. Using some strips of padauk, I added a 1/2″ frame around the opening of the base of the box where the lid would sit. It added another pop of the colour, tying in the padauk from the symbol, and it gave me the little bit of lift I needed for the lid to shut flush again when the deck boxes were inside the carrying case. I was on an unlucky-lucky role? Unlucky for the mistakes, but lucky that the fixes were turning out to be better than my original plans.
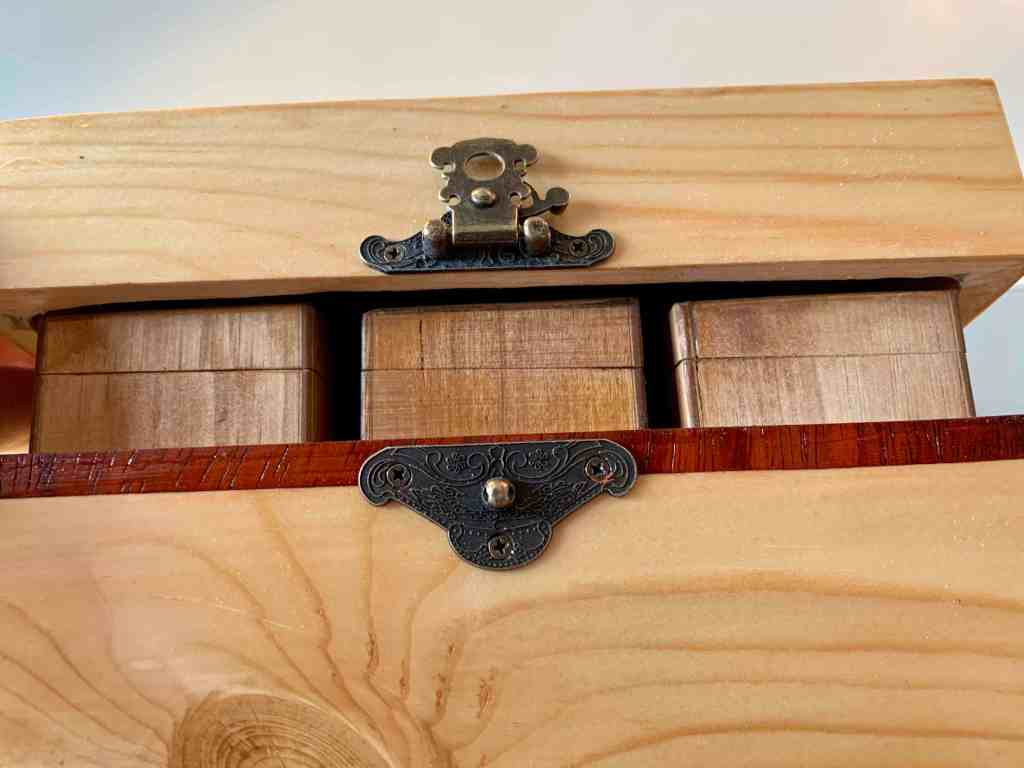
Before I got that decorative frame on top of the lip of the bottom box, I decided to get my dividers into place. Once I had the padauk frame on, it would cover the channels, erasing that mistake, and also would help lock those dividers in further. Win Win! Using my dry-fit technique, I made sure that my notches in the dividers would properly line up before I cut them. Once I was sure everything would line up, I cut in my notches so that the horizontal walls would lock into place with the vertical wall. This ensures nice straight lines rather than 3 small pieces being glued in and hopefully lined up. Nah, I wanted it to be perfect, so the interlocking walls were the way to go. Everything worked on the first cuts and no adjustments were needed. The box was giving me a break with an easy step. Whew. After a dry-fit and a quick test with the deck boxes, in they went with some wood glue to hold them in place.

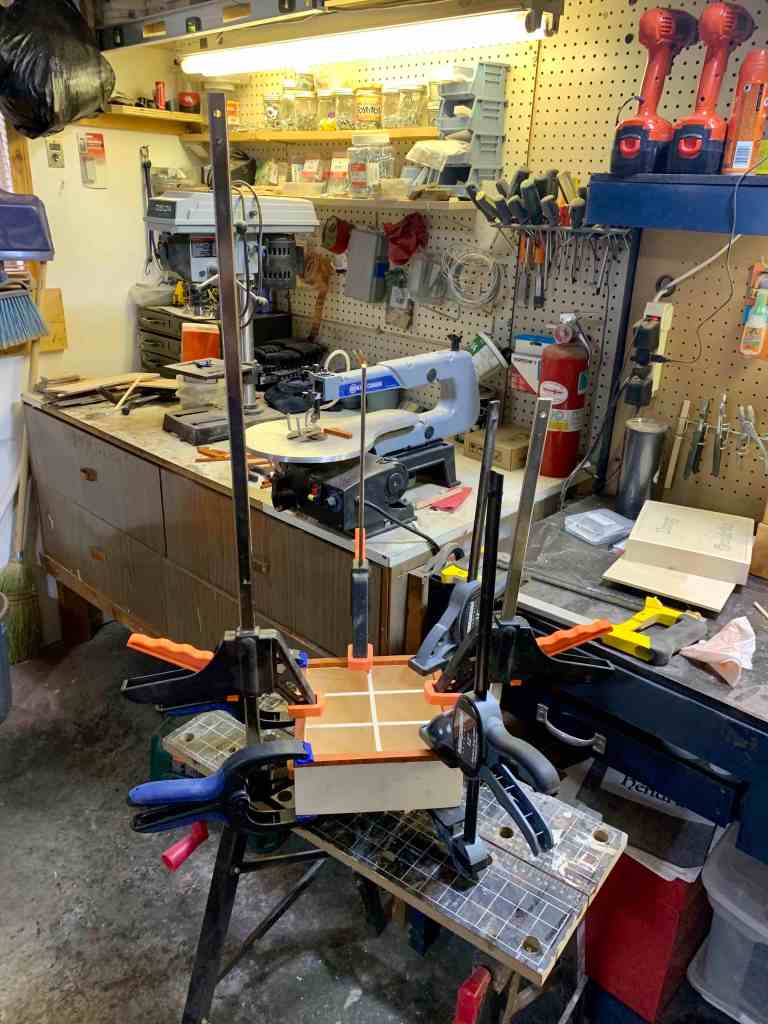
Now for the padauk frame. Padauk is a beautiful flaming red wood. It also stains everything with its saw dust, but it was something I was willing to deal with. Only problem was that I had always used it in thick pieces for cutting boards. Smaller pieces apparently break quite easily. GAH! After breaking the first one while cutting the 45*, I realized quickly that I would need to be very gentle with the brittle little pieces. After a very slow cutting process, all the pieces were ready to be glued with no more incidents of separation. I grabbed all the large ratchet clamps I had and set the frame in place with a thick squeeze of wood glue and clamped it down tight. Then I left it alone, like a giant metal porcupine sitting on my workbench. I left it to cure for 24 hours to ensure a nice solid attachment. Wowza, I love Padauk.

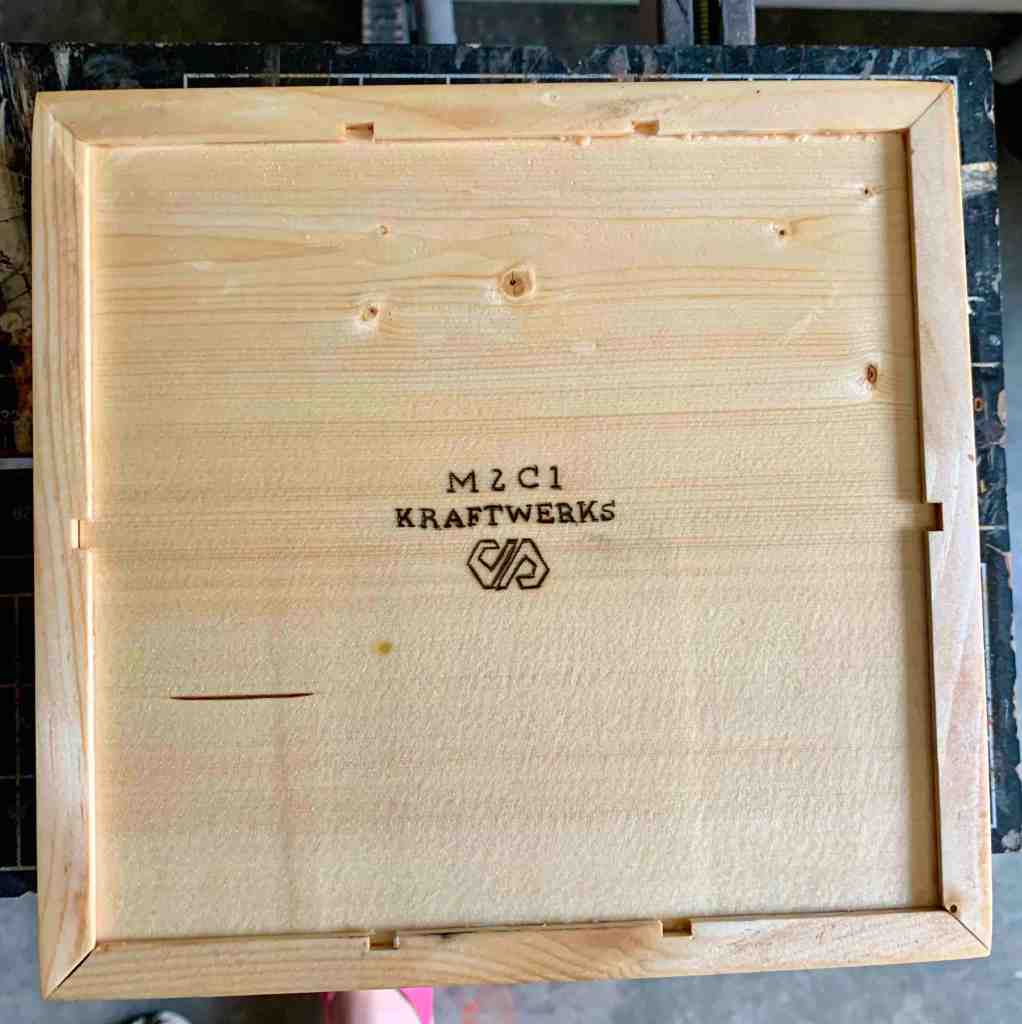
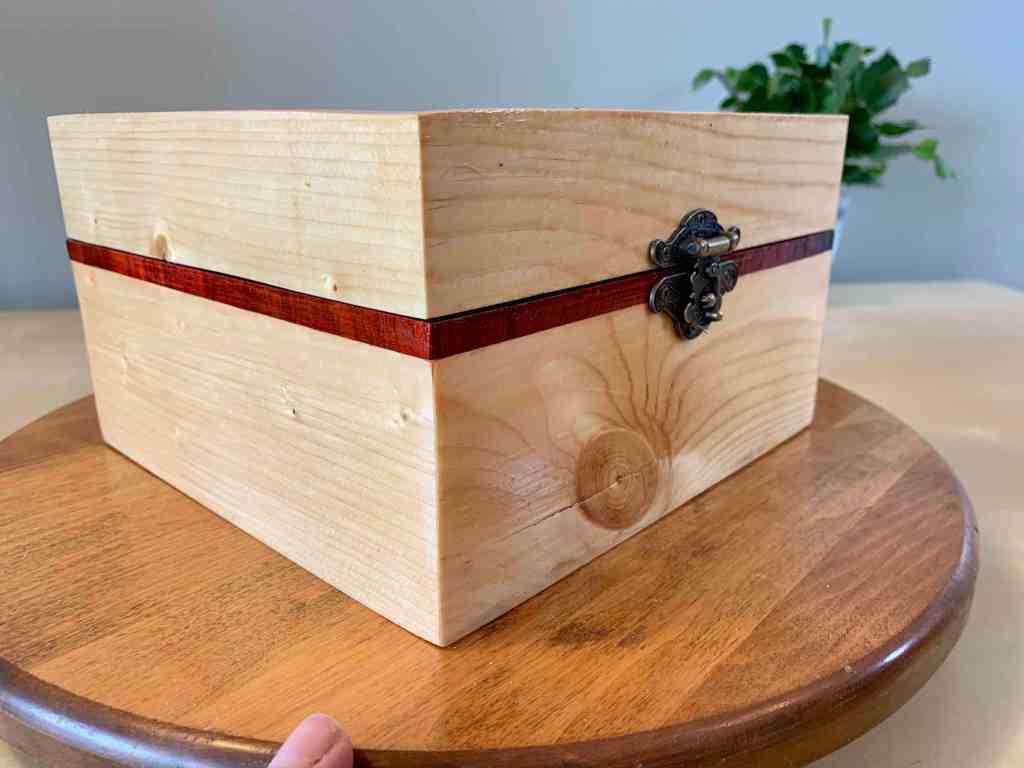
Placing the lid on and the carved symbol into place, I could see what this box was going to be, and thanks to my mistakes, it was going to look so much better than I had planned. I love it when things work out. I sanded the outside of the box down to 220 grit, making for a velvety soft texture. I had to change out the sanding pad and go back over the blond wood to make sure it wouldn’t end up pink in the next step, but it was worth the extra sanding time for the pop of red from the padauk. Using a 900 gloss oil-based stain, I went over the full box, giving it a kick of shine. I had opted to leave the wood in it’s natural colour because I liked the contrast between the woods. The stain gave the blond wood a rich, warm amber glow. It was the right choice. Before I stained the bottom of the box, I added our M2C1 Kraftwerks brand with my JP initials. You know, just in case the soon to be owner shows it off to his friends who then want their own custom box set.
The final step once stained was to add the hinges and the clasp. I had found this really cool looking set that was an antiqued bronze look. The clasp has a piece that fits over the ball to close it, and then a little pin swings down into the ball to lock it into place. Seemed fitting for the theme of the box. I used some ratchet clamps to hold the lid on the base of the box, perfectly lined up so that everything would attach nicely. I attached the hinges first, and then the clasp. Thanks to the clamps it was easy and quick to screw the itty bitty screws into place on the hinges and the clasp. It would have been impossible without clamping the box together.


That’s it, I finished the carrying case….right? NOPE. One more hurdle. In went the deck boxes and now the lid wouldn’t close because of the angle that it had to go over the corner of the deck boxes. yeesh. No problem. I used my dremmel to shave down the inside of the lid to a point that the walls of the lid would now clear the deck boxes. Whew. Last crisis averted.

Will I make more of these boxes? Absolutely. Did I learn a lot from this build? Absolutely. Will I implement some of my happy mistakes and solutions into future boxes? Absolutely. It was fun, and I love spending time in the shop. I already know that I will need to build this set for my brother-in-law. Seems a must when it was all his idea in the first place. Perhaps he will get it for Christmas? That gives me 6 months to get it made. Ha!


One Comment Add yours