
I have been working on a mask carving with my dad for around 5 years now. It certainly didn’t need to take that long, but we have just been working on bits of it here and there, so it has been a bit drawn out. We are, however, finally reaching the final steps in the carving.
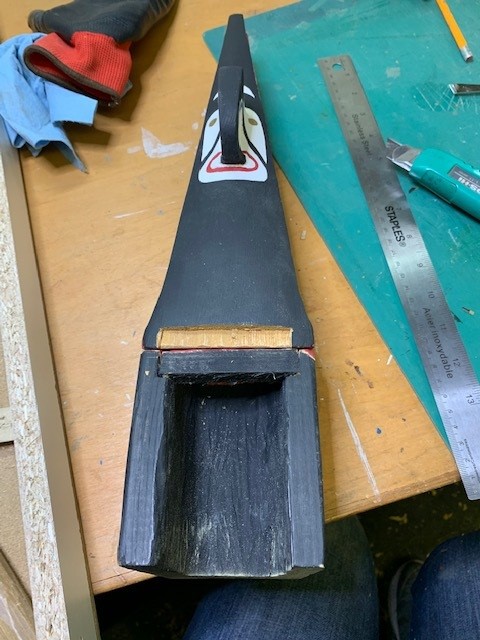
I have carved and sanded the full mask now, and am ready to paint the designs onto it. We used a piece of cedar fence post for the carving and it has been a bit of a challenging piece of wood to carve as the grain on one side is really nice, while the other is very spread out, making it difficult to get a clean carve into it….especially for a beginner carver. Not to worry, a little wood fill patched the few blemishes quite well. You can see in the below photos where I have had to patch the carving to create a more even surface.
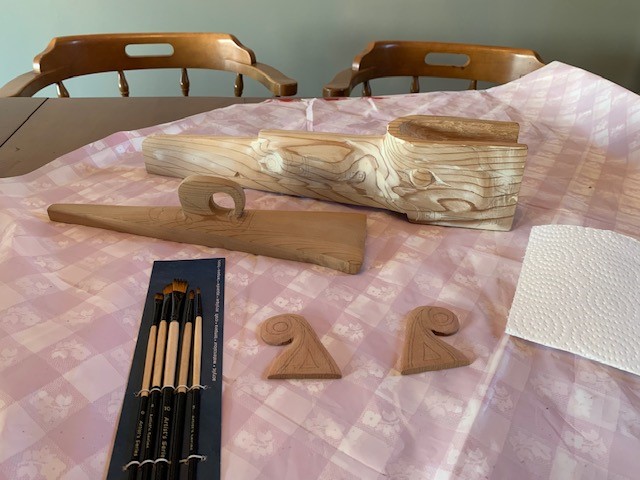
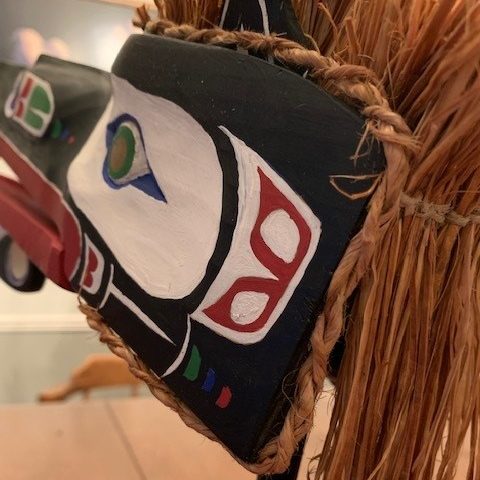
My dad provided me with a paper template of the mask so that I could work out the designs that I wanted to add to the mask, without having to draw and erase them repeatedly on the mask itself. He also explained some of the general shapes and patterns that are common within the design work, so that I could make sure that the design I went with looked correct in the tradition of the carving. It took a little while, but I finally came up with a design that I was happy with. You can see in the photo below that there are 2 mask outlines filled in. The top one is the one that my dad did on his mask, and the middle one is the one that I have done. I chose to use green, blue and red as my main colour accents.

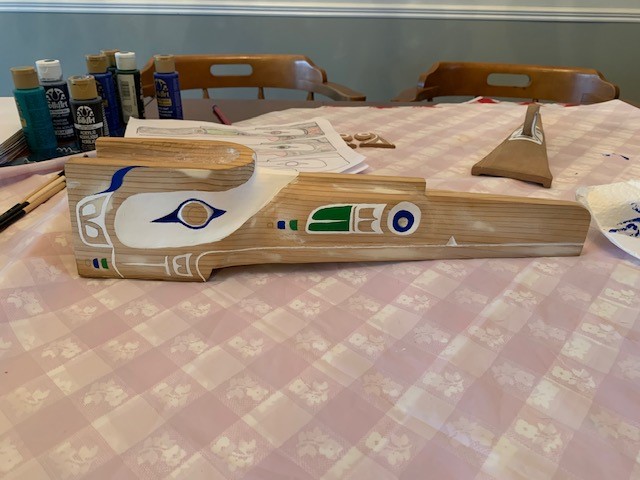
Once I had my design sorted, I had to draw it onto both sides of the mask. It was quite challenging as I wanted it as symmetrical as possible. But let’s be honest, it doesn’t really need to be as you won’t be seeing both sides of the mask at the same time anyway. It took a lot of drawing, erasing, re-drawing, erasing, adjusting, tweaking, erasing and more drawing. Dad had reminded me before I started to not press too hard with the pencil as it would leave indents in the wood. I am so happy he gave me that reminder because I would have had to sand all over again based on how much erasing and re-drawing I did.
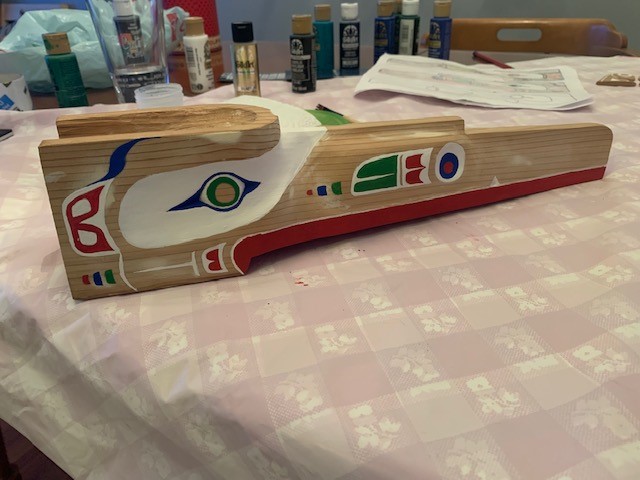
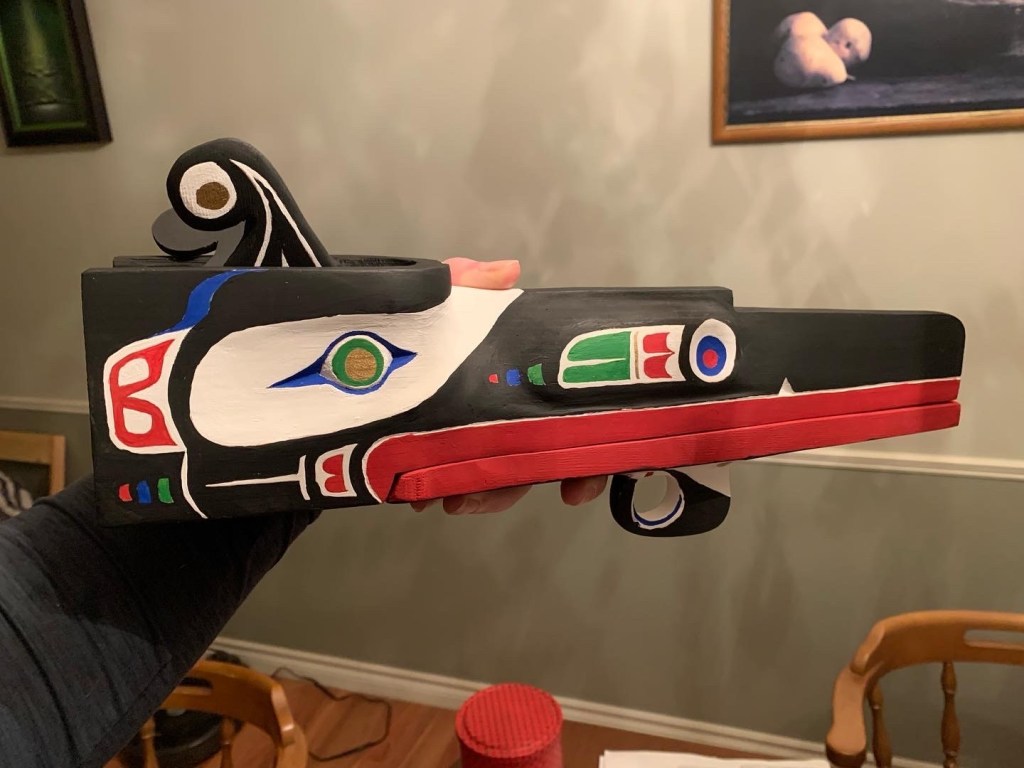
I’m not going to lie, I put off painting it for a while. Some of it is very finicky work, and I didn’t have a good set of paintbrushes. I finally got around to getting a new set with a variety of shapes and sizes so that I would have plenty to choose from depending on the portion I was painting. I started with the white because it would be the easiest to paint over any blemishes. I then added the blue, green and red accent colours in the designs. Last to be added was the black. I was able to use the black to help clean up some areas where my colours had gone out of the lines. It made getting the black on much more tedious, but worth the final result. I did still have to go back over a few spots once the black was dry to clean up some of the white lip outline as well as a some of the designs.


Now that the painting was complete, it was time to take the mask back over to dad’s to add the cedar rope and hair. Last summer we had found a nice area filled with cedar trees and were able to get some of the bark for this next part. It is a really neat process, being able to peel some of the bark off without damaging or harming the tree. Dad and I were able to get some good strips for both our masks.
Dad had soaked the bark overnight so that it was nice and pliable. We then had to cut it into the size of strips we needed, and then hammer it to break the fibres so it became even more pliable. Once the fibers are broken, it becomes more rope-like. The first task was making a rope to go around the forehead, down the sides and under the bottom of the mask. As we were measuring it out, we realized that I had missed carving part of the head. I needed to round the back of the mask so that there were not sharp corners. It was a quick fix and dad luckily had some black paint that matched what I already had.
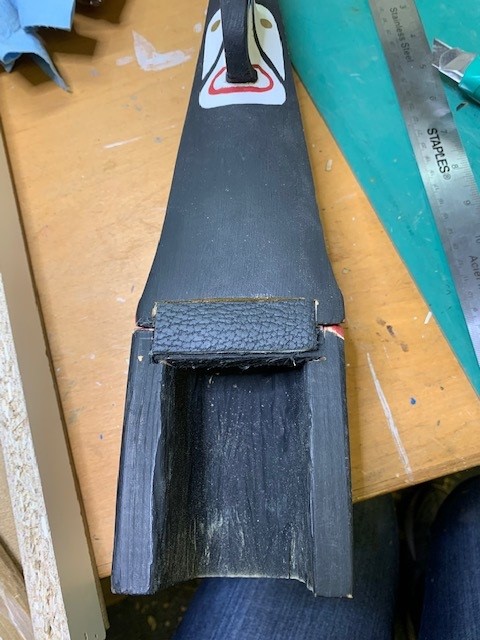
Before we got started on the hair, dad helped me attach the bottom jaw of the mask to the top portion using some leather. This would allow the beak to open and close so that when I was ready to display it, I could set the jaw slightly open. It would take some eyelet screws and some string to tie it into place, but that will be one of the final tasks.
To make the rope, we managed to cut two lengths of three feet. Ideally, we wanted to keep the lengths all in one piece, but it was easy enough to splice in a new piece to extend the length if needed. We whipped the end with some nylon string and nailed it to dad’s workbench. I then had to twist each length of the bark so that it was twisted. As I was twisting each individual length, I also had to twist the two lengths together. This is what creates the rope. The first time round, I didn’t twist the two together properly and when we tied off the end, it all unraveled. The second time around was a little easier as each length stays somewhat twisted, so I was really only re-twisting the rope itself. Turns out I had twisted the two lengths in the same direction, so when twisted around each other, they just let loose. I needed to twist the two lengths in opposite directions so that when twisted together they would have to go against each other to un-twist, which couldn’t happen so the rope stayed together. From there, we took the rope and attached it to the mask using small nails.
Once the rope was attached, it was time to add the feathers/hair to the head. We cut strips about 4″ in length and pulled them apart so that we had hair-like strips. We would then grab a small bundle of them and tie them in the middle with a bit of the nylon rope. From there, we bent it in half, and at the bent part, nailed it into the top of the mask. This results in the hair-like look at the top of the mask.

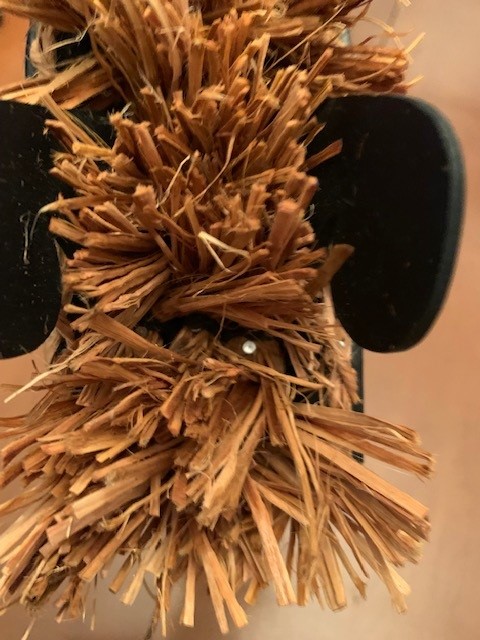
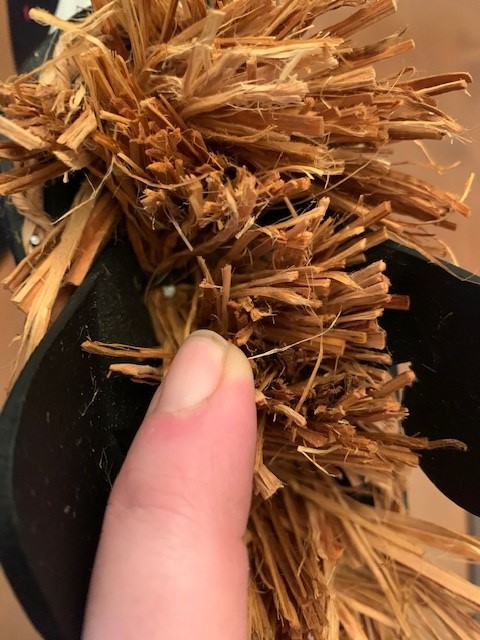
The last step with the hair was to add the long sections that sweep down the back of the head. Again we cut sections, about 6″ in length and split it into fine hair-like sections. We then created little bundles and tied the near the top, leaving a bit sticking out the top so that it would line up with the hair that I had added to the top of the mask. Once again, using small nails, I attached it to the back of the mask.
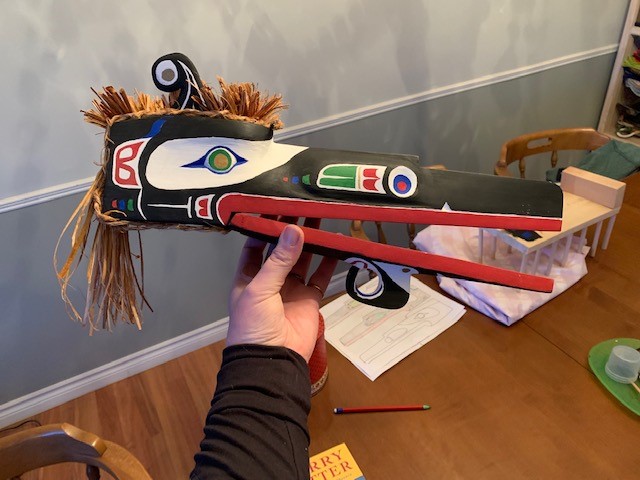
Almost there! I will just need to build the stand that will allow me to display the mask on my mantle.

