
After many delays, we are just about finished the renovations to the spare bedroom. After we finished painting, and before we moved all the furniture back in, I wanted to get the shelves framed and finished. What should have been a fairly quick job did not turn out to be a quick job.
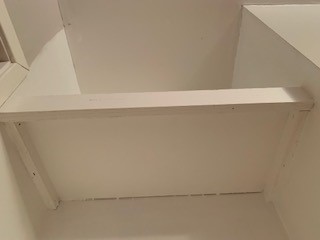
I had measured the width of the existing shelves and built a new shelf to those specs. The previous owner had made very simple plywood shelves by gluing together an “L” shape. The shelf part should have been 21.5″ x 12″ based on my measurement of the bottom most shelf. Glued to the front is a 2″ face plate. That “L” shape then sits on 2 pieces of 1″ plywood that is drilled into the studs. Super simple design.
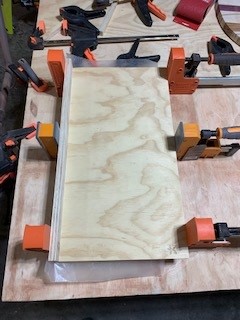
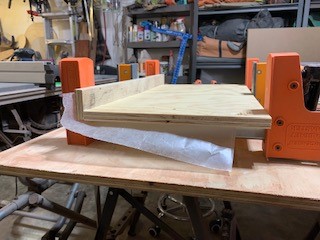
I started by cutting the pieces of 5/8″ plywood that I needed. Luckily I had some scrap pieces from when we re-did our deck in 2020. I used my clamps to attach the face-plate to the shelf and let it cure overnight for a nice solid hold.


Once it was dried it was time to put it into place so I could finish framing and painting the shelving area. This is where it went from what was supposed to be an easy fit to a bit of a conundrum. As soon as I tried to slide it into place I hit a snag….literally. The shelf wouldn’t slide into place. Luckily, I hadn’t drilled the rails in yet, so I still had some time to adjust. I re-measured the opening and low and behold, it was an 1/8″ smaller than what I had measured. So I re-measured the shelf above it, and it was 21.5″ wide. Ok, not a problem, I could shave a little bit off the shelf using the table saw.
Once I had shaved the smallest bit off, I went to try fitting it again. Snagged again. So I tried sliding it in at an angle to get it past the opening, and then see if I could get it to fit flat. No luck. So I pulled it out and measured again. The measurement of the shelf opening and the shelf I built were the same size, so why wasn’t it fitting. I decided to scrap the extra shelf and just get the framing done, so I handed the shelf to Kurt to set aside for a different project and realized I should take a picture of how the shelf just would not fit. So I slid it in at an angle, and as I went to put it as flat as it would go a crazy thing happened…it fit. WHAT?!

Ok, so I will just roll with it. I grabbed the level and the measuring tape and it was 14″ from the shelf above which was somewhat on par with the other shelves which were anywhere from 14″ to 14.25″ distance from each other. I then carefully slid the shelf out and placed the rails, screwing them into the studs based on the points at which all the other shelves were drilled in. Then I slid the shelf back into place and realized what the issue was. The shelf nook area is bowed! The shelf at the front fits perfectly, but has gaps on either side and then fits perfectly again on the back corners. So frustrating. But we made it work.
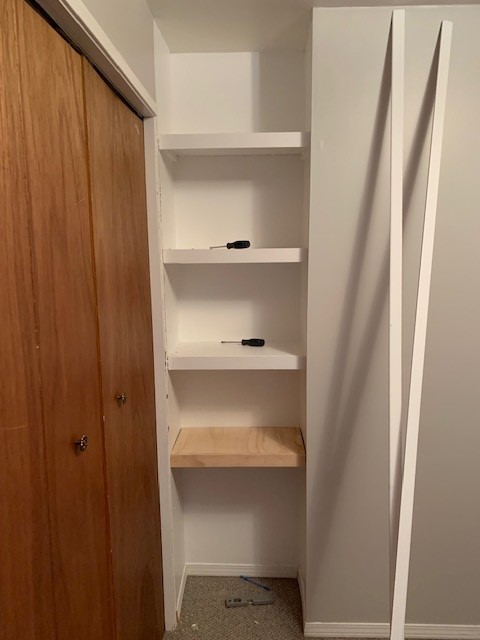


I gave the shelf a coat of paint and we moved on to the framing of the shelving unit, to make it look more like it’s own object, rather than part of the wall. I popped the molding from the one side of the closet off and cut the top molding corner piece straight so that it would butt up against the new molding. I started by adding a piece of wood along the top of the shelf to frame in the ceiling portion of the unit. I then cut the molding on both sides to finish framing the shelving unit. The left side was dual purpose molding for both the shelving unit and the closet.

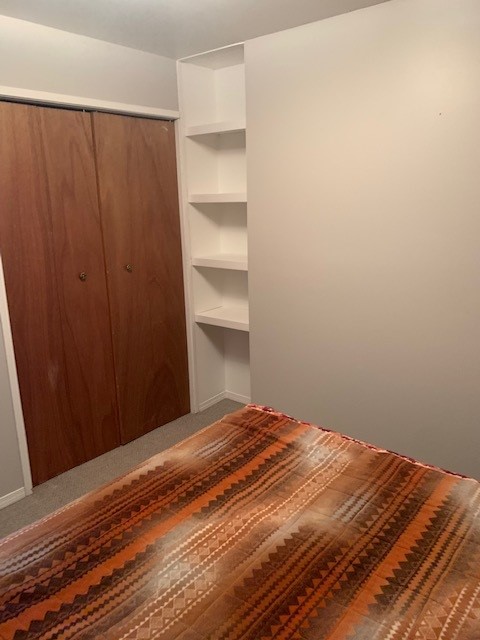


The finished project turned out good. We could hide the gappy shelf with Kurt’s display pieces so it all worked out for that oddly shaped area. If I were to do this in the non-simplistic aesthetic way, I would have made a few changes. I would have cut the carpet out of the bottom and put a proper bottom shelf with thicker molding to create a base to the shelving unit. I would have re-built all of the shelves with a nicer material. I would have also dropped the top of the shelving unit down and put a thicker, possibly crown-molding, to finish off the top. Perhaps one day I will get that into it, but knowing what I do now, with the walls being bowed and wonky, I would likely build an actual shelving unit to slide into the space, with a frame around it. For now, the finish we gave it looks nice and adds to the look of the room.

