
Well, the boat is officially in the shop, and it isn’t as big as I remember. Or rather, it isn’t taking up as much space as I thought it would, leaving me with a good size open area to work. That being said, the stands that I built for a few of my tools are already worth their weight in gold! Here are the plans that I used for some simple tool stands on casters. You can use them to build your own with easy adjustments to the sizing to fit your needs.
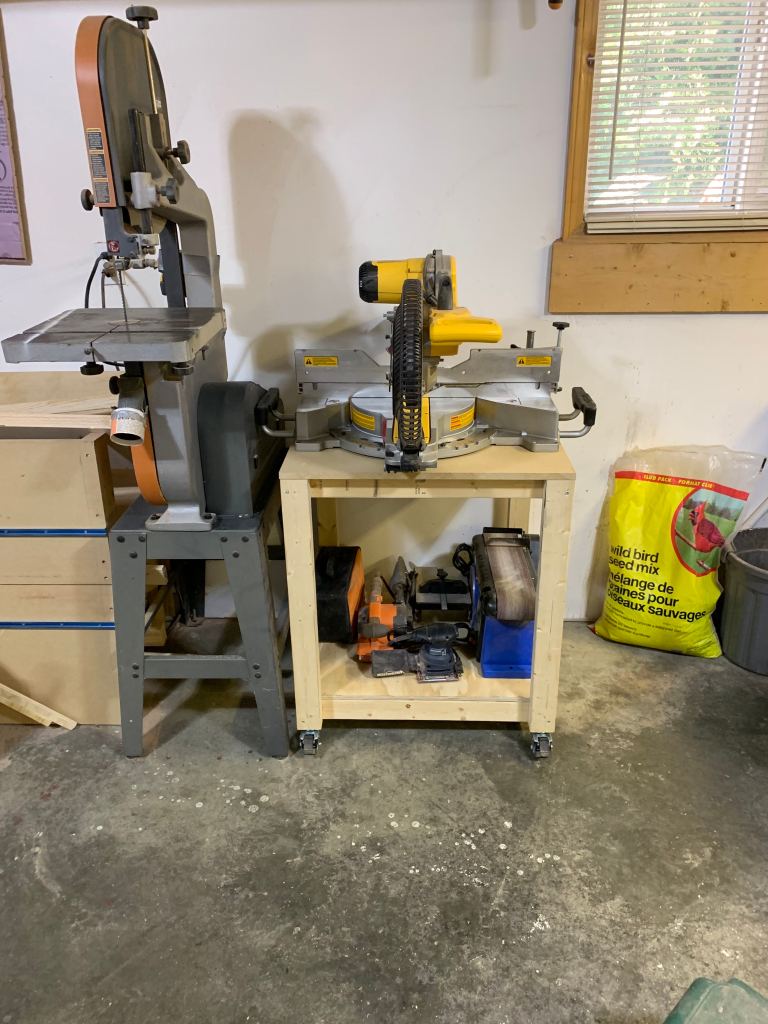
I am also going to preface this with the fact that I planned both these stands so that when working with the tool, the wood would be level with the top of my table saw. This allows me to use the table saw deck as extra workspace to help support the wood I am working with. My future benches will also match this height which was 34.5″.
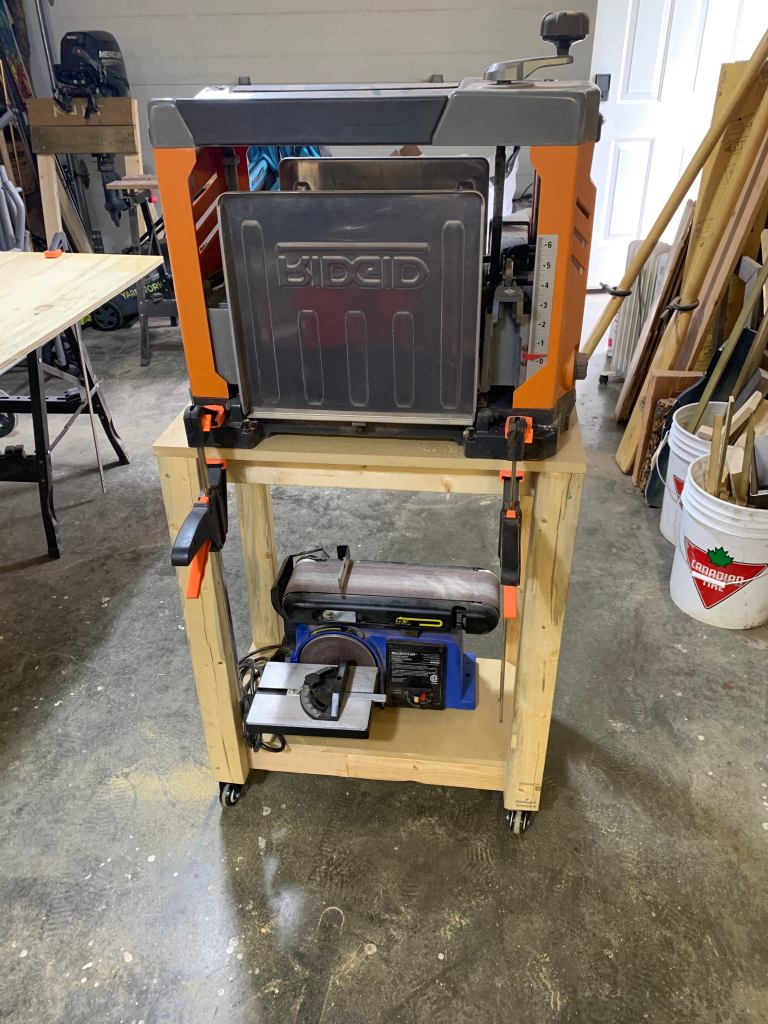
As you review the plans below, you will notice both stands are a different height. That is due to the deck height of both tools being different. I wanted the deck of the mitre saw and the deck of the planer to be level with the deck of my table saw. The mitre saw has a 3″ space to the deck and the planer has a 2-1/4″ space to the deck.
Tools:
- Mitre Saw
- Square
- Tape measure
- Pencil
- Drill
- Wood drill bit
- Robertson drill bit
- 2-1/2″ screws (I used #8 size, but you can use what you have)
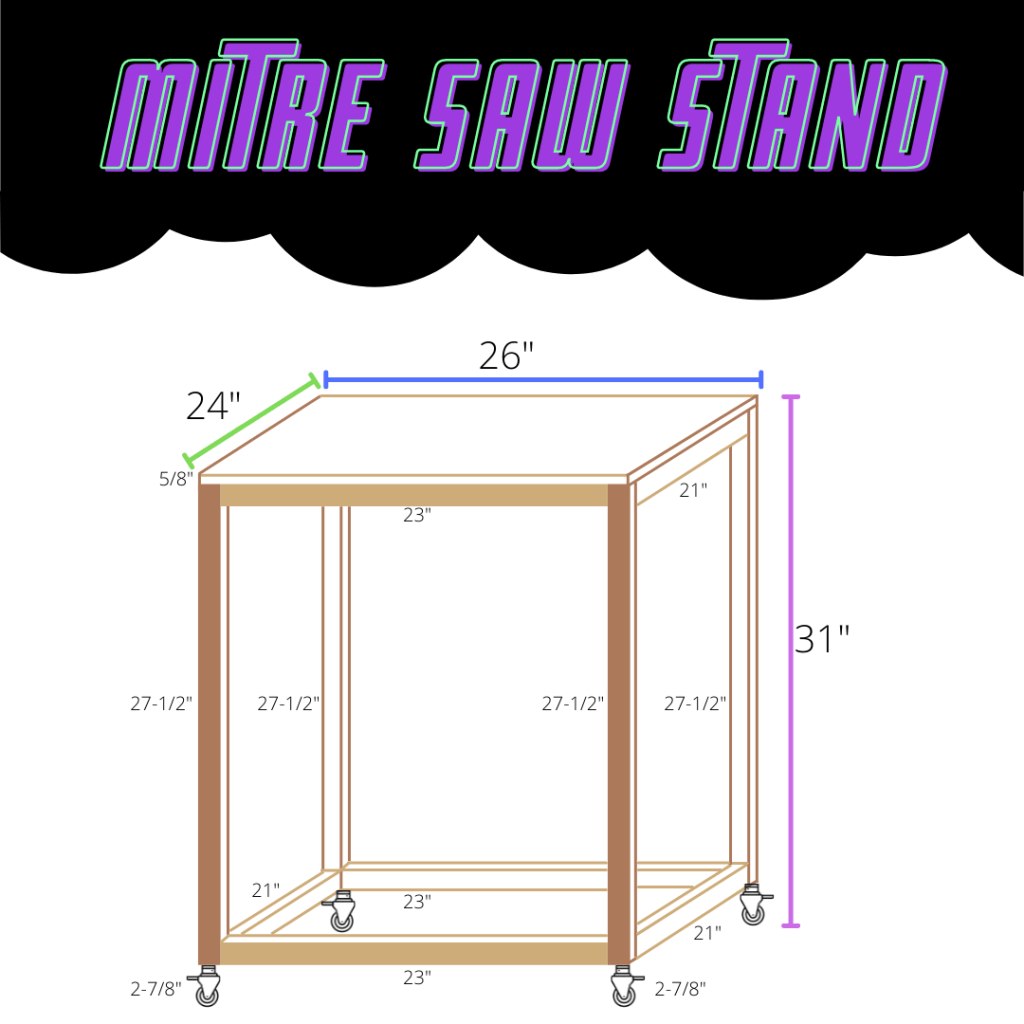
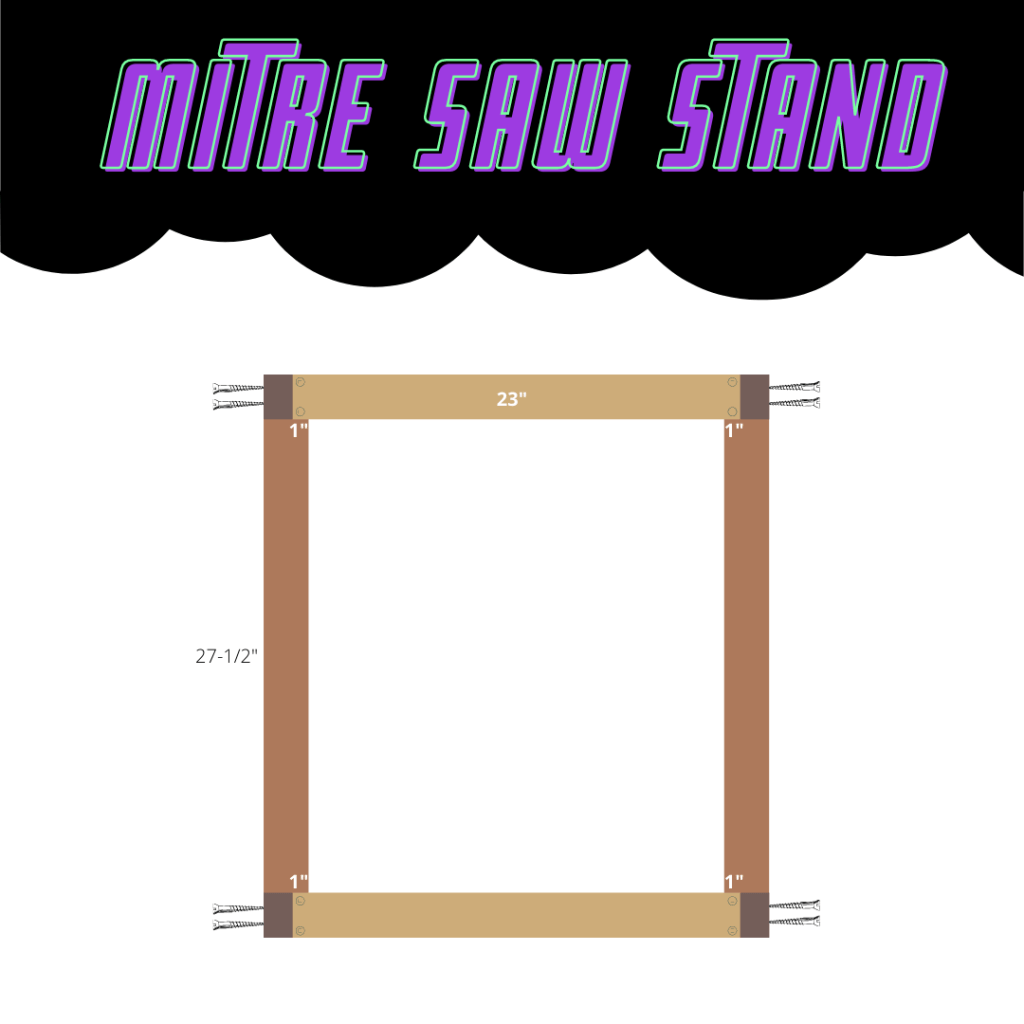
Mitre Saw Stand Supplies:
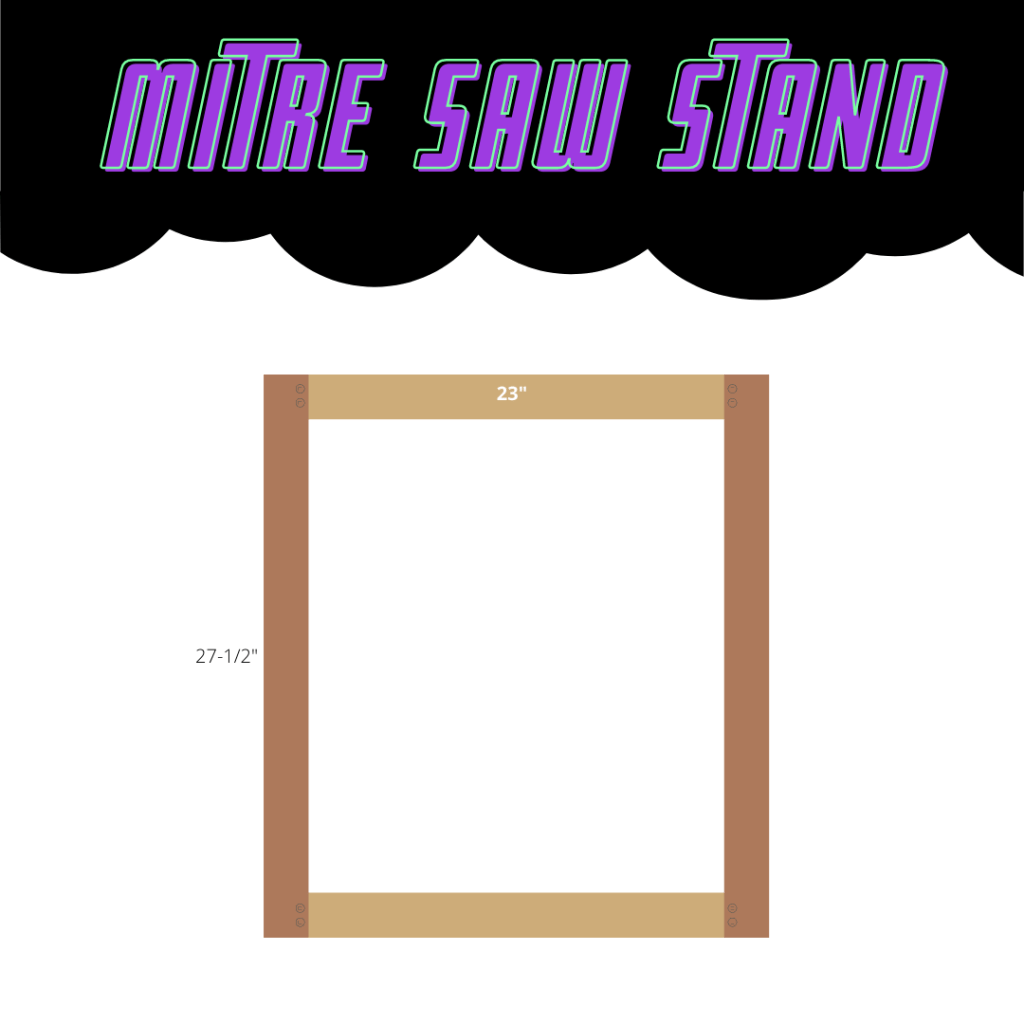
- 4 – 2″ x 3″ x 27-1/2″
- 4 – 2″ x 3″ x 23″
- 4 – 2″ x 3″ x 21″
- 1 – 24″ x 26″ x 5/8″ MDF or Plywood
- 4 – 2-7/8″ height casters
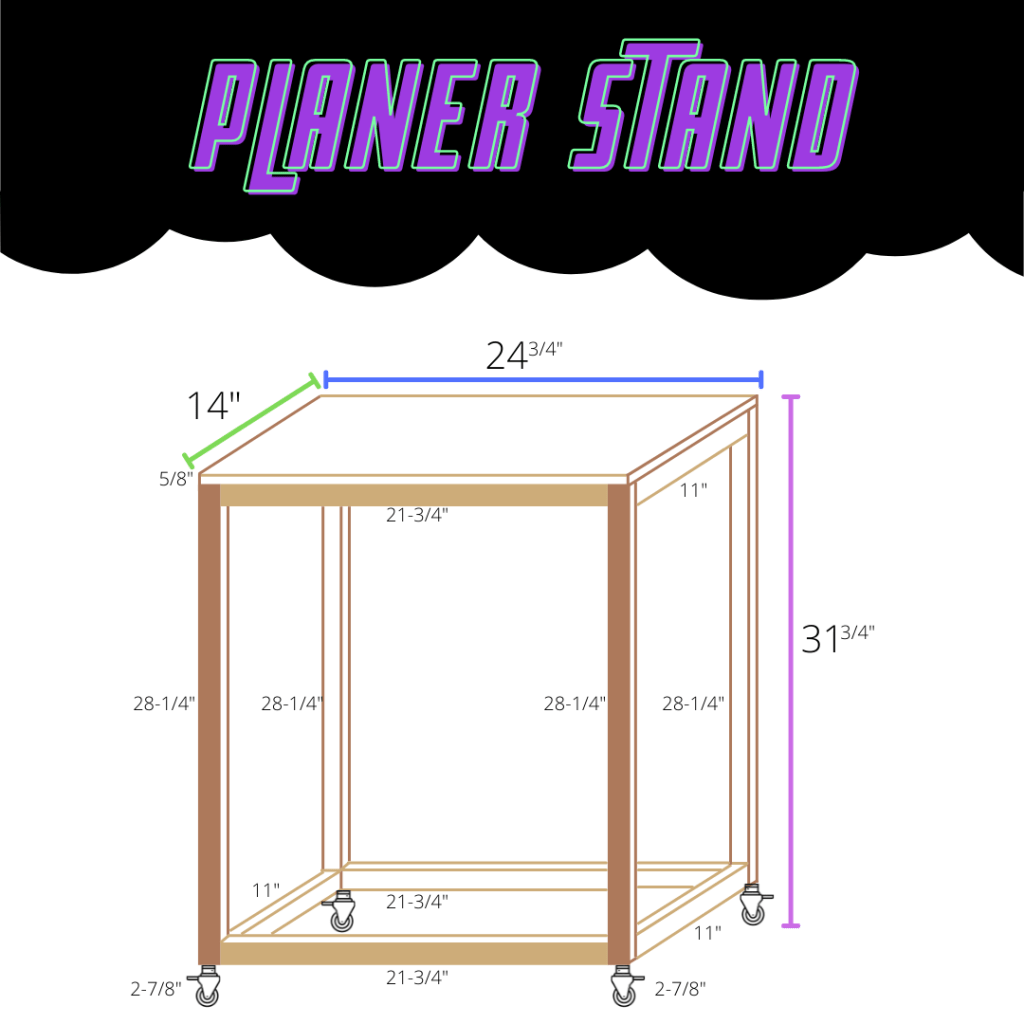
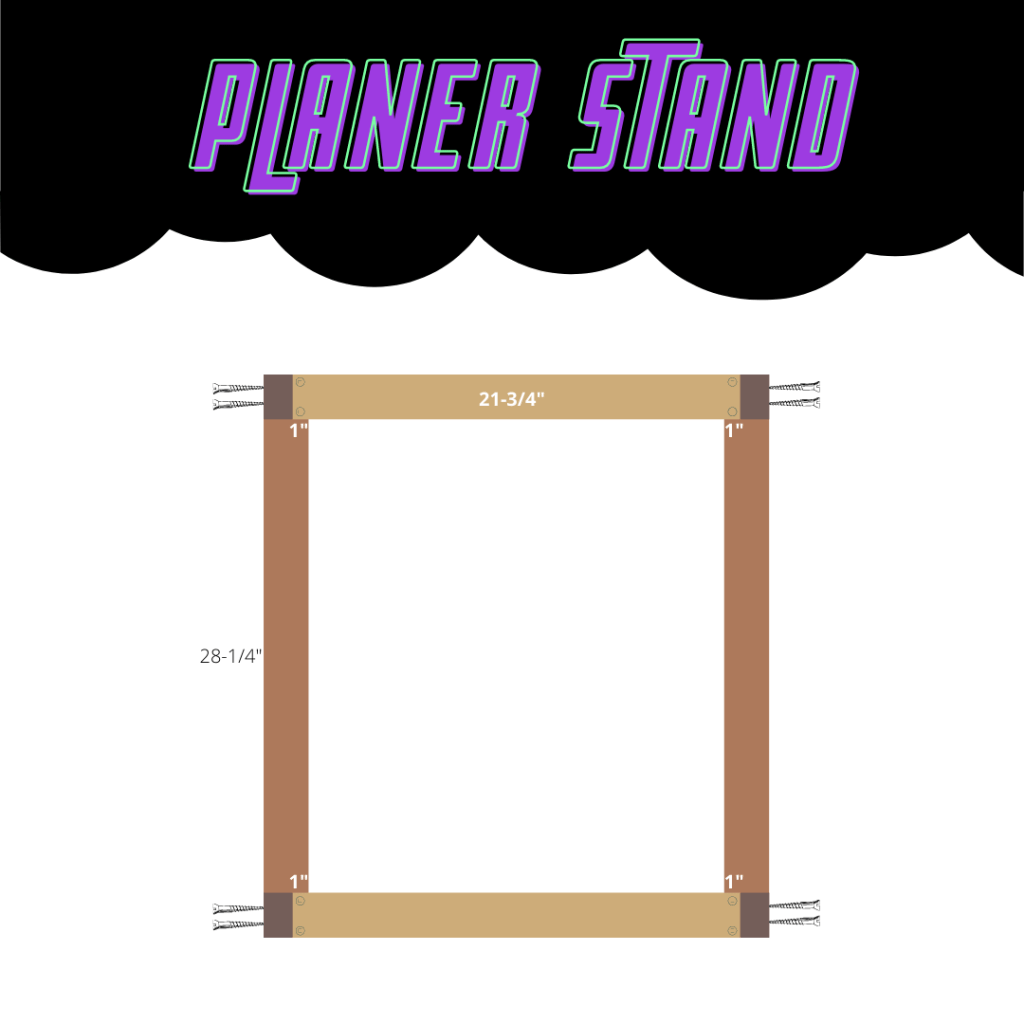
Planer Stand Supplies:
- 4 – 2″ x 3″ x 28-1/4″
- 4 – 2″ x 3″ x 21-3/4″
- 4 – 2″ x 3″ x 11″
- 1 – 24-3/4″ x 14″ x 5/8″ MDF or Plywood
- 4 – 2-7/8″ height casters
Plans:
Directions:
Step 1:
Cut all the boards to length.
Step 2:
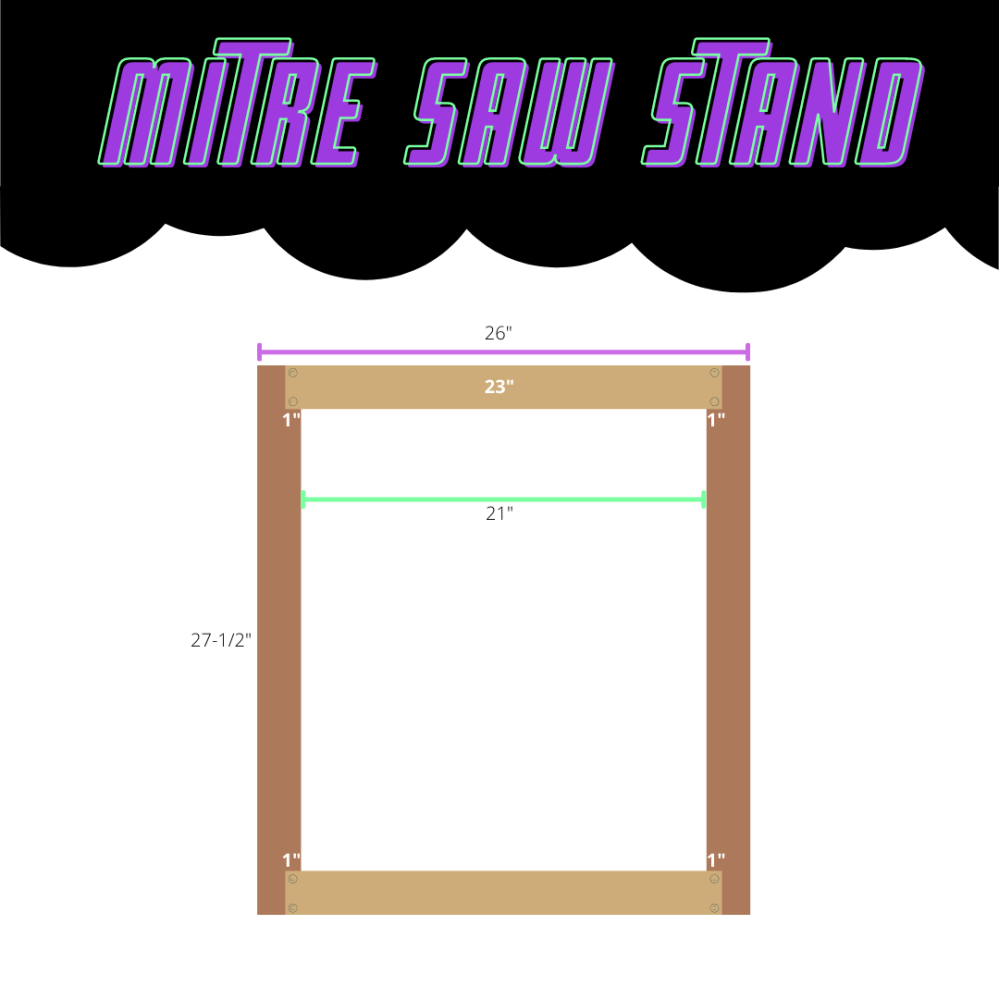
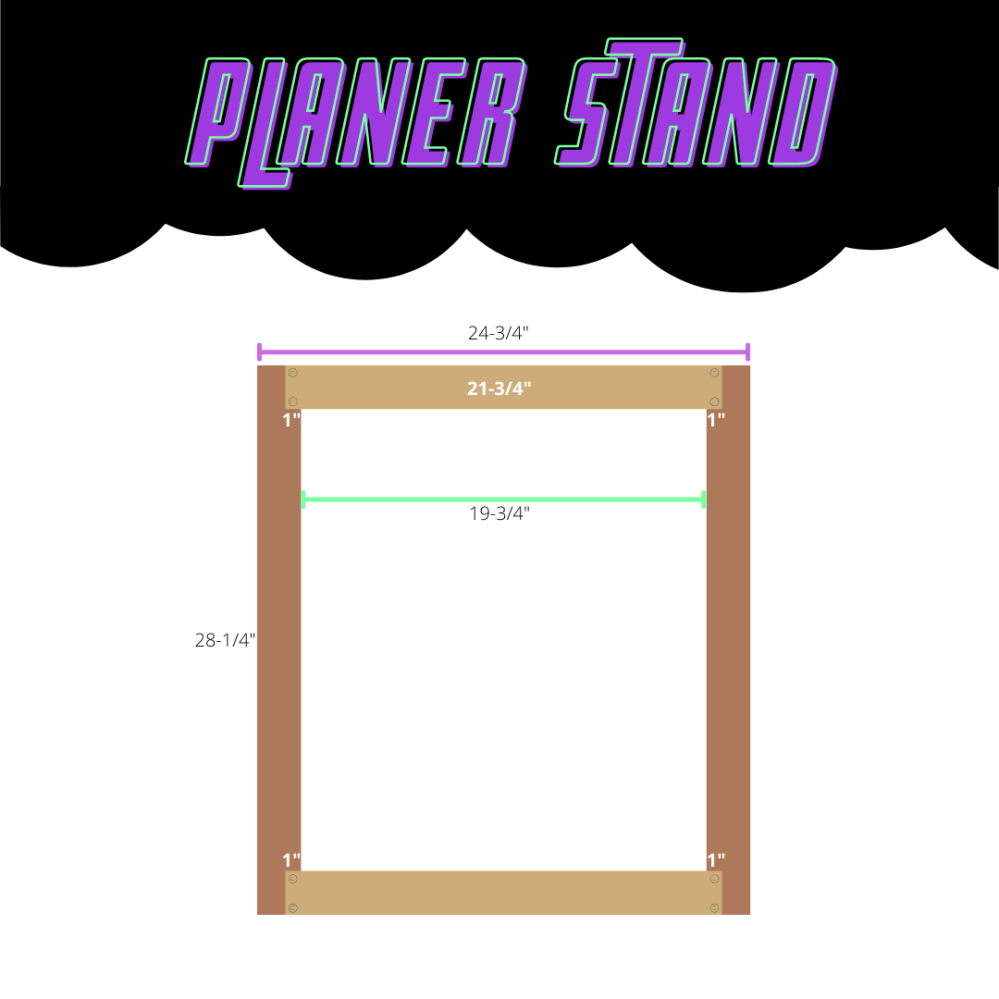
Start by building the base frame. Place 2 of the legs (27.5″ for Mitre or 28.25″ for Planer) down on an even surface or workbench. The distance between the legs should be the length of the cross bar minus 2″ as the cross piece will overlap the legs by 1″ on each side. For the mitre saw stand, legs should be 21″ apart and for the planer stand, legs should be 19-3/4″ apart.
Place the cross pieces so that they have the 1″ overlap on both sides. Using the square, ensure that your boards are square to the legs.Pre-drill your screw holes to ensure that the ends of the wood does not split. Place 2 screws on each side.
Repeat so that you have both the front and back sides framed.
Step 3:
Attach the middle braces to complete the stand base. Place one of the finished frames onto a flat surface or workbench. In the 1-1/2 space left beside the top and bottom cross piece, stand a middle brace up.
Once placed, use the square to ensure it is square to both the cross piece and the leg. Attach by pre-drilling holes towards the frame cross-piece, then screwing into place. Note the placement of the cross-piece screws to ensure you are not putting the bracing screws in the same place as you will run into issues. Instead, go between the screws to ensure the full length can go into both pieces of wood.
Step 4:
Add screws to the middle braces. Once the full frame is built, add some screws from the front and back, into the middle braces that were just added. This will help ensure that there is no flex in the overall frame under the weight of the tools.

Step 5:
Add the casters to the frame. Line up the casters to make sure the base of them have a good hold on all 4 screws. As with the rest of the stand, pre-drill the holes for the screws to ensure that there is no cracking of the boards.
Step 6:
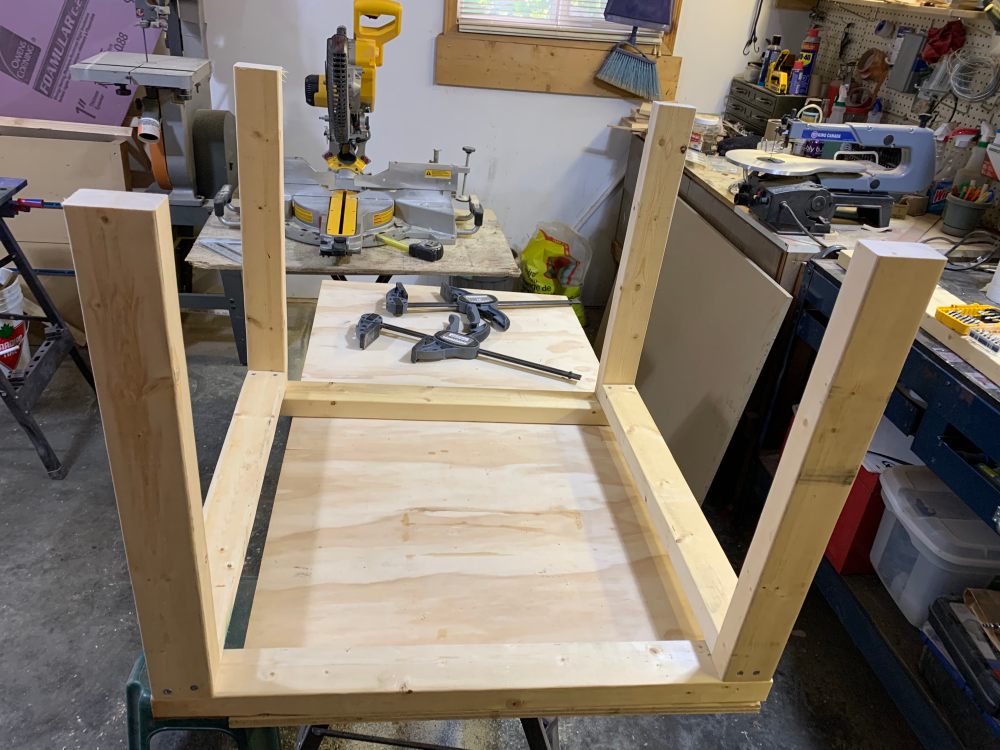
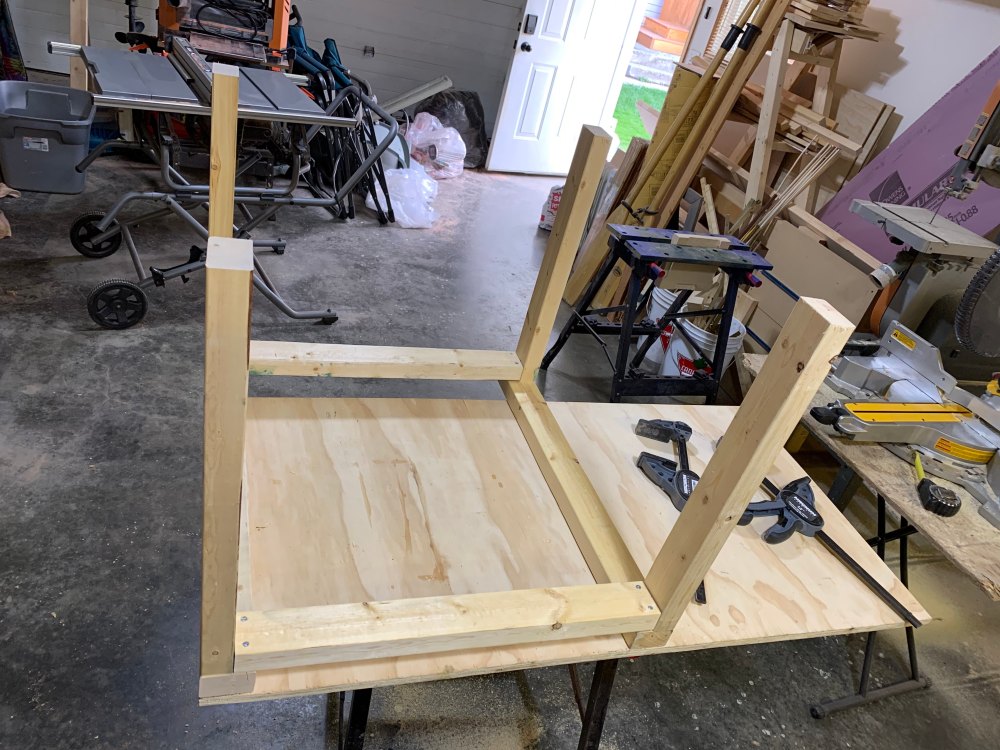
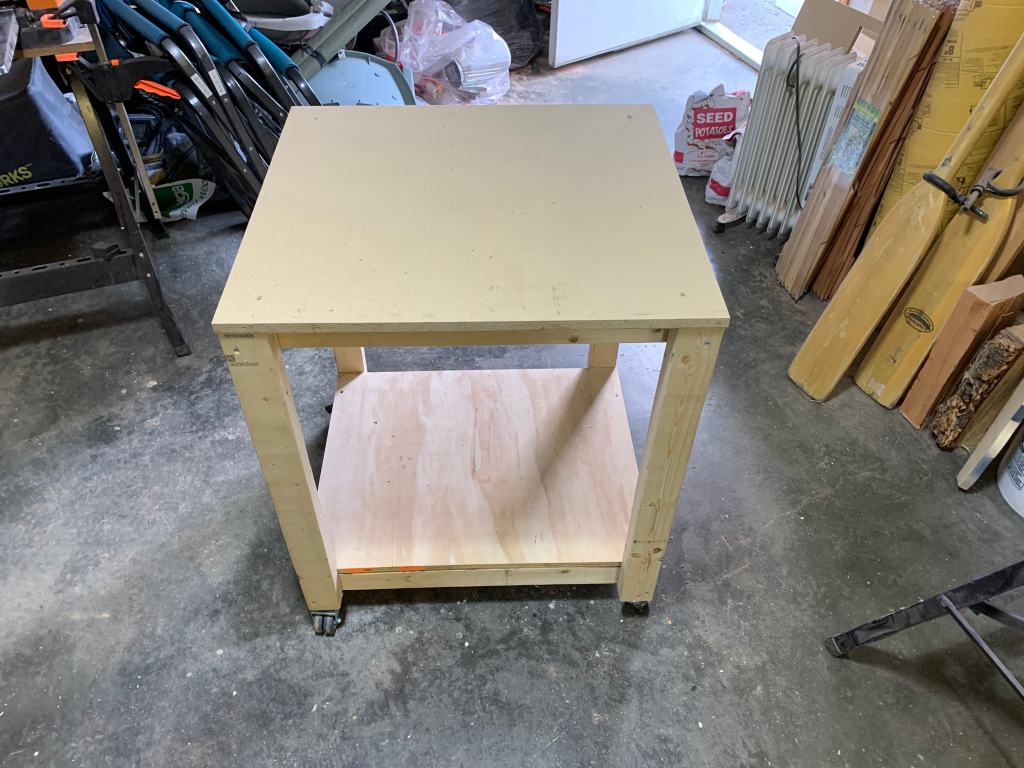
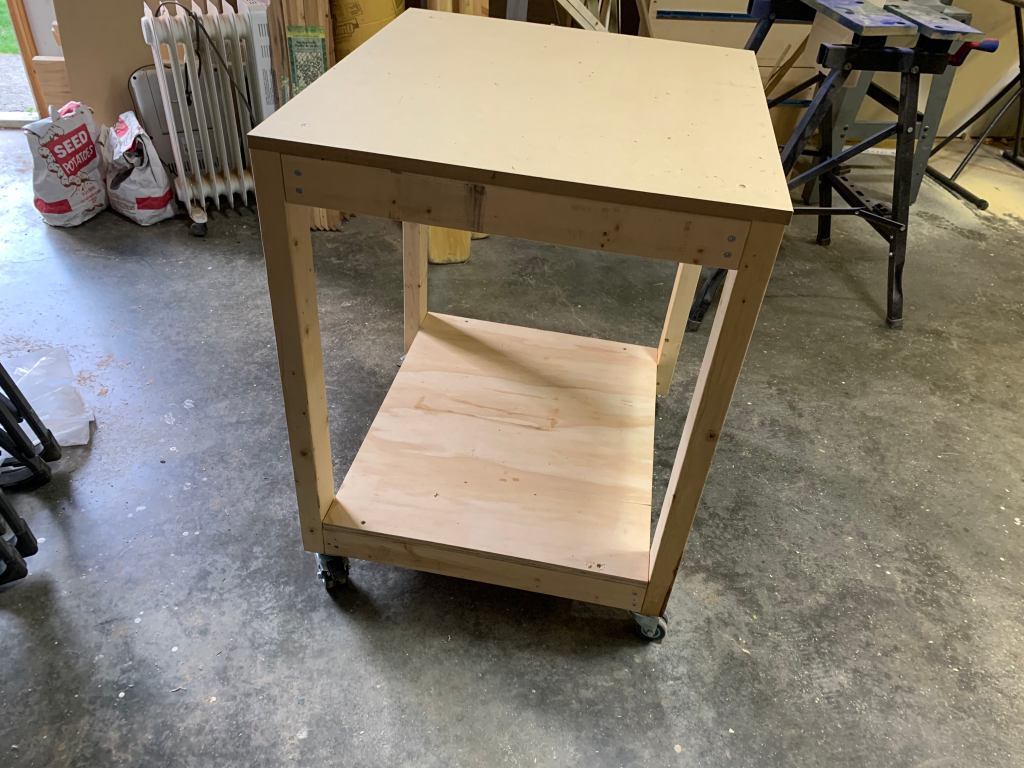
Add the top to the stand and a shelf if you would like one. Now that you have the casters on, place the stand on the ground to ensure everything is square and level. You will want to do this on a surface that is level. Unfortunately my shop has some discrepancies in the level so in some areas my stands wobble a little, in others it is solid and level. Fun! Once the tools were added, the weight helped get rid of that minor wobble in certain areas of my shop.
Add your MDF or plywood top to the stand. I also added a piece of plywood at the bottom for some extra storage area, but it is not mandatory to do so. The stand will work just fine without the shelf on the bottom. Because I used MDF on the top and I wanted the screws to be completely flush, I used a counter-sinking bit to ensure the head of my screw was level with the top.


One Comment Add yours