
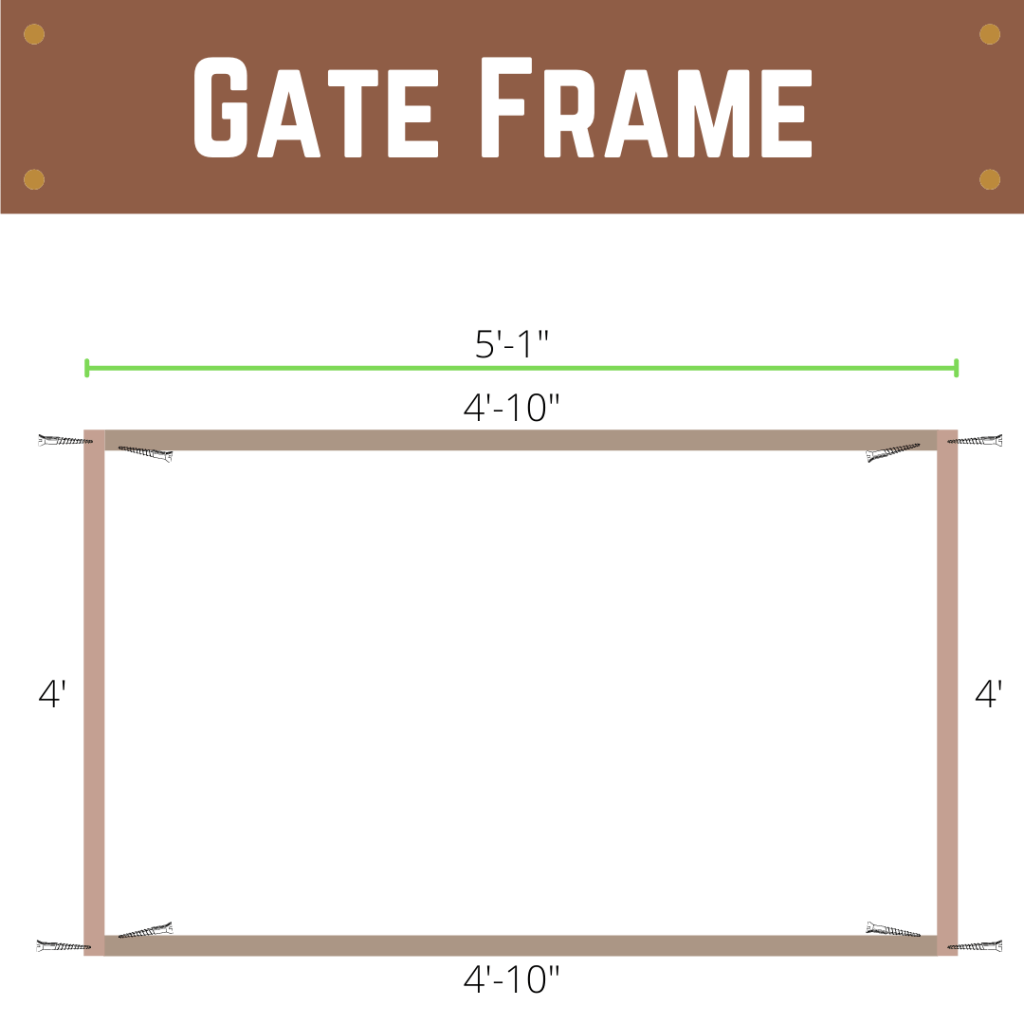
If you followed along with our previous post about how to build fence panels for a slope, here is a follow-up additional post about how to build a gate in the same style. Please note that your measurements may vary depending on where your gate is going, so please adjust accordingly. The sizes are for a 5’1″ ![]() x 4′ (H) gate.
x 4′ (H) gate.
Tools Needed
- Mitre Saw
- Drill
- Wood drill bit
- Robertson drill bit
- Brad nailer
- Level
- Kreg jig (optional)
Supplies
- 2″ deck or fencing screws (protected against rust)
- 1-1/2” deck or fencing screws
- 1-1/2” brad nails
- 2 – 2″ x 4″ x 4′ treated lumber (Frame sides)
- 2 – 2″ x 4″ x 4′-10″ treated lumber (Frame top & bottom)
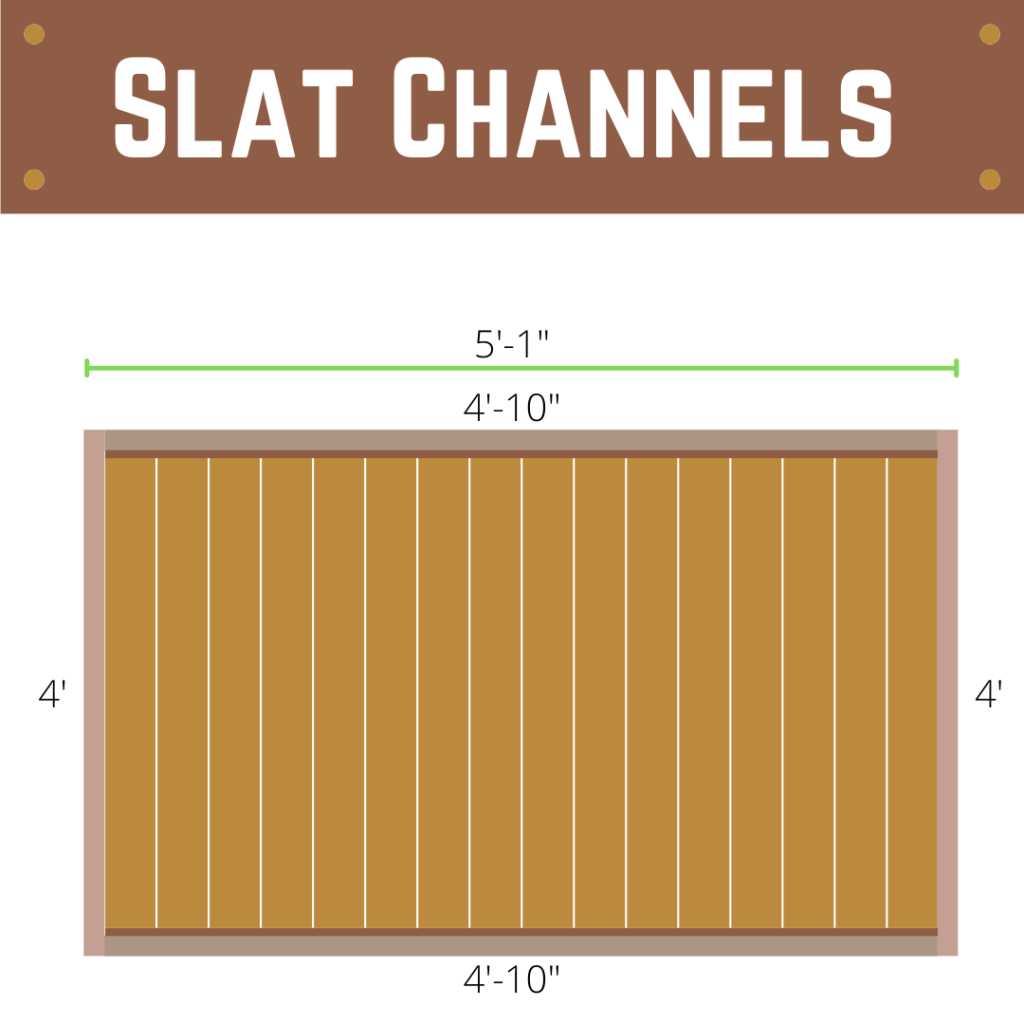
- 4 – 3/4″ x 3/4″ x 4′-10″ treated strips (Slat channels)
- 10.5 – 1″ x 6″ x 3′-9″ (Gate slats)
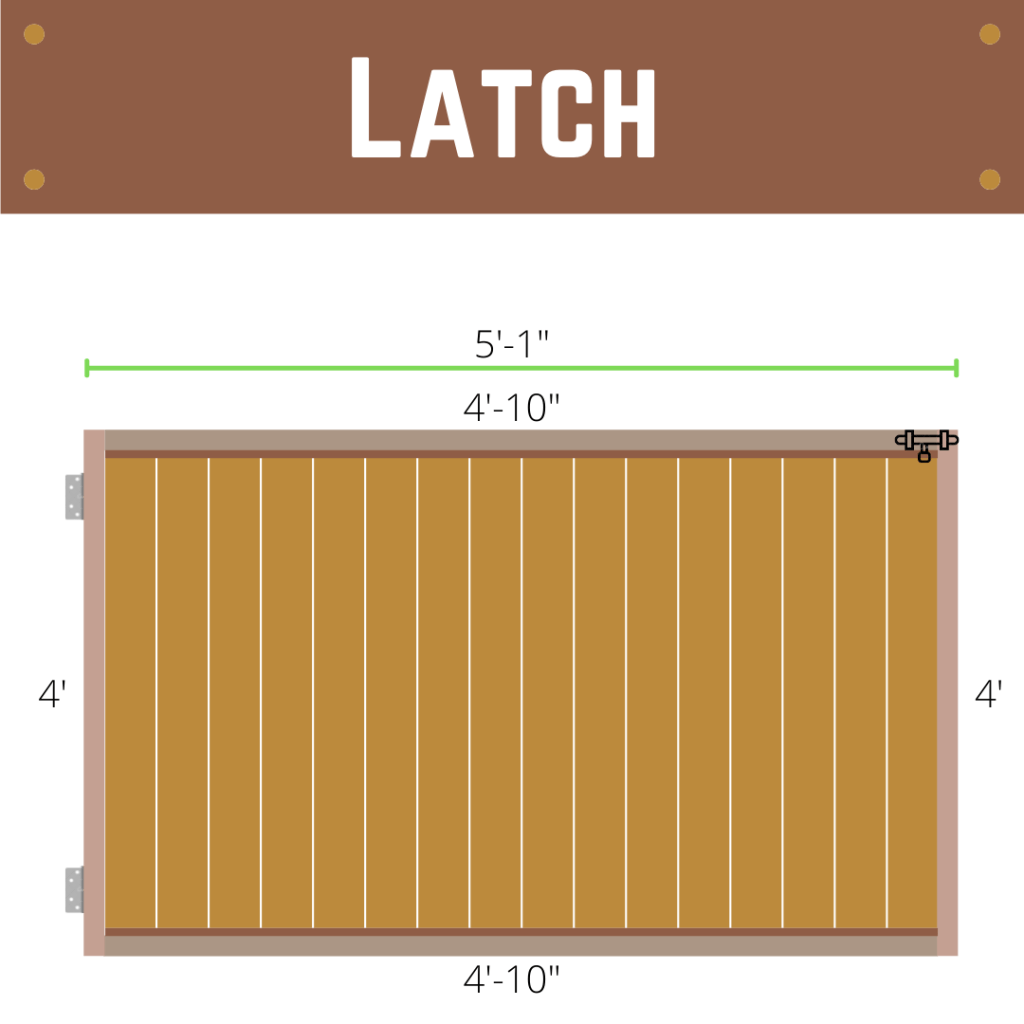
- 2 – heavy duty gate hinges
- 1 – gate latch package
Plans

Directions
Step 1: Build the Frame
Cut your treated lumber to the sizes needed for the frame sides & frame top/bottom. For this example build, you would cut 2 of the 2″ x 4″ boards to 4′, and another two of the 2″ x 4″ boards to 4′-10″ or 58″.
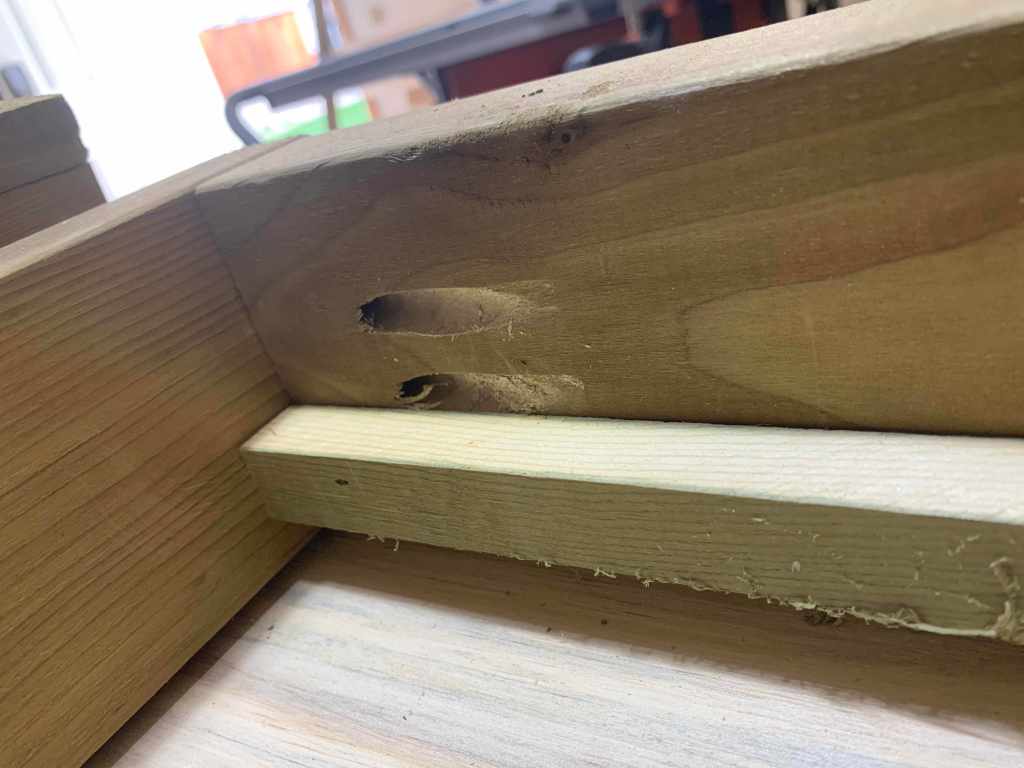
Once you have your lumber cut to size, lay it out on a flat, even surface. On the top & bottom boards, use your kreg jig to drill 2 holes on each end. This is optional, but will help with the strength & stability of the frame.
Once your kreg holes are in place, dry-fit the frame together, making sure the kreg drill holes are on the inside of your fence frame. Start screwing together the frame, starting with the kreg drill holes.
Once the frame is fastened using the kreg drill holes, use a wood drill bit to add 2 screws on the top and bottom of the sides, drilling into the top & bottom portions of the frame. You should now have 4 screws attaching each corner, 2 through the kreg holes and 2 from the outer portion of the frame.

Step 2: Add Back Portion of Slat Channels
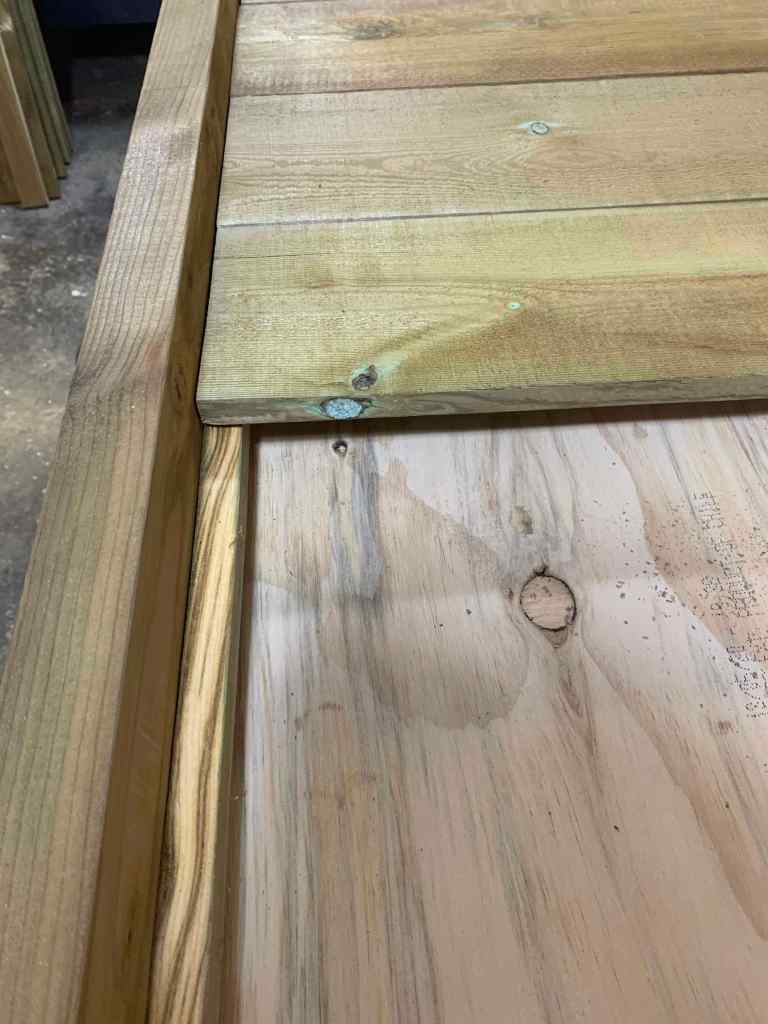
As this will be laying flat on a surface and not standing upright, you only have to attach one of the slat channel strips to both the top & bottom. These strips are the 3/4″ x 3/4″ strips cut to whatever length you require. For this example, they are cut to 4′-10″ or 58″ lengths.
As you want the slats to sit in the centre of your 2″ x 4″ frame, you will want to place your strips in slightly from the edge. Use a brad nailer to attach the strips to the top and bottom of the 2″ x 4″ frame.


Step 3: Add Slats
Determine how many 1″ x 6″ slats you will require for your gate. For this example, I required 10.5 slats that were cut to 3′-9″ or 45″.
Once you have cut your slats, place them onto the back slat channel strips that you attached in Step 3. Make sure everything fits snug, then use the brad nail to attach the slats, angling the nails so that they are pushing into the 2″ x 4″ frame. 2 brad nails at the top and bottom of each slat is sufficient.
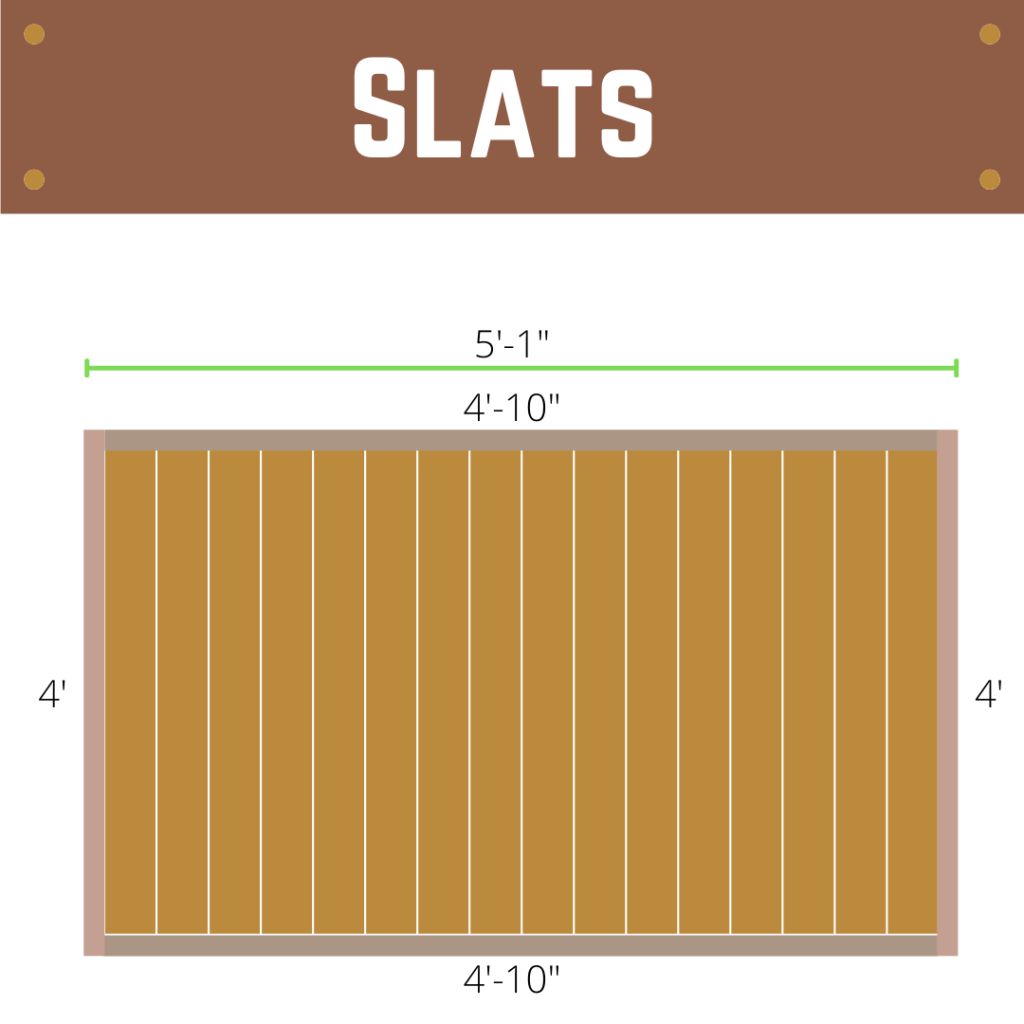

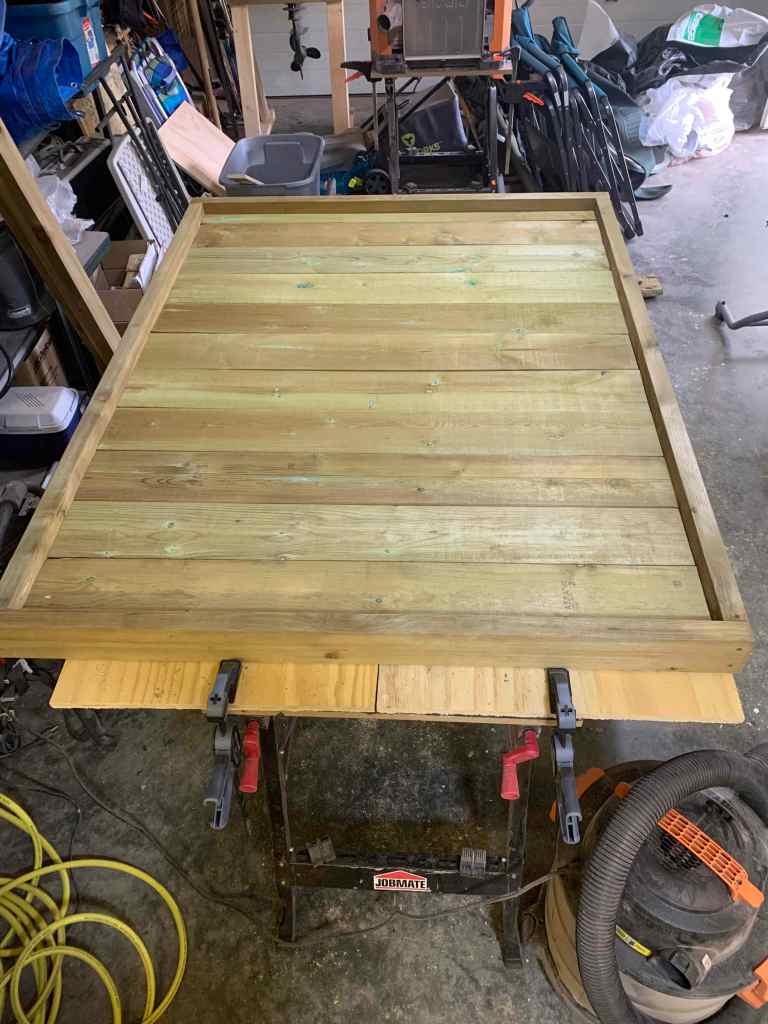
Step 4: Finish Slat Channels
Attach the remaining 2 slat channel strips to the top and bottom of the frame, finishing the channel for the slats. Use brad nails to attach to the 2″ x 4″ frame, sandwiching the slats in place.

Step 5: Attach the Hinges
This design best uses a square hinge that attaches to the side of the gate frame. The longer gate hinges could work, but have less wood to attach to, which may result in it loosening or even breaking the wood frame over time.
Determine where you want your hinges to attach to the gate & post and how it will open & close. For this example, the hinges are 2″ from the top and bottom of the gate and the gate will open into the yard and rest against the house.
Use a wood drill bit to pre-drill the screw holes. Use deck or fence screws to attach the hinges to the gate. Make sure that your hinges are level to ensure no binding when opening or closing.


Step 6: Attach the Latch
Choose the latch that will best work for your gate and needs. As this will be attaching perpendicular to the fence, I chose a latch that will bolt into the fence post. There is no room for a gate latch with a lift release, so it is a sliding latch instead.
Attach the latch to the fence as per the directions with your latch package. Make sure to use a wood drill bit to pre-drill any screw holes so as not to split the frame wood. Use deck or fence screws to attach the latch.
Step 7: Attach the Gate to the Fence
Attach your gate to your fence. Depending on your gate size, this is possible to do on your own, but is always easiest with at least one other person helping you. You will want to make sure the gate is level when attaching, so having a second set of hands to hold the gate in place while you attach it is important.
Use a wood drill bit to pre-drill the screw holes. Use deck or fence screws to attach the gate.
Enjoy your gate access to your newly fenced yard!

