
When I bought my table saw just under a year ago, all sorts of new opportunities opened up for what I could make in my shop. It is one of those essential tools that really make so many projects possible. I’m not going to lie, I am nothing close to an expert on using a table saw, but am gaining more knowledge every day and with every new project I try. As soon as I got the table saw, my dad helped me put together my first table jig to helping cut some of the cutting board wood that I needed. You can see that post at the aptly named blog post “Doing a Table Jig“. I have gotten lots of use out of that jig, and it was made to last, so it is still in great shape after so many hours of getting used.
Over the weekend, I needed to make another jig due to the same table saw causing some issues. See, not being an expert, I have not been the best at maintenance of my saw. Last week I got a digital angle for some upcoming projects on the table saw, and I decided to put it to use to see if I could confirm an issue that I was having with assembling some of my cutting boards. My wood seems square but as I glue it, it is off by a bit. I don’t have a jointer, but also haven’t had this issue in the past with my cutting boards. Using the digital scale, I realized my blade was off by 1.35* and would not set at 0*. Long story short, I pulled out the manual and tuned the whole thing. I think it is better than it was when I first got it because I didn’t tune anything at that time, and there were definitely a few things off from factory settings. Moving forward I shouldn’t be running into the angle issues I have been having with my cuts because I will keep this bad-boy tuned properly now.
Anyways, my cutting boards have always been a little off once glued, but now I was getting some pretty major pieces sticking up. There was no way I was going to spend umpteen hours sanding those end-grain pieces down. So I had to look at some other options. Following so many talented woodworkers on Instagram had me thinking about a jig that I had seen so many using to plane down large live-edge slabs. It is a simple jig that fits over the piece and allows your router to shave down the surface for easier sanding and finishing. Perfect!
DISCLAIMER: This is a super simple jig that I plan to re-build with better materials and in a much more permanent fashion, but it got the job done and worked like a charm, so it was worth the temporary build.
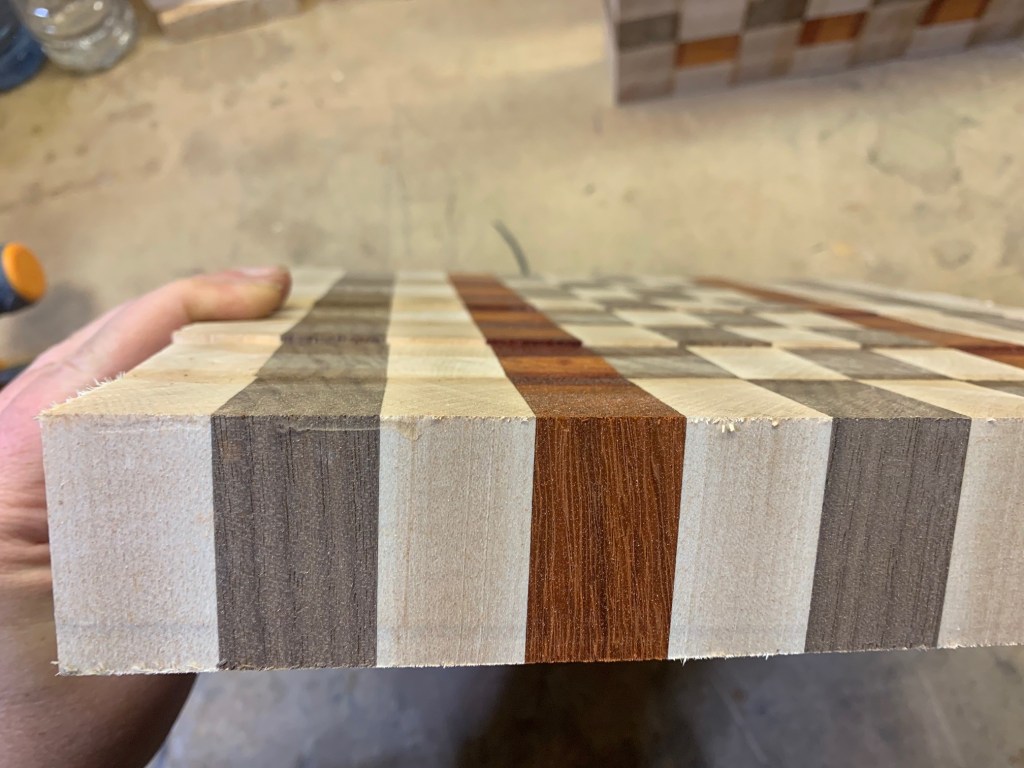
I had 5 boards glued up, all at 1-5/8″ thickness (or some close variation of that), but with very uneven tops and bottoms. I have another 4 that are in their initial glue-up and un-cut for the second glue-up so I will be able to test my table saw tuning skills. If they are out, well, at least I have this jig. I knew that I needed at least 1-5/8″ clearance, but to be safe for any uneven bits, I decided to make it stand at 1-7/8″.
This jig is a very simple design as many jigs tend to be. It is a top plate with a gap for the router bit to slide through, some side rails to keep the router straight, end plates to hang and follow the edge of a table, and then some legs that fit onto the end plates to determine height of the router to the wood piece. Below is a photo of the jig that I found online that I decided to use as my template.

I had some MDF scraps from some storage shelves that were 1/2″ thick. I wanted something that wouldn’t flex to ensure I got even cuts with the router. I cut it down to the 6″ width that I needed for my router base, and then cut it to the same length as some scrap plywood I had that I was using as a tabletop. Instead of cutting two strips, I just used the router to cut a channel in the MDF. Might as well use the tool it is made for right?

Once I had my top, I added some 1″ x 2″ strips to the sides as stops for the router and to create the rails that it would slide along. This makes sure you have nice straight cuts that don’t wander. I then used some other scrap wood to create the end plates that would run along the edge of my plywood table. As you can see, they were a little warped, but it was not a problem. It slid beautifully once assembled.

The last step was adding the “legs” or pieces of wood that would sit on the table top to hold the jig at the right height over the work piece. This is an important process that should not be rushed. You want to make sure that once these are in place, that your jig is level. If you do not have a level top, then all of your cuts are going to be angled or off from the previous one.


Once it was done, it was time to take a test drive. The first board smoothed out beautifully, but I took more material off that I had wanted to. This was partly learning how to use the jig properly. As I went through the boards, each one got better and better. That being said, even my worst routered one was still easy to sand down to a smooth finish.


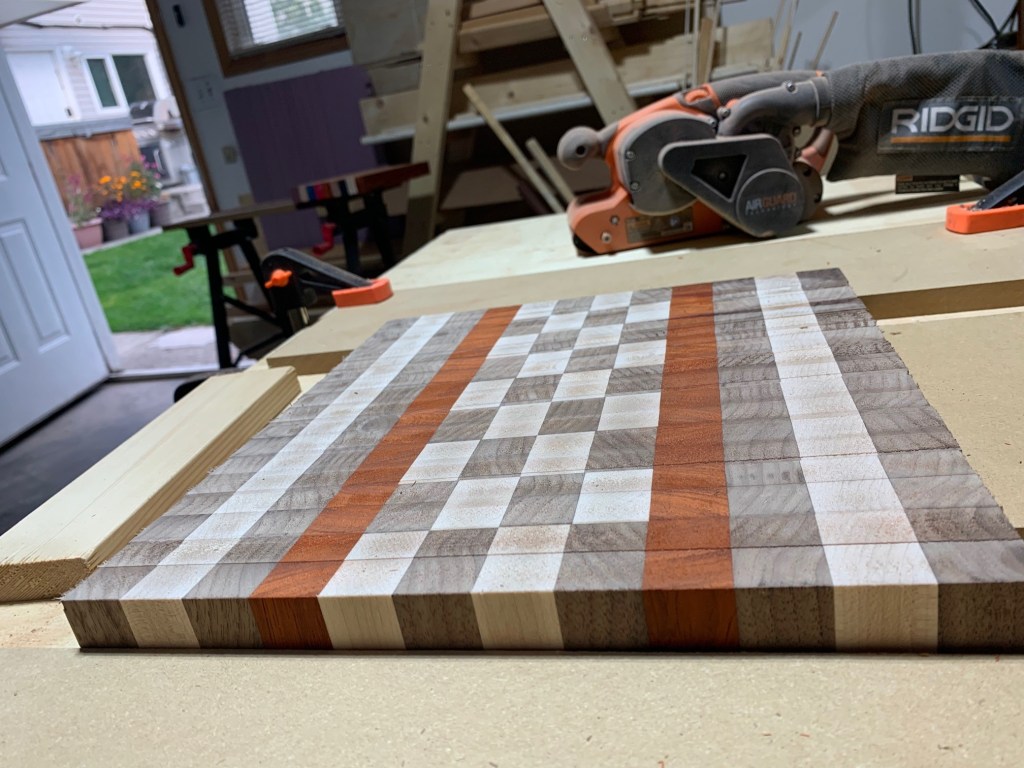

The boards were then sanded smooth using 80 grit on a belt sander. Once I got to that point I started to consider the handles that I usually router into the boards. But once again, I was thinking of all the posts from the awesome woodworkers I followed, and decided to test out my newly tuned table-saw instead. I decided to try chamfer or beveled edges on the short sides to replace the handles. I loved the look of it on the other woodworkers boards so I figured I would give it a try.
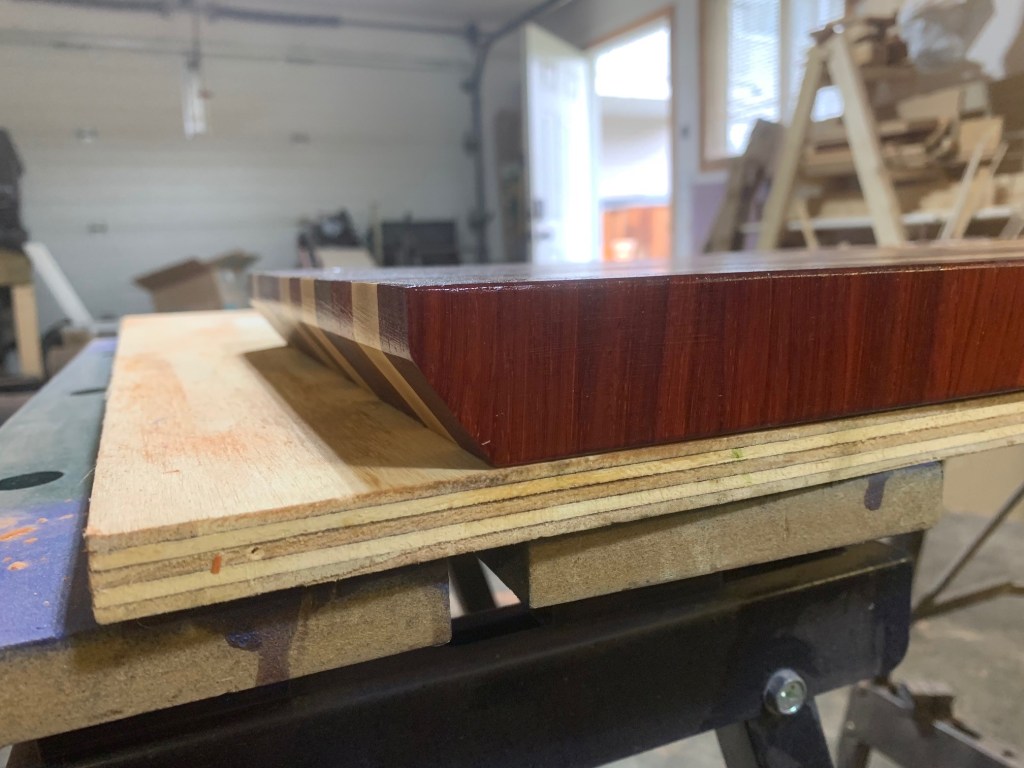


These were my first angle cuts on my table saw. I have to say, it wasn’t as stressful as I thought it might be. I had fears of the blade binding or having some bad kickback, but the boards cut beautifully and I had no issues. It makes me feel better about an upcoming board I would like to try where a few angle cuts are required prior to assembly for some unique patterns in the board. I’m itching to get to work on those now.
The chamfer edge is also now my go-to for these thick cutting board/butcher blocks. I liked the look so much that I also decided not to add the rubber feet to the board so as not to change the line of the wood down to the table top. One of these new boards may have to stay in my kitchen rather than being added to the shop, but we will see.


One Comment Add yours