
I have treated myself to another shop tool, a table saw. It’s something that I have been wanting but making due without. I had planned to wait until Christmas because I had a sneaking suspicion that K was going to get me the saw as a gift…but I couldn’t wait. I was right, K now has to find some other tools to put under the Christmas tree. Shouldn’t be too difficult!
The reason I couldn’t wait is because I have been making advent calendars galore and getting nice straight edge cuts on the boxes and frames is extremely important. I had been managing with a combination of my bandsaw, belt sander and mitre saw, but not without some hair-pulling frustrations. It was also time consuming, and after borrowing dads saw, I realized how much time I could shave off.

As soon as I got it, I told my dad about it. He taught me to use most tools growing up and I was excited to share about the new addition. He immediately went into a safety lecture, which I of course appreciate. A table saw has always been the tool that I am most careful and cautious with. I respect all my tools ability to maim me, but the table saw is the one that would likely do the most damage. Dad suggested we make a cross cut jig for safer operation, especially with what my current needs are. So we made plans for him to come over and help me build my jig.
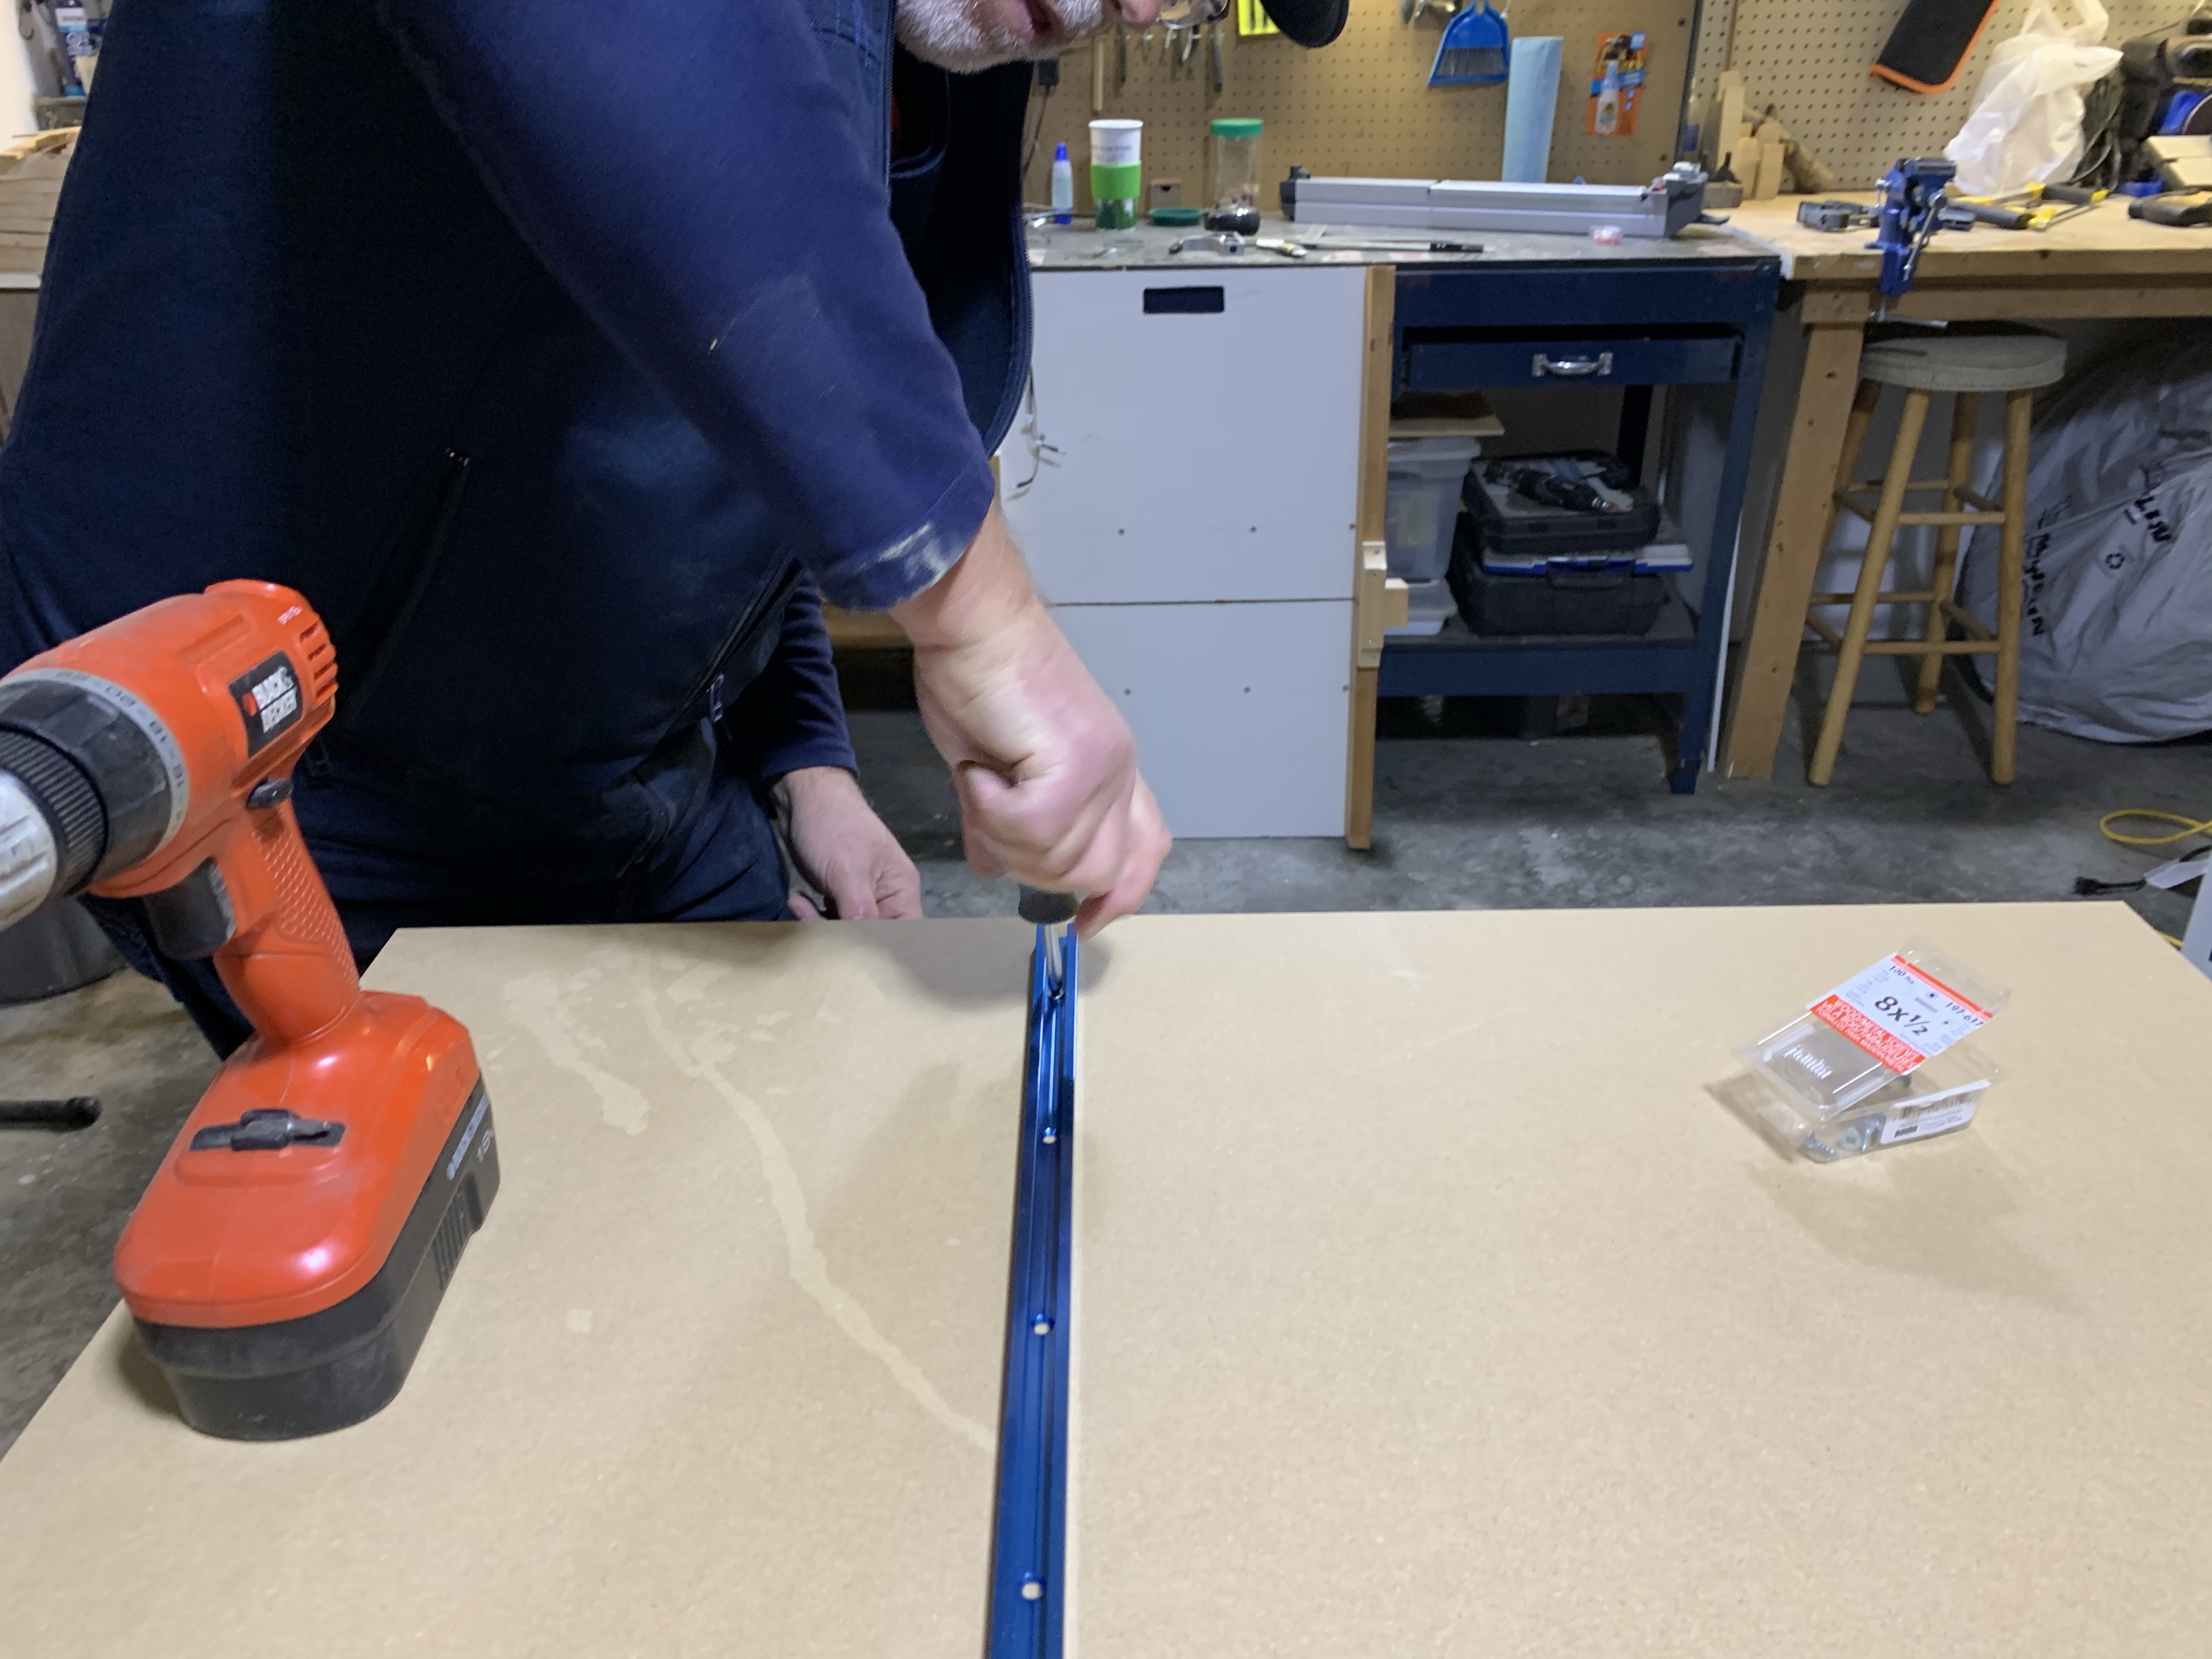
He brought his jig over as a template to work with and away we went. We started with the base. I had some leftover hardboard that I had used to build the bookcase shelves. It wasn’t quite as wide as dads, but it was a good length to work. We set that to the side so that we could test the t-track to make sure it would work as the rails for the sled. They need to be flush, or just a little short so that they slide easily in the track. They were a perfect fit. I had planned to make a circle jig for my bandsaw, but this was a build that had to happen first. We cut the track down to sizeand placed them in the tracks on the table so that we could get the sled lined up.


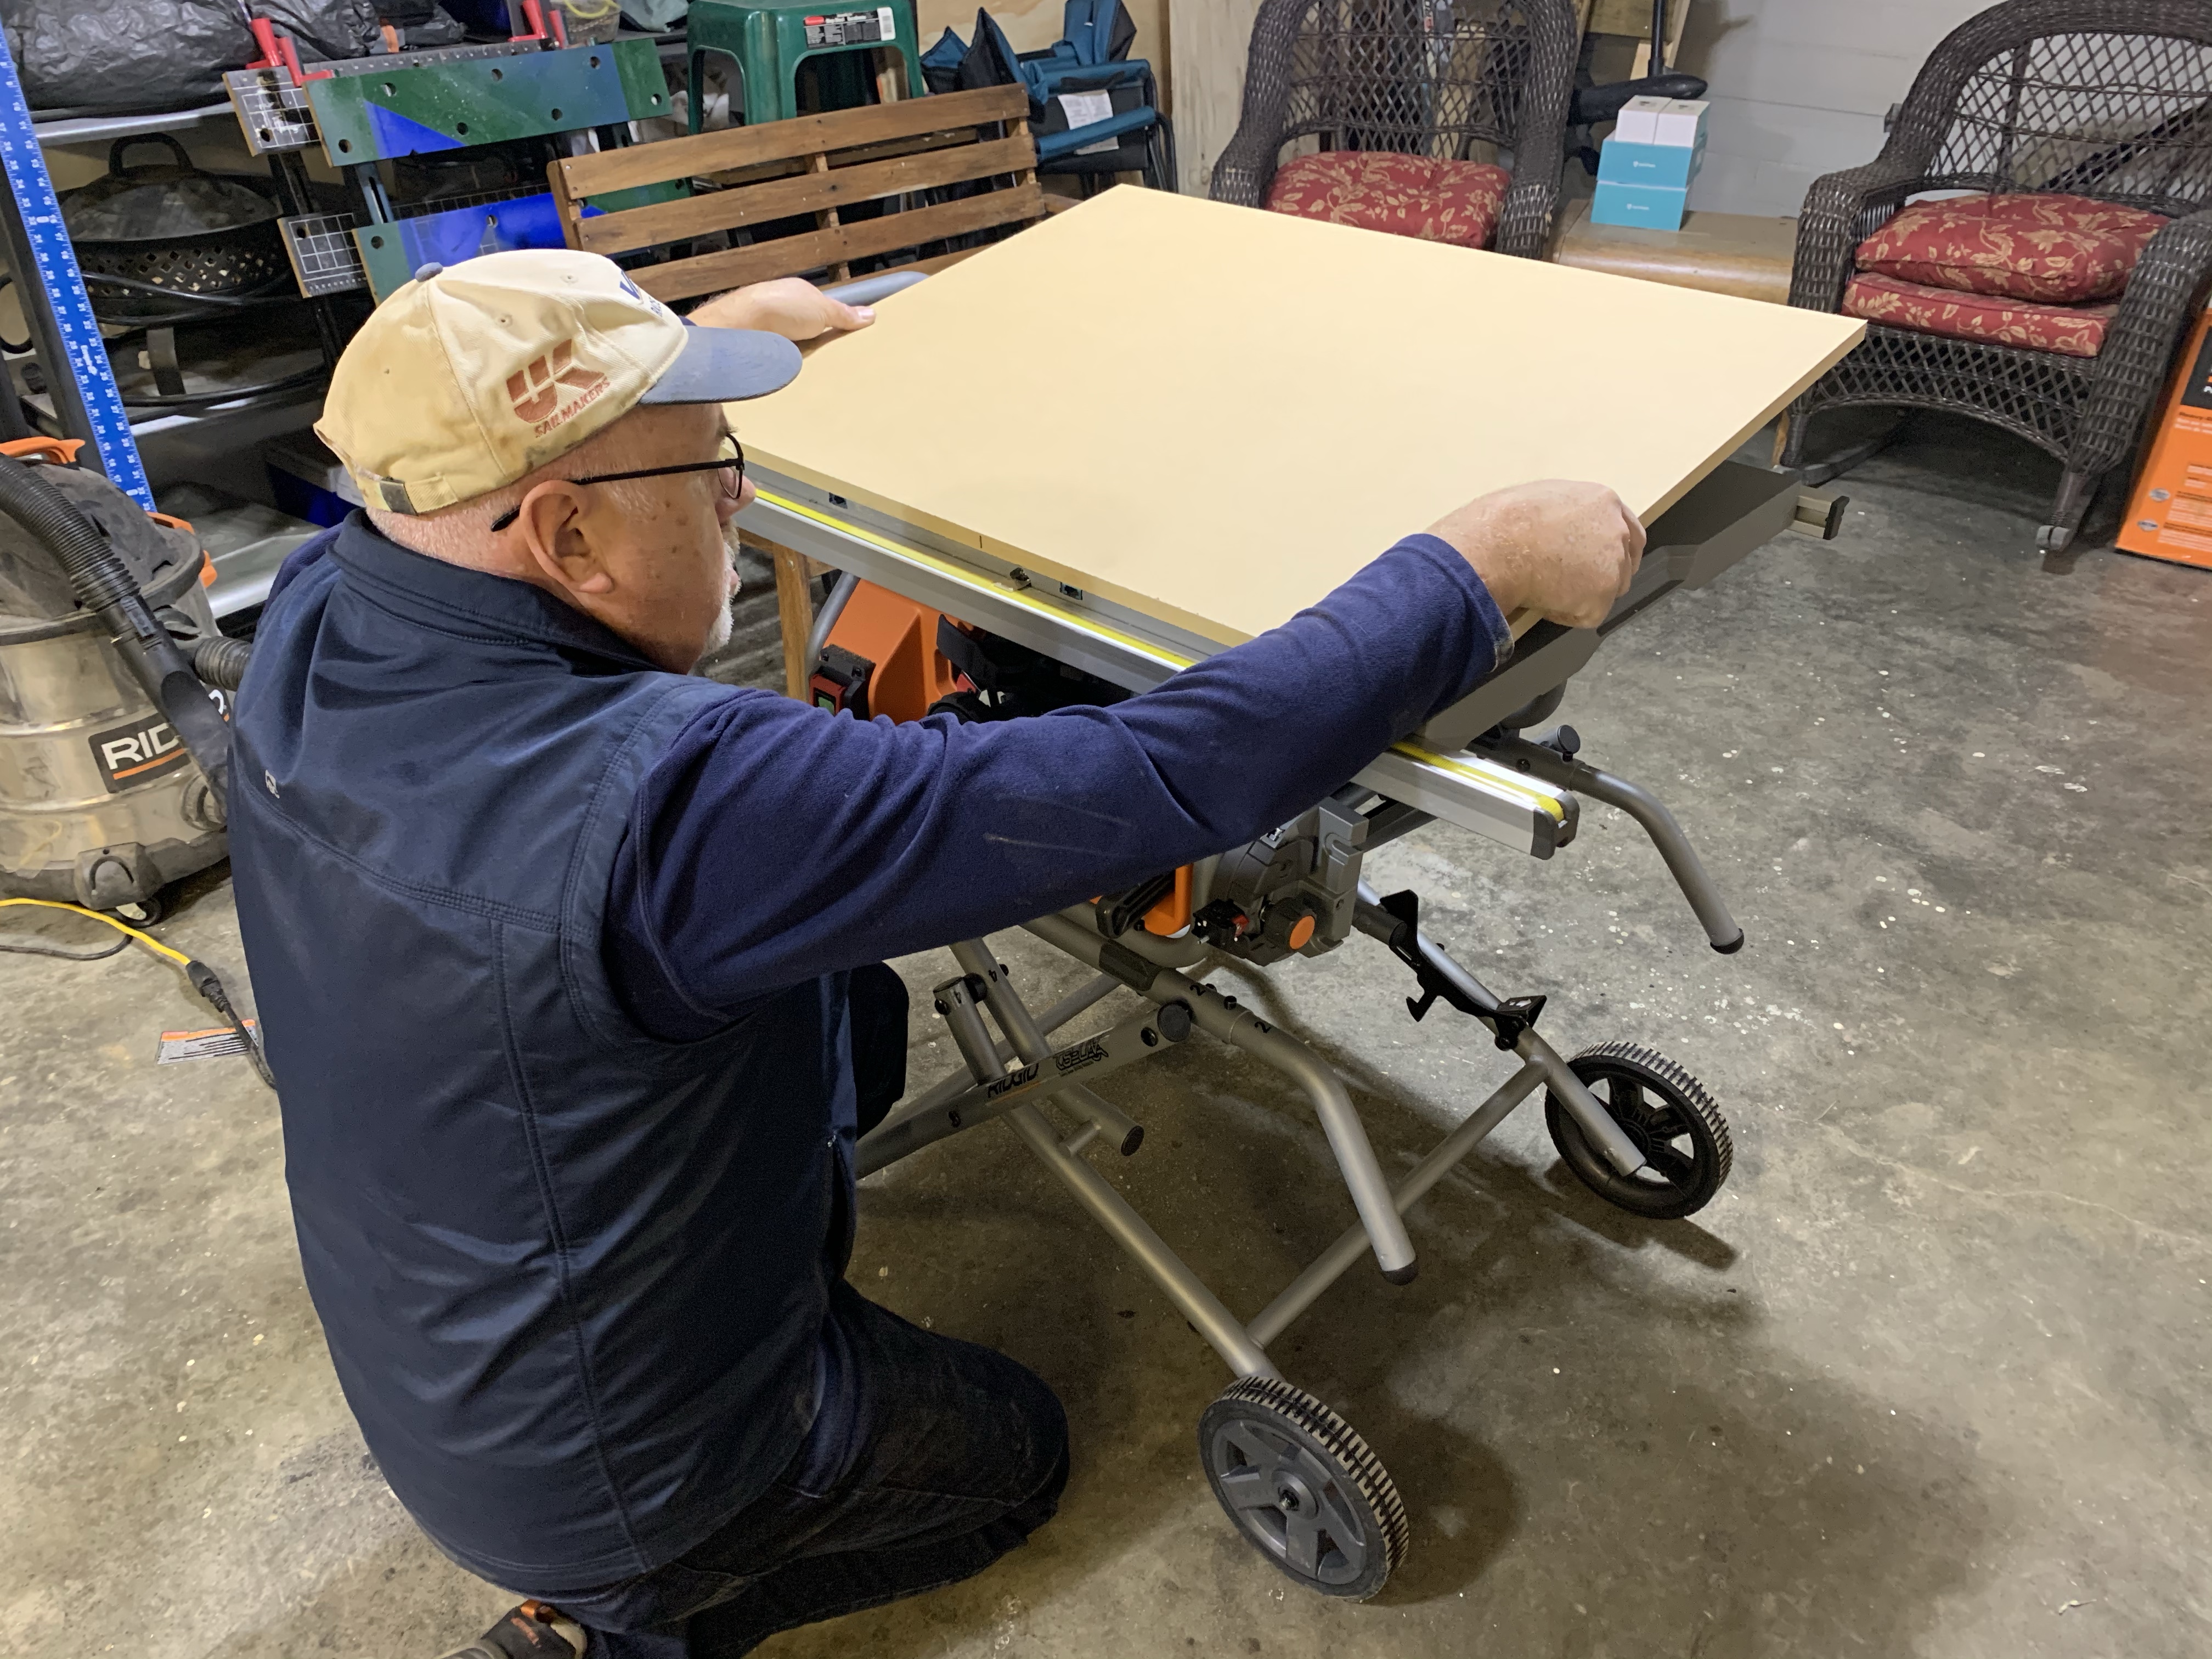
Using double sided tape, we lined the edge of the sled up with the edge of the table. We made the assumption that the table would be square. Luckily, we were right and it worked out. What we didn’t think through was the dust on the sled. When we placed the sled and pushed down to get the double sided tape to stick, we only managed to successfully get one of the tracks to stay long enough to flip it over to screw into place. No problem. We put a few screws in, not all so that we could adjust as needed. More double sided tape and a quick wipe-down of the sled resulted in a successful stick in the second track. We got all the screws into both tracks and flipped it back over to test to make sure that it slid smoothly in the tracks. Success!


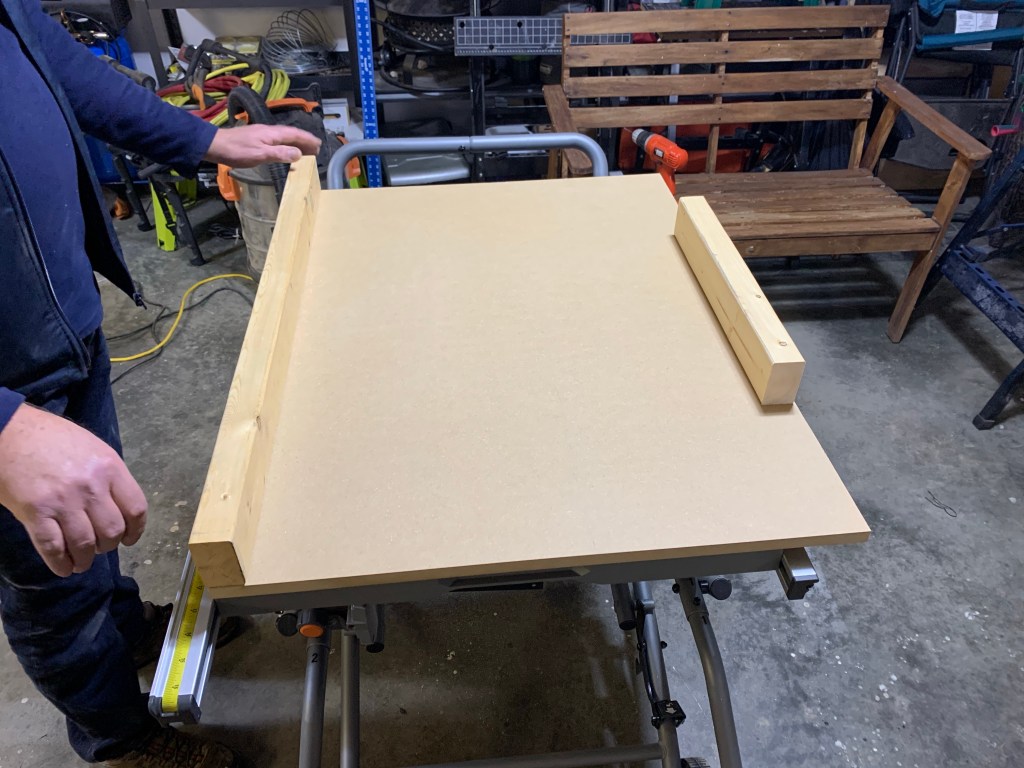
The next step is to add a backboard and a hand board. The backboard went all the way across the end. The hardboard only went part way across the middle. We added another block as a reminder to keep my hands away from the blade area.
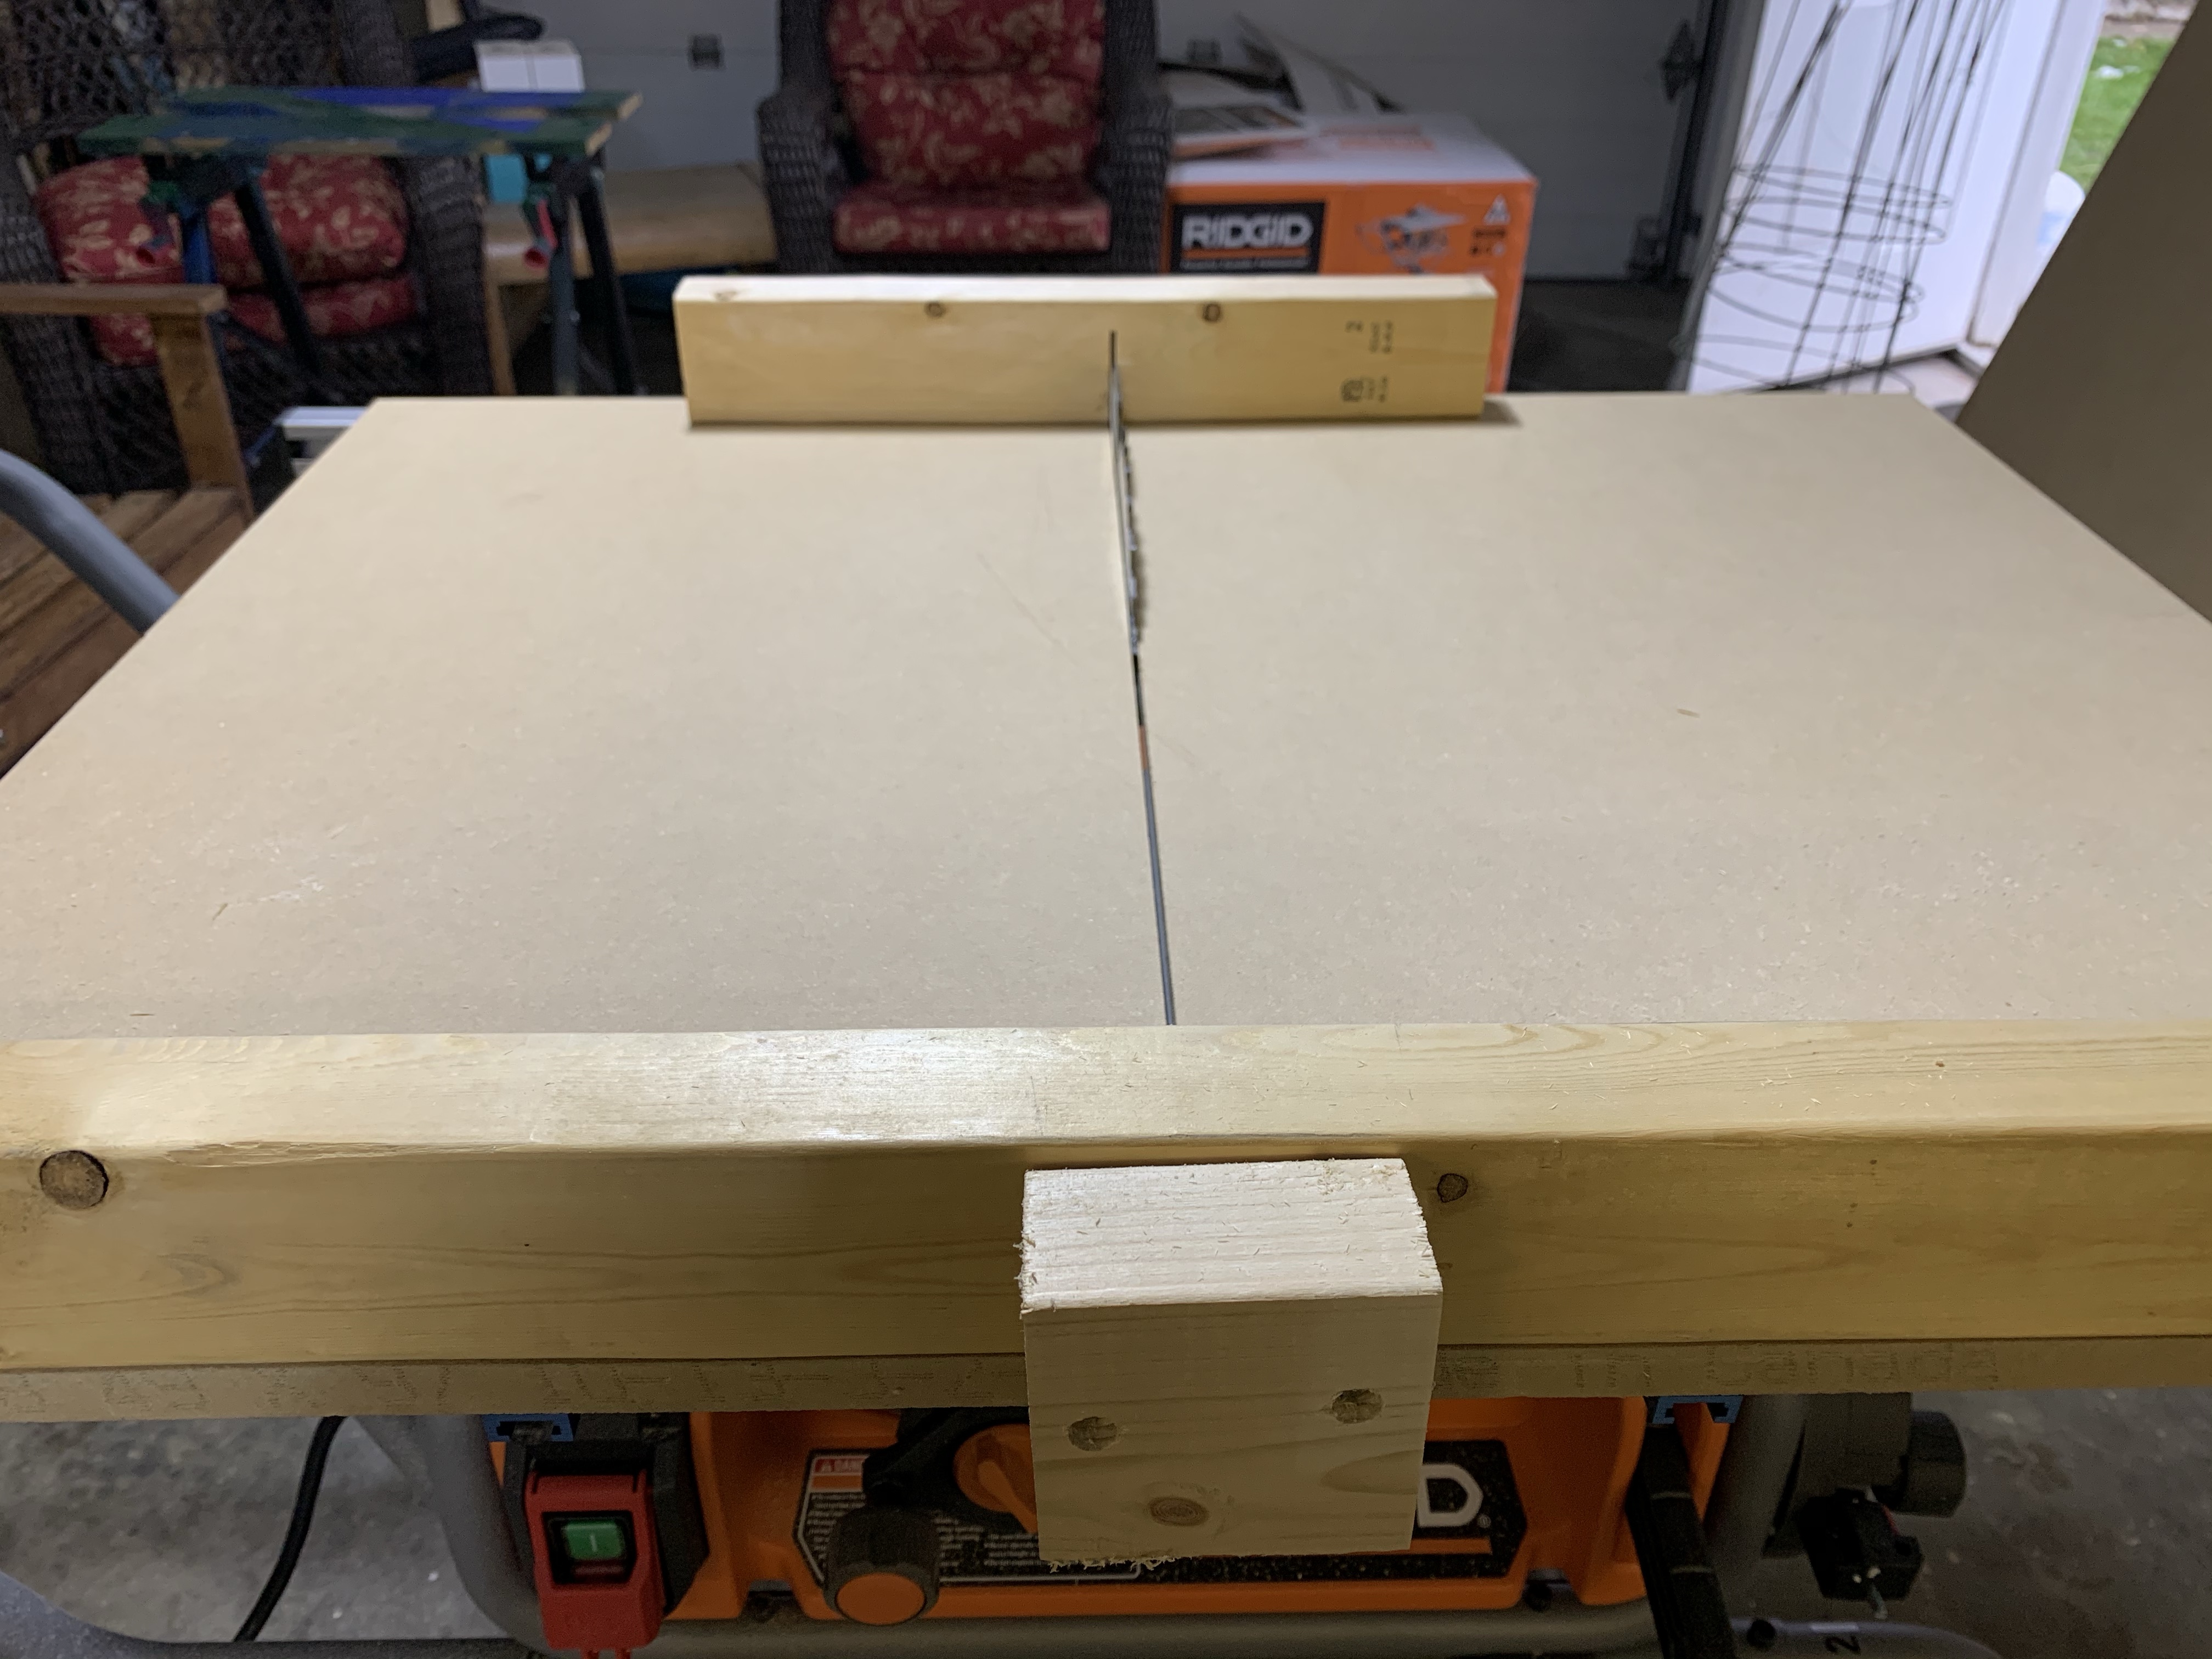
The last step was to cut the blade channel into the jig. Dad did the honours of cutting the blade channel, making sure it didn’t cut through the handhold, reminding me again to be careful. Although the jig will help make the saw safer, it isn’t fool-proof.

I’m looking forward to using the jig with some upcoming projects.


2 Comments Add yours